Torsion bar to Coil Over Conversion
This is my overview of going from Torsion bar setup to a Coil Over conversion. Included is a parts list of what will be needed (depending upon which way you go, or mostly the way I went with), a review of the setup and a few pictures of my setup installed.
First what is needed for this:
PARTS NEEDED
- Atomic's KIT (upper & lowers w/ hardware)
- QA1 DS301 Coil Over Shocks http://www.summitracing.com/parts/hal-ds301/overview/
- QA1 Spanner Wrench and Thrust Bearing Kits - # 7888-110 http://www.summitracing.com/parts/hal-7888-110/overview/
- QA1 COM8T-102PK – Steel Bearings (upgraded ones) 2 sets (4 bearings total)
(this package comes with 2 bearings each package) http://www.summitracing.com/parts/hal-com8t-102pk/overview/ - Hyperco Springs part # 7B1200 (1200lb spring) – Ebay
- Spacer - 1/2" (top) http://www.summitracing.com/parts/aaf-all18572
- Spacer - 3/8" (bottom) http://www.summitracing.com/parts/aaf-all18571
- Bumpstops – http://www.summitracing.com/parts/ens-9-9101g/overview/
- Pro Comp Shock Mount Conversion Kit # 690001 http://www.summitracing.com/parts/exp-690001
- Anti-Seize
Click all pics for bigger ones
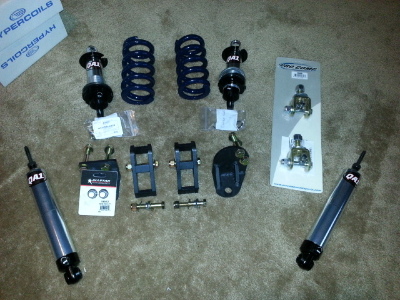
--Long shocks on both outter sides are my rear shocks--
Better pic from Iregrets install
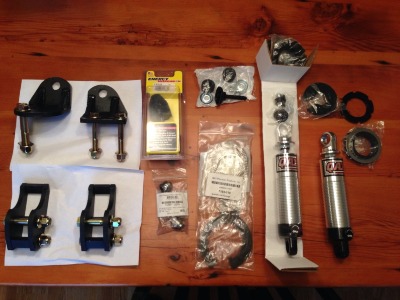
Few notes on parts list
When ordering parts make sure you double check what you are getting. (read the parts descriptions) I choose the DS301 shocks per Richard (Atomic) suggestion as it was the correct shock for my application. So, be sure to use the correct shock for your application as it will differ. (unless you want to replicate my setup)
If ordering the DS301 shocks do not freak out when the shock is received, it is about the size of a cell phone. It will work though.
The spanner wrench and bearings kit is an optional purchase, but will ease when raising or lowering the coil overs.
Bearings shown only
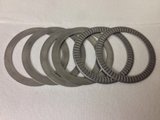
Must order the COM8T Steel Bearings. These are upgraded bearings from the original qa1 shocks. These will be able to handle the weight of the vehicle; the poly ones supplied w/ the shocks will get destroyed quickly. 4 bearings will be needed if you choose the pro-comp adapter way, 2 for each shock. If you choose the stud top mount, then only 2 will be needed for the bottom of shock, but will need to purchase an upgraded bushing for the stud mount. (currently none have held up to my knowledge 3/1/14)
Pic of steel bearing installed
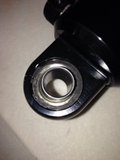
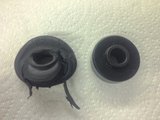
Pictures below are why I went with the Pro -Comp adapter instead of using a stud mount w/ bushing.
Poly Bushing that comes w/ qa1 shocks after only just sitting on the weight of the truck (pic courtesy of Iregret)
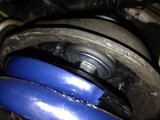
Bushing installed - notice how squished it is
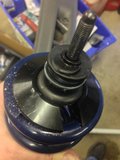
The rest of the parts are self-explanatory, if not feel free to ask. Most of my information and research came straight from Atomics threads (and communicating with him personally) as well as FILL IN with his help.
INSTALL
First if you have no knowledge of removing suspension or shocks, I recommend paying a professional to do the install for you. (I take no responsibility for any damage, torn relationships, sold vehicles, nothing. Do at your own risk) I had a good friend that builds custom dropped trucks/suvs helping me w/ this whole install. 4 hands or a friend is very helpful for this install.
**Note – If you want to see the difference, make sure to measure the before height**
To get started : (not going into detail on this)
Get vehicle lifted off ground and secured. A lift is quite helpful. Take off wheels and front shocks. Assemble the coil-overs (put springs on, bearings, clips, anti-seize, etc) Best to do before you get it into this, just in case you need to run to the store for something.
** If you choose you can take off keys / torsion bars / & torsion bar x-member if you choose to do so. Please be very careful when uninstalling these. **
This is how I did MY setup – Just a guideline if you will for others
- Place atomics upper bracket on upper shock perch. (the one meant for the side you are working on. There is a driver’s side and a passenger side)
- Get the pro-comp adapter and using the supplied nut, bolt it up through the upper bracket & shock perch and tighten it up. Make sure it is placed well and flat against the frame. There is a plug there, (speed sensor?) it will make contact, but I did not have to unclip mine. My bracket did not go completely flat as the shock perch on the frame was added after GM made the frame. (So, it is not flat against it all the way, but very close)
- Then take the lower bracket from Atomic and bolt it to the hole on the lower control arm where the shock bottom would normally bolt to.
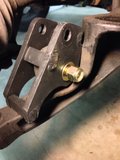
- Next take the assembled Coil-over and do a mock up. Making sure all is right and fits correct. **note, I had to jack up the LCA a little to get the shock to mount to the top, this appears to be normal from my research, does not affect anything**
- While mocking up is being done, check for clearance all around the spring. I.E. will it make contact with anything, but remember you have no load on the suspension. To double check at your discretion jack up lca to normal level and check clearance.
Pictures of clearance that might cause issues (reason for cutting)
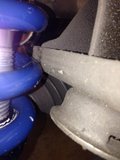
- Now it gets interesting and power tools are needed. (Think of tim allen) Mine spring was hitting the very corner of the bump stop and bump stop bracket. (the piece of frame/metal that the bump stop bracket is welded to. ) In order to fix this dilemma that piece needed to be cut, (as atomic has mentioned). If you fear cutting up your Tahoe then maybe this is not for you, but I guarantee it will be well worth the heartache. Basically your cutting an angle off that bracket. (hopefully picture makes more sense) **Take off shock before cutting to not accidentally cut the shock / spring. **
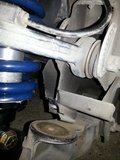
 (Iregrets Cut)
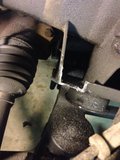
- Now w/ the corner gone, double check fitment and clearance.
- Everything looked good to go on my setup. Now, here is where install will differ from others.
- Take off the shock, but leave the pro-comp adapter attached to the upper bracket, but remove shock completely.
- Weld the upper bracket to the frame. For assurance spray w/ rust-o-leum or similar since raw metal will be exposed as well as on bump stop where it was cut.
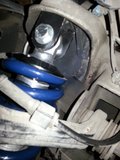
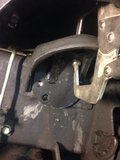
- (Or you can drill holes in the frame and bolt the bracket to the frame. I choose not to do this b/c after looking at it on the driver’s side where the bolts / holes are supposed to go, the engine motor mount is exactly right there. I saw no way to get to the bolts on the inside of the frame to tighten them down.
Here is what your working with on the inside of frame
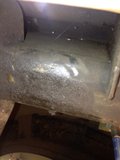
- The upper bracket is optional honestly; it is just for reinforcement of the upper shock perch. So if hesitant at all, you can try to just use the pro-comp adapter and disregard half of 6, 7 & 8. I have seen others in my search that are doing it that way.(no information on how it has held up)
- By this time, the upper mount should be welded on, pro-comp adapter bolted up and tight and upper mount done. Hard part is now over.
- Now get the coil over and mock it back up again. Bolt it to the bottom bracket & the top, (jack up lca if needed to reach / mount top shock bolt to the pro comp adapter. I had to jack it up a little.
- Here is where I removed my Torsion bar setup. The bars & keys but left the x-member. (it serves no purpose as there is a real x-member right behind it.)
- If all is good and well, tighten up the bottom bracket- both bolts. Then tighten up the top bolts. Basically tighten all bolts. (you can tighten up the bottom bracket in the beginning if you choose)
- Now, you should have the coil over fully installed and ready to mount the tire back up.
- Sit back and take a break after both sides are done and admire that both those 5” shocks actually fit (if you choose the shocks I did)
- Put wheels back, tighten accordingly and lower vehicle.
- Check clearance / movement / measurements etc. and that you can get off lift. (ha ha)
- Re-adjust if needed, remember suspension has been messed with. Go for a test drive and come back and re-measure and adjust to desired height.
- That’s it, all should be tight and adjusted and the ride improvement should have been felt on the test drive.
- Now go drive it again and really feel the difference you just created. It is truly a vast improvement of t-bars.
The install time depends upon you or the installer. It took me and my friend w/ a few breaks about 2.5hrs, testing / fitting / mocking / assembly of shocks/ etc.
There may be some steps I left out or did not mention some things. I was not going to go into full detail as this is really not quite that hard to do. It really is a bolt on ordeal with the exception of the upper bracket and cutting the bump stop bracket is needed. I only listed the way I did my install. Whichever top shock mount you choose will differ w/ the install. I.E. stud mount straight to upper mount. No welding or drilling required for upper bracket. Only modifications needed is the bump stop cut.
In order for the above to make sense here are some installed pictures:
Click image for bigger pic
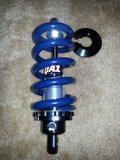
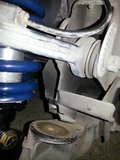
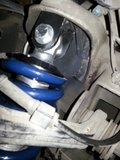
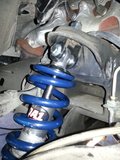
Big Pictures for reference, rest just click for bigger size
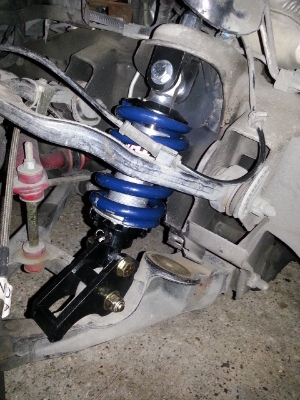
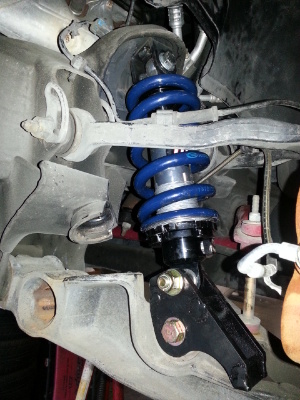
Few notations about my Tahoe:
- It is a 2005 with 285/50/20 tires which ends up being a 31 tall tire.
- 2WD
- I have - Mcgaughys 2" drop sprindles / Rear LCA / UCA / Panhard - (all adjustables) /Sways/ Endlinks/ Free Travel mod/ *STOCK FRONT LCA & UCA*
- I have fender flares (factory)
- Daily Driver
- Beltech 5305 rear springs
- leveled at 32" ground to fender all around
- Center Hub to Fender 17" (4/28/14 - front height is 31.5 )
IMPRESSIONS
Since I was at a suspension overhaul I also installed QA1 RS702 adjustable rear shocks. Most of my impressions will try to focus on front impact.
Starting off on the test drive around to settle the suspension I noticed a difference immediately, a much softer ride in front. The big difference came on the ride back home; about 50 miles on back roads and freeway traveling. First let me say, I forgot I had the front shocks on setting 5 and the rear on 10. Adjusting the knob only 1 click will make a difference. But on the way home not even 10mins into the drive I could not believe the vast amount of difference I was feeling. This, coming from a jar bouncing ride w/ about 1 to 2” of shock travel on the previously installed shocks to having the correct shocks installed w/ the t –bar setup gone. I felt no bumps at all, no jarring bounce, no squeaks, no rattles, nothing but pure bliss. Some of the roads were twisty, (I did not go crazy as I just did the install and still had that, how is my 5” shock holding this beast up mentality) but took the turns w/ even more ease than before. No more side to side movement, it felt as though I had much more control of the front wheels or front as a whole. It is hard to explain. The best explanation I can say is it’s like driving a car w/ a good suspension setup and knowing that you have control of it at most times. You point left it goes left, no movement. Not sure if that really makes sense. The other road or time I noticed an improvement is the entrance to my neighborhood is terrible, like going over 50 million little speed bumps and now it is bearable. I do not get bounced up and down the whole way through the entrance. It cushions the bumps and the only way I can think of, is it feels like driving a car, not a slammed Tahoe. I need more time to actually respond on the feeling of the ride. At the time of writing this I have only put around 50 miles on it and in just that little time has me honestly blown away on the improvement. Just feels more planted & more in control. To copy Atomics words “It’s kind of hard to verbalize just the truck feels more confident and secure, makes it a lot more fun than it should be.”
I messed with the qa1 settings and put on 15 clicks out of 18 which is the firmest, and it still rides much much better than the t-bar setup. Actually, was very impressed w/ the ride at 15 clicks, truck did not move at all. Feels like I could take a corner at any speed. (Which I do not condone) But I love the feeling of driving it now, it’s like a new vehicle. (sort of)
Cliff notes for those that don’t want to read:
WOW, the feeling of driving is fun again in a slammed Tahoe and rides 100x better than with the t-bars. I find myself making up places to go to keep driving it. Well worth the investment and time. You will not be disappointed. If for some reason you are, i would love to know why!
Questions that may come up
A little negative for those that want to go really low. With my setup using the pro-comp adapter, my Tahoe is about as low as its going to go right now. 32” ground to fender or 16.5” center hub to fender. The qal coil overs are on the lowest thread possible. I can only up from here. Until someone comes up with a bushing for the stud mount type shock that holds up to the weight, I can live with my height. Otherwise i think the pro-comp adapter is about 1.5", so then i could go to about 30" height.
This setup to me, (do your research) will fit any application, meaning if you are at stock height and want a much better ride, or if your lowered just a little, or if you want to raise your vehicle. It is all in the shocks that are chosen for the application.
Any questions you may have or I missed over please feel free to pm or ask away. A more knowledgeable person than myself would be Atomic –Richard himself. He has helped me very much and appreciate his help and time. Also thank my friend Low ain’t Enough for helping me with the install.
Thank you Richard AKA Atomic for your time and help & Iregret for allowing me to use his excellent pictures and referencing his thread from PT.net
For Reference and more info see below threads
Atomics Thread on TYF - http://www.tahoeyukonforum.com/forum/showthread.php?t=57560
Atomic thread on PT.net - http://www.performancetrucks.net/fo...2/99-07-4wd-front-coilover-conversion-518118/
Great thread on PT.net that i followed and asked questions also to. He has many pictures of the install, clearance issues, height, etc. Great thread from Iregret - Justin
http://www.performancetrucks.net/fo...lverado-project-charlie-murphy-489579/page25/
** NOTE: For those wanting to do only stud mount Install (no pro-comp adapter) This is from Iregrets thread. he is the thread i am watching closely to see what he comes up with for a suitable bushing install. He has used stock / poly / delrin, These i believe are the new poly he got and custom cut & added washers to spread the load. -- Not my setup--
W/ stock bushing (as above pics)
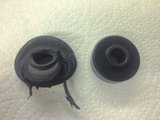
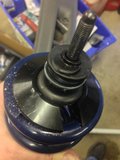
WIth new Poly Bushing w/ fender washers as well. No results yet
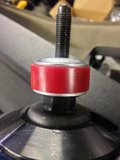
This is installed & weight on.
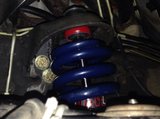
Pictures of Stance after Coil Over install
Tahoe is dirty - weather is not the best lately as we all know. But pix to show all the stance
Quick Video of movement. QA1 shocks set to 0. Softest ride
This is a video of my bro, showing the bounce i know have. lol. Click for the video
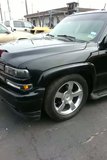
Before
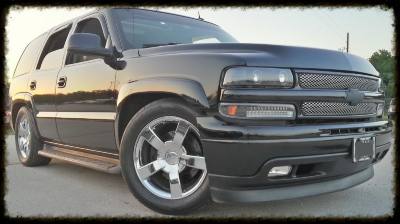
After
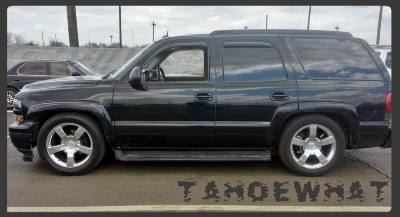
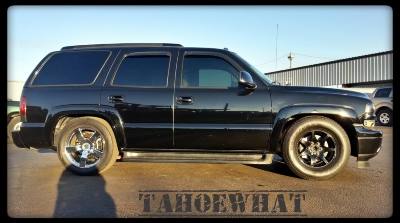

Last edited:

