ScottyBoy
Full Access Member
I recently replaced my rear brake pads and rotors and decided to do a little write up about the process. Some of the rear disc brakes have single piston calipers, and some have the dual piston calipers. Mine has the dual piston calipers, so this should apply to any GMT800 truck or SUV with rear disc brakes with dual caliper pistons. The rear discs are actually a drum/disc combo with a "hat" shaped rotor. Its basically a rotor with a drum built into it. The drum part is completely separate brake shoes used strictly for the parking brake. I did not change the parking brake shoes because I had them replaced at the dealer about 2 years ago before my extended warranty ran out. I did however clean them pretty good with some spray on brake cleaner.
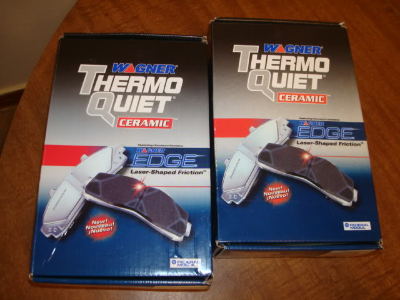
I replaced my pads with some Wagner Thermoquiet Ceramic pads. I also installed the same pads on the front a few months ago.
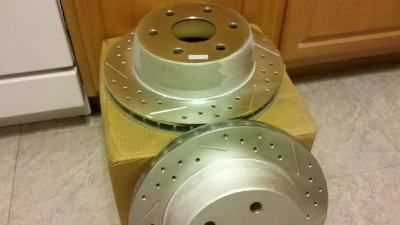
And for the rotors, I ordered some Powerstop drilled and slotted rotors. I installed these same rotors on the front brakes and I am very satisfied with them.
First off, you want to jack up the rear of the vehicle and securely support it with sufficient rated jack stands. Do not support the vehicle with a jack or other stuf like bricks, cinder blocks, lanscape bricks or other crap you have lying around. Dont risk killing yourself, just buy some jackstands.
Remove the rear wheels and set them aside.
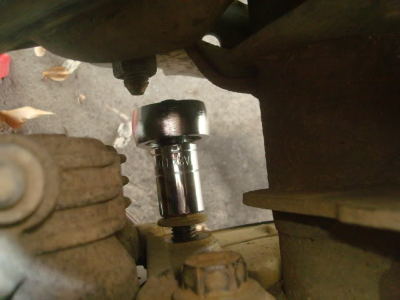
Now you have to remove the two caliper mounting bolts from the caliper slide pins with a 13mm socket (some vehicles may have differents ized bolts). The slide pins may want to spin around on you, hold them still with a 16mm wrench.
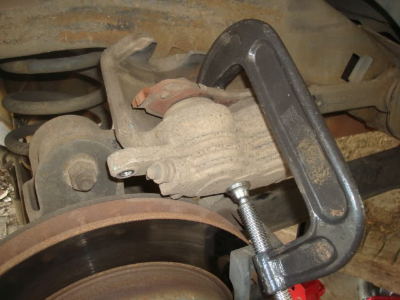
Now lift the caliper off of the caliper braket and rotor so you can remove the old pads and compress the pistons back into the caliper. I used a 5 inch "C" clamp and one of the old brake pads to compress the pistons back into the caliper. Some people simply choose to turn the bleeder screw to relieve the pressure so the piston can retract. I don't like to do that because then you have to bleed the brakes afterwards.
Now set the caliper aside. You can use a bungee cord to support it up out of the way. Do not just let it hang from the brake hose!
Now you need to remove the caliper braket, which is held on with two 18mm bolts, which just happened to be tight as a muthafWONker. :fume: I had to use a 1/2 inch drive 24 inch breaker bar to break them loose, then removed them with a ratchet.
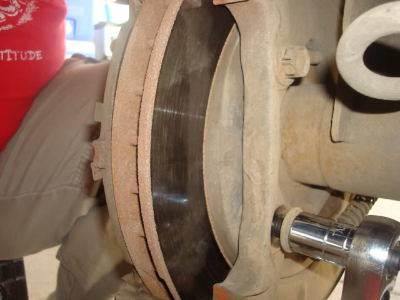
Now once you have the caliper braket off you can remove the rotor. Luckily mine came right off by just grabbing it and wiggling it side to side as I pulled it straight off of the wheels studs.
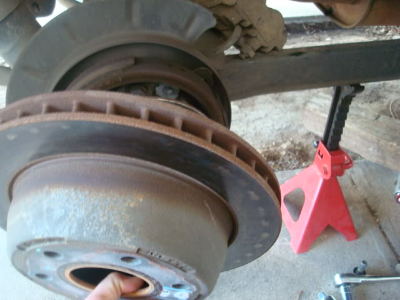
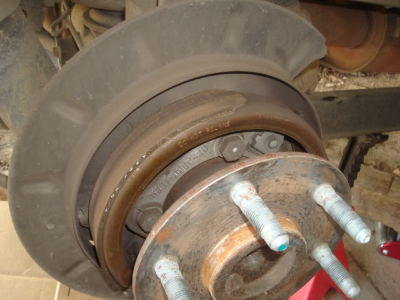
Now look at the parking brake shoes and clean them if needed or replace them if needed. (you are on your own if you need to replace those )
)
Now take your caliper braket and pop those slide pins out and clean them off and regrease them with some caliper slide grease. Just peel back the little rubber boot and the pin will slide right out.
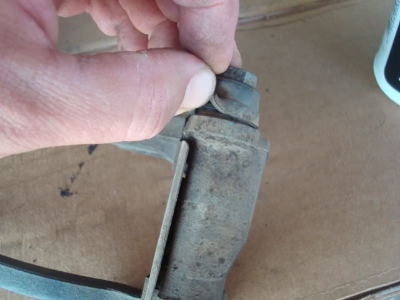
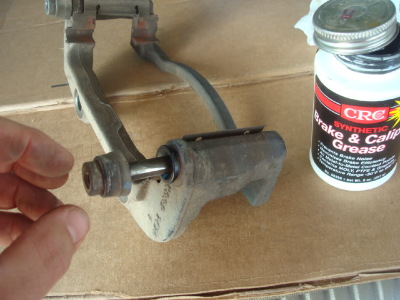
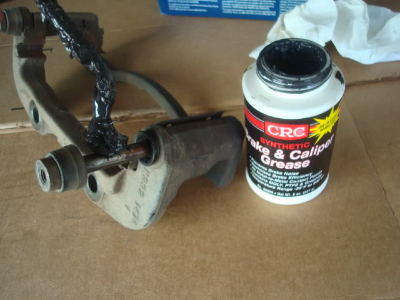
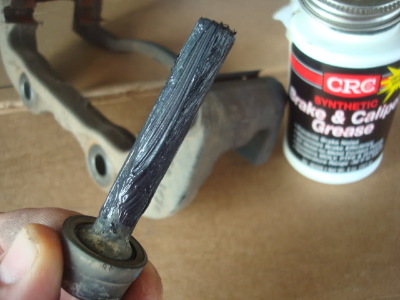
Now get those pins popped back in and the rubber boots popped back on and wipe off any excess grease.
Now start putting stuff back together. Slide your new rotor onto the wheel studs. Then bolt your caliper bracket back on, make sure you get those two 18mm bolts really tight. Now get your new pads situated in the caliper and slide it over the rotor into position to be bolted up to the caliper bracket. If it doesnt fit on, you may have to compress the piston a bit more like I had to do.
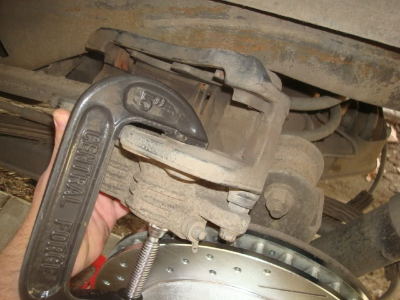
Now get it all lined up and bolt the caliper back in place. Now it should look like this.
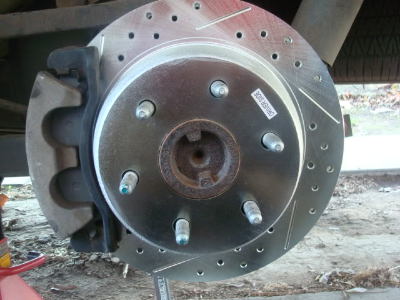
Now get your wheels back on and get the truck off the jack standsand you are good to go. :thumbs:
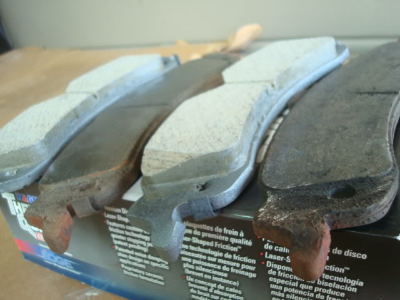
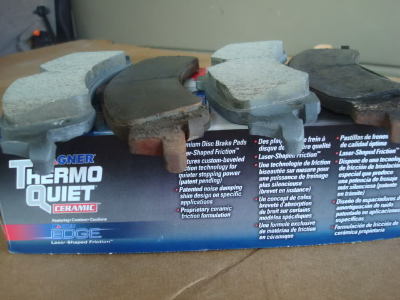
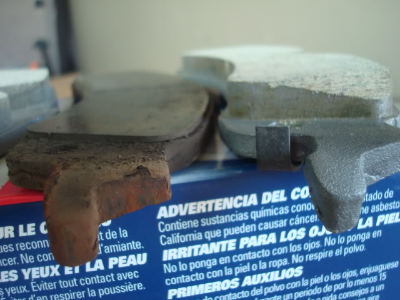
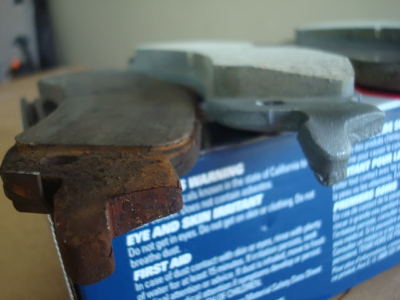
Here is some pics of my old pads next to the new ones. They were starting to get pretty thin.
I replaced my pads with some Wagner Thermoquiet Ceramic pads. I also installed the same pads on the front a few months ago.

And for the rotors, I ordered some Powerstop drilled and slotted rotors. I installed these same rotors on the front brakes and I am very satisfied with them.

First off, you want to jack up the rear of the vehicle and securely support it with sufficient rated jack stands. Do not support the vehicle with a jack or other stuf like bricks, cinder blocks, lanscape bricks or other crap you have lying around. Dont risk killing yourself, just buy some jackstands.
Remove the rear wheels and set them aside.
Now you have to remove the two caliper mounting bolts from the caliper slide pins with a 13mm socket (some vehicles may have differents ized bolts). The slide pins may want to spin around on you, hold them still with a 16mm wrench.
Now lift the caliper off of the caliper braket and rotor so you can remove the old pads and compress the pistons back into the caliper. I used a 5 inch "C" clamp and one of the old brake pads to compress the pistons back into the caliper. Some people simply choose to turn the bleeder screw to relieve the pressure so the piston can retract. I don't like to do that because then you have to bleed the brakes afterwards.

Now set the caliper aside. You can use a bungee cord to support it up out of the way. Do not just let it hang from the brake hose!

Now you need to remove the caliper braket, which is held on with two 18mm bolts, which just happened to be tight as a muthafWONker. :fume: I had to use a 1/2 inch drive 24 inch breaker bar to break them loose, then removed them with a ratchet.


Now once you have the caliper braket off you can remove the rotor. Luckily mine came right off by just grabbing it and wiggling it side to side as I pulled it straight off of the wheels studs.


Now look at the parking brake shoes and clean them if needed or replace them if needed. (you are on your own if you need to replace those
 )
)Now take your caliper braket and pop those slide pins out and clean them off and regrease them with some caliper slide grease. Just peel back the little rubber boot and the pin will slide right out.


Now get those pins popped back in and the rubber boots popped back on and wipe off any excess grease.
Now start putting stuff back together. Slide your new rotor onto the wheel studs. Then bolt your caliper bracket back on, make sure you get those two 18mm bolts really tight. Now get your new pads situated in the caliper and slide it over the rotor into position to be bolted up to the caliper bracket. If it doesnt fit on, you may have to compress the piston a bit more like I had to do.

Now get it all lined up and bolt the caliper back in place. Now it should look like this.

Now get your wheels back on and get the truck off the jack standsand you are good to go. :thumbs:
Here is some pics of my old pads next to the new ones. They were starting to get pretty thin.


