So i've seen several good walk throughs on here that helped me immensely so i thought i would do my own and bridge a couple of gaps that held me up.
I took the advice of another member and purchased this camera from ebay. http://tinyurl.com/3da9l5a
For $16 i'm thoroughly impressed. It works really well and came with enough cable to run from the front of my yukon to the back... perfect.
For the screen i was trying to look for something stylish enough that if it showed in the cubby hole that it wouldn't be a big deal and i actually bid $10 on this one just for the hell of it and ended up winning it. I liked the way it looked but there were a couple of problems with it i'll describe at the end. http://tinyurl.com/3kbv4t5
As for the install, like i said it's been chronicled a few times on here but there were a couple of questions i had even following those tutorials. One was power to the monitor. For me i didn't want to run the power cable all the way to the back of the truck to power it off of the same source as the camera, just so i didn't have to run so much cable. So i went looking around up in the front of the cab and found this little green guy in the a-pillar, that i found out with a tester, only powered up with the truck in reverse SCORE!
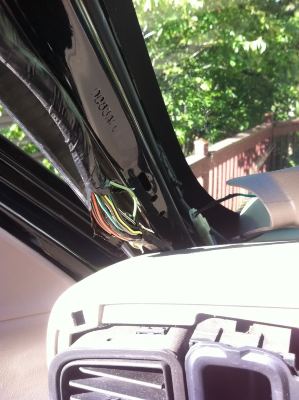
It's the wire that is sticking out to the right. There were quite a few green wires in there so note the color of this one if you do this. Or if you have a 12 volt tester you can fish around in there and find it with that.
After i got power to the screen i started deciding how to mount it. This screen wasn't ideal but it works ok. You can come up with your own mounting ideas but i'll show you what i did. When i pulled out all the guts of that cubby i decided to hack off the "legs" that attached it to the dash and just use them on the screen to mount it in there. So i hacked them off measuring the thickness of the screen to get them the right length and attached them to the back of the monitor. First with just double stick tape to test it.
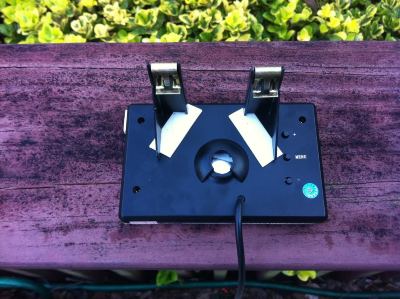
When i put it in the truck it looked pretty good but i wanted it angled a tad towards me so i could see it better so i took a little more off the left one to give it an angle.
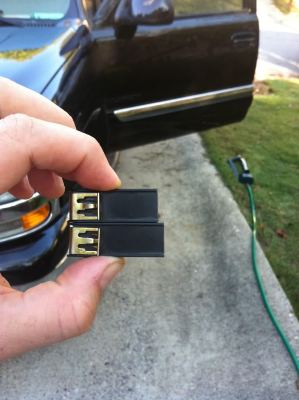
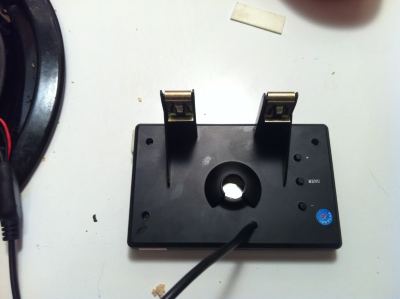
Then tried it again. When i was satisfied with the placement. I scarred the screen where the "legs" would be and used some plastic glue to attach them.
Then on to the reverse camera install. I stole the idea from 05nali where to put it. It works perfect here. This is his picture.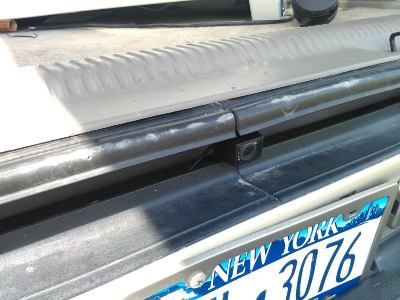
Wiring is pretty simple. I used some all weather splicers just in case...
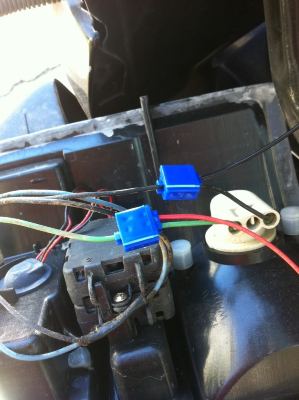
After that all that was left was just running the wire from the camera to the screen which was pretty painless. I ran it under the dash on the passenger side. Popped up all the plastic along the rocker panels back to the camera in the back and hooked her up.
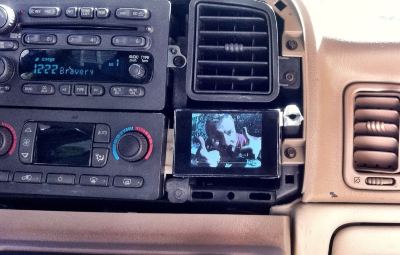
Good to go.
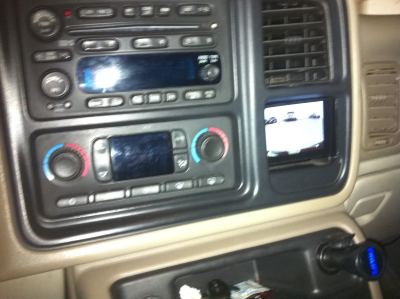
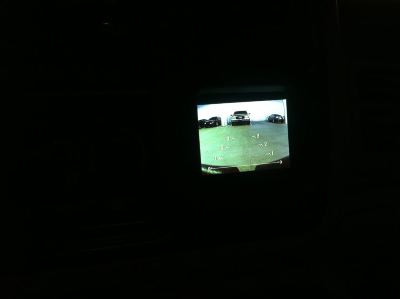
So as i said before the only thing i would change is the screen. It works, and i'll probably leave it be but there is a couple things about it it didn't like. First i didn't notice the resolution was lower than most of the screens until after i already bid on it (hence the $10 price i got it for i suppose) and second is the extended sides on it. If you look at the picture the area to the left and right of the screen posed a bit of a problem when trying to center it in the hole in the dash. It's a tad off center and it drives me nuts (i'm a bit of a perfectionist i guess).
All and all I didn't think it wasn't a bad install at all. I was sort of dreading it but besides finding a wire by trial and error to power the screen, it wasn't bad. Started around 10am and was done by 2 including going up to radio shack to get wire nuts and wire splicers, extra wire etc etc.
Hope it helps anyone that was thinking about doing it.
I took the advice of another member and purchased this camera from ebay. http://tinyurl.com/3da9l5a
For $16 i'm thoroughly impressed. It works really well and came with enough cable to run from the front of my yukon to the back... perfect.
For the screen i was trying to look for something stylish enough that if it showed in the cubby hole that it wouldn't be a big deal and i actually bid $10 on this one just for the hell of it and ended up winning it. I liked the way it looked but there were a couple of problems with it i'll describe at the end. http://tinyurl.com/3kbv4t5
As for the install, like i said it's been chronicled a few times on here but there were a couple of questions i had even following those tutorials. One was power to the monitor. For me i didn't want to run the power cable all the way to the back of the truck to power it off of the same source as the camera, just so i didn't have to run so much cable. So i went looking around up in the front of the cab and found this little green guy in the a-pillar, that i found out with a tester, only powered up with the truck in reverse SCORE!

It's the wire that is sticking out to the right. There were quite a few green wires in there so note the color of this one if you do this. Or if you have a 12 volt tester you can fish around in there and find it with that.
After i got power to the screen i started deciding how to mount it. This screen wasn't ideal but it works ok. You can come up with your own mounting ideas but i'll show you what i did. When i pulled out all the guts of that cubby i decided to hack off the "legs" that attached it to the dash and just use them on the screen to mount it in there. So i hacked them off measuring the thickness of the screen to get them the right length and attached them to the back of the monitor. First with just double stick tape to test it.

When i put it in the truck it looked pretty good but i wanted it angled a tad towards me so i could see it better so i took a little more off the left one to give it an angle.

Then tried it again. When i was satisfied with the placement. I scarred the screen where the "legs" would be and used some plastic glue to attach them.

Then on to the reverse camera install. I stole the idea from 05nali where to put it. It works perfect here. This is his picture.

Wiring is pretty simple. I used some all weather splicers just in case...

After that all that was left was just running the wire from the camera to the screen which was pretty painless. I ran it under the dash on the passenger side. Popped up all the plastic along the rocker panels back to the camera in the back and hooked her up.

Good to go.


So as i said before the only thing i would change is the screen. It works, and i'll probably leave it be but there is a couple things about it it didn't like. First i didn't notice the resolution was lower than most of the screens until after i already bid on it (hence the $10 price i got it for i suppose) and second is the extended sides on it. If you look at the picture the area to the left and right of the screen posed a bit of a problem when trying to center it in the hole in the dash. It's a tad off center and it drives me nuts (i'm a bit of a perfectionist i guess).
All and all I didn't think it wasn't a bad install at all. I was sort of dreading it but besides finding a wire by trial and error to power the screen, it wasn't bad. Started around 10am and was done by 2 including going up to radio shack to get wire nuts and wire splicers, extra wire etc etc.
Hope it helps anyone that was thinking about doing it.


