vt_hokie2008
Full Access Member
If you don't have a dremel tool, now is probably a great excuse to get one. You've been wanting one anyway right?
Tools/Supplies needed:
Dremel or similar (or several types of saws and lots of patience)
8mm socket
10mm? socket (might be a 12, can't remember)
Ratchet
Screwdriver (depends on the head of the bolts you buy)
Plastic/Metal epoxy (I found it at Lowes pretty easily)
ABS Plastic
Projectors
Paint/Primer/Clear
Four bolts, thin and I believe 2.5" would be perfect
Four flat, larger washers
Four blind nuts
I got these projectors:
Pontiac Buick Chevy Pickup Truck Fog Driving Lights Lamps Pair 15162675 Set
http://www.ebay.com/itm/310568679627?ssPageName=STRK:MEWNX:IT&_trksid=p3984.m1497.l2649
$52.50 shipped to your door.
I already had DDM 35w HIDs in my factory fogs, so I just bought another set of HID bulbs to fit these. The new projectors are H11 bulbs.
I ordered this ABS plastic from Amazon (to make the color matched rings):
http://www.amazon.com/gp/product/B004UBUV5O/ref=oh_details_o03_s00_i00?ie=UTF8&psc=1
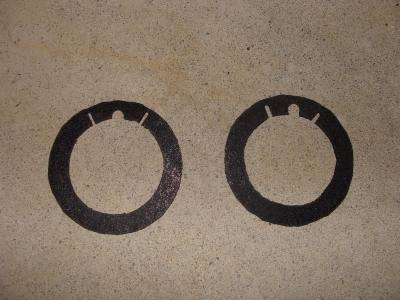
First up, I measured the diameter around the projector itself (inner) and pulled out a compass to draw myself a ring on the ABS. I then cut it out with a Dremel. Once the inner hole is cut, you can put it on the projector and trace the outer diameter and then cut that out. Note, there are a two tabs that you'll want to leave sticking out, those being around the adjustment screw. The rest I trimmed down flush with the rest of the mount. Once the inner and outer cuts are made, I cut the two slots to allow for the tabs to stick through. Don't forget to make a place for access to the adjust screw. You end up with something like this:
I then sanded, primed, sanded again, painted, and cleared these rings with paint I already had from doing my emblems. They came out like this:
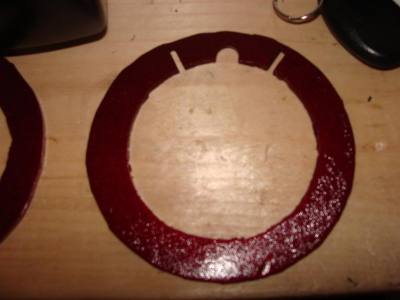
Terrible picture, I know. I'd recommend using the smooth side unlike myself as it would probably look a little cleaner in the end.
Next up is mounting the fogs on the Tahoe. Remove the lower plastic piece that is just below the fogs on the rear of the bumper:
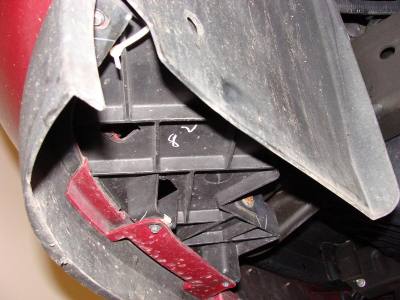
This involves a few screws, one bolt and a couple of clips.
Once removed you have easy access to the rear of the fog housing hole. Remove the factory fogs and then trim a little to make the rear of the projectors fit. I left the factory holes untouched so I could return to stock if I ever needed/wanted to.
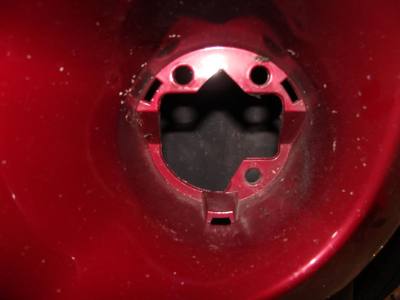
There are 3 metal tabs on the projectors that extend beyond the edge of the round mount. I filed these down with a regular metal file until they were flush. If you don't, you'll likely damage the paint a bit where they'll dig in and will not have the fogs sit as far back in the hole and as flush.
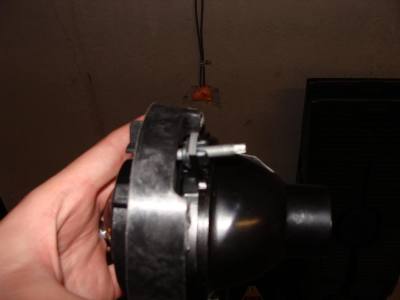
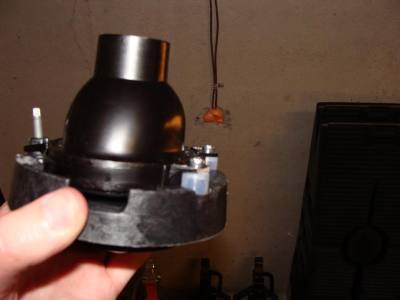
Next I drilled out part of the projector mounts to allow for a bolt to go through to mount them.
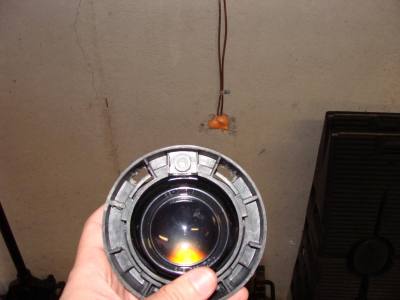
Here's the slightly trickier part; I purchased four bolts. They had to be pretty small to fit into the projector mounts, four large washers to keep the bolt head from going through the factory fog housing holes, and four blind nuts.
With the blind nuts I had to cut off (or grind off if you have a grinder) one side completely flat so it could fit against the wall of the mount and simultaneously not turn when tightening the bolt. The end result is this:
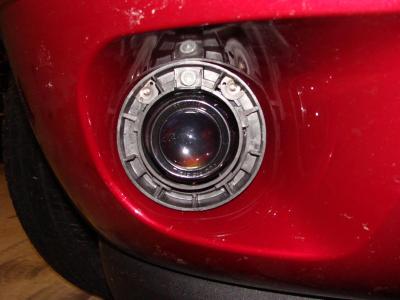
The bolts go through the back of the factory fog housing top two holes with washers in place. They go through the holes in the new projector mounts and screw into the blind nuts. I'll admit this took a little time to get the bolts started, but they will eventually. I had to cut the bolts off in order for them to not stick out too far for the plastic rings to mount flush on the projector mount.
Now that they're mounted, you can put bulbs in and adjust twisting them left and right to get the cutoffs level, then tighten them down a bit (not too much, it's still just a urethane bumper!) to hold them in place. You can adjust the up and down later with the adjust screw.
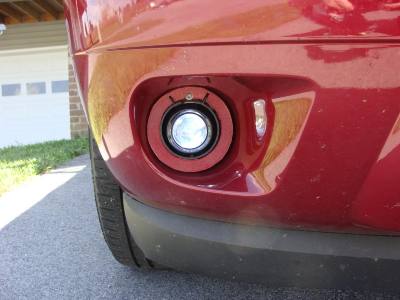
I bought some epoxy from Lowes that claims to work on Plastics and metal. I glued the blind nuts in place (none touching the bolts) in case I ever need to take these off the nuts will not move. I then put a thin bead of epoxy around the outer ring of the projector mount and stuck the painted ABS plastic piece on top, holding until it setup to make the finished look.
Below is the end result.
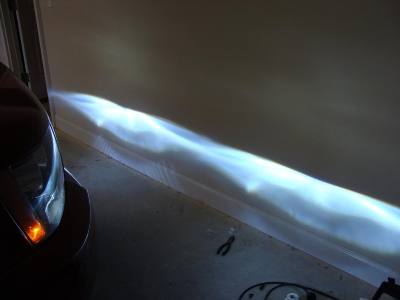
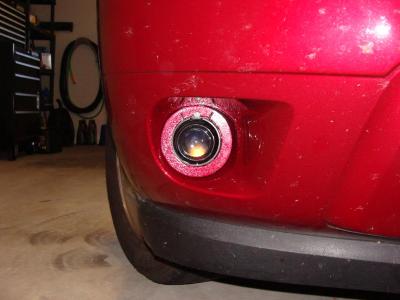
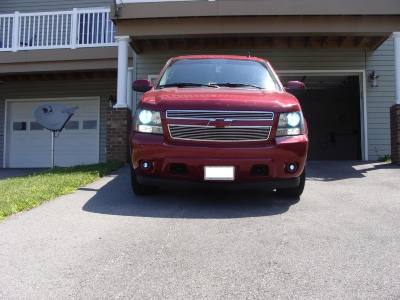
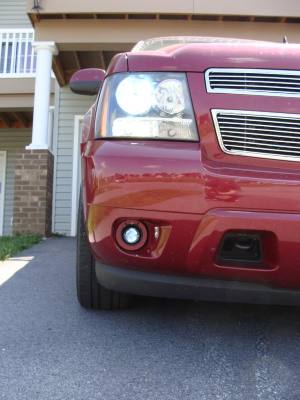
Let me know what additional info you need and I'll update this post.
Tools/Supplies needed:
Dremel or similar (or several types of saws and lots of patience)
8mm socket
10mm? socket (might be a 12, can't remember)
Ratchet
Screwdriver (depends on the head of the bolts you buy)
Plastic/Metal epoxy (I found it at Lowes pretty easily)
ABS Plastic
Projectors
Paint/Primer/Clear
Four bolts, thin and I believe 2.5" would be perfect
Four flat, larger washers
Four blind nuts
I got these projectors:
Pontiac Buick Chevy Pickup Truck Fog Driving Lights Lamps Pair 15162675 Set
http://www.ebay.com/itm/310568679627?ssPageName=STRK:MEWNX:IT&_trksid=p3984.m1497.l2649
$52.50 shipped to your door.
I already had DDM 35w HIDs in my factory fogs, so I just bought another set of HID bulbs to fit these. The new projectors are H11 bulbs.
I ordered this ABS plastic from Amazon (to make the color matched rings):
http://www.amazon.com/gp/product/B004UBUV5O/ref=oh_details_o03_s00_i00?ie=UTF8&psc=1
First up, I measured the diameter around the projector itself (inner) and pulled out a compass to draw myself a ring on the ABS. I then cut it out with a Dremel. Once the inner hole is cut, you can put it on the projector and trace the outer diameter and then cut that out. Note, there are a two tabs that you'll want to leave sticking out, those being around the adjustment screw. The rest I trimmed down flush with the rest of the mount. Once the inner and outer cuts are made, I cut the two slots to allow for the tabs to stick through. Don't forget to make a place for access to the adjust screw. You end up with something like this:

I then sanded, primed, sanded again, painted, and cleared these rings with paint I already had from doing my emblems. They came out like this:

Terrible picture, I know. I'd recommend using the smooth side unlike myself as it would probably look a little cleaner in the end.
Next up is mounting the fogs on the Tahoe. Remove the lower plastic piece that is just below the fogs on the rear of the bumper:

This involves a few screws, one bolt and a couple of clips.
Once removed you have easy access to the rear of the fog housing hole. Remove the factory fogs and then trim a little to make the rear of the projectors fit. I left the factory holes untouched so I could return to stock if I ever needed/wanted to.

There are 3 metal tabs on the projectors that extend beyond the edge of the round mount. I filed these down with a regular metal file until they were flush. If you don't, you'll likely damage the paint a bit where they'll dig in and will not have the fogs sit as far back in the hole and as flush.


Next I drilled out part of the projector mounts to allow for a bolt to go through to mount them.

Here's the slightly trickier part; I purchased four bolts. They had to be pretty small to fit into the projector mounts, four large washers to keep the bolt head from going through the factory fog housing holes, and four blind nuts.
With the blind nuts I had to cut off (or grind off if you have a grinder) one side completely flat so it could fit against the wall of the mount and simultaneously not turn when tightening the bolt. The end result is this:

The bolts go through the back of the factory fog housing top two holes with washers in place. They go through the holes in the new projector mounts and screw into the blind nuts. I'll admit this took a little time to get the bolts started, but they will eventually. I had to cut the bolts off in order for them to not stick out too far for the plastic rings to mount flush on the projector mount.
Now that they're mounted, you can put bulbs in and adjust twisting them left and right to get the cutoffs level, then tighten them down a bit (not too much, it's still just a urethane bumper!) to hold them in place. You can adjust the up and down later with the adjust screw.
I bought some epoxy from Lowes that claims to work on Plastics and metal. I glued the blind nuts in place (none touching the bolts) in case I ever need to take these off the nuts will not move. I then put a thin bead of epoxy around the outer ring of the projector mount and stuck the painted ABS plastic piece on top, holding until it setup to make the finished look.
Below is the end result.


Let me know what additional info you need and I'll update this post.
Last edited:
