Alyssa's 99 Yukon

Disclaimer: Links on this page pointing to Amazon, eBay and other sites may include affiliate code. If you click them and make a purchase, we may earn a small commission.

AlyssaB

Member
Joined
Feb 24, 2014
Posts
45
Reaction score
0
Location
Austin, TX
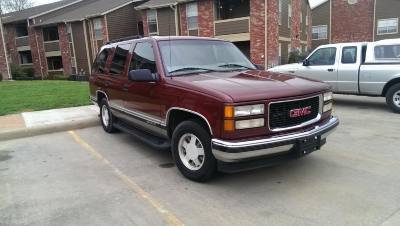
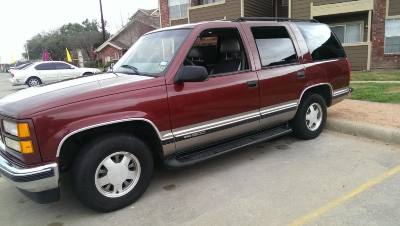
Hey everyone, I picked up a 1999 Yukon SLT recently and wanted to start myself a thread to keep track of what I do with it. It's the OBS and it has roughly 108,500 miles. It's extremely clean for its age.

The day I brought it home, next to my dad's Sierra(both needing a little TLC)
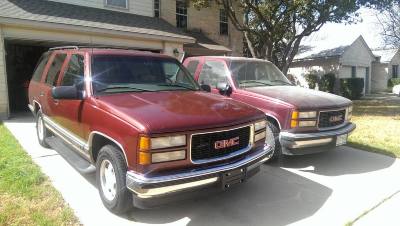
yukonandsierra_zps9f7b0800.jpg


Washed the truck and restored the headlights. One was very faded and one was obviously newer. Can't tell a difference now unless you're looking for it. Fixed a short in the tail lights. Also, the back door wasn't locking and unlocking even when closed so I took some DeoxIT and some steel wool and cleaned the pins and other hardware. Now they're all shiny clean and I have locking functions and rear defrost functional again.
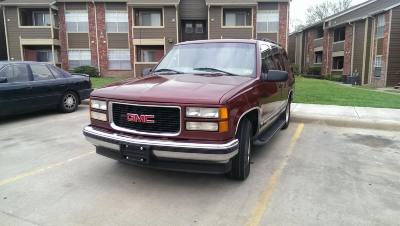
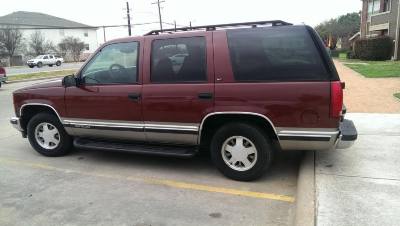
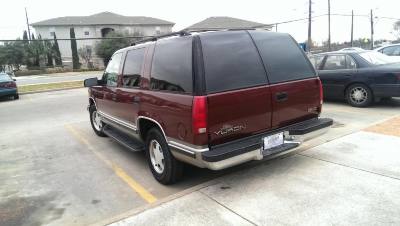
Yukon5_zps5d7becdb.jpg
Yukon4_zps7057adcb.jpg
Yukon3_zpsbcc4ebad.jpg
Yukon1_zpsea3e3b96.jpg


Then today, I installed my new Kenwood Excelon KDC-X597 and wow what a difference! The music doesn't sound near as tinny as it did, even on stock speakers. Also put a pocket in there, been really wanting that extra space in there as I don't use CDs so the stock radio was taking up too much room. I was really proud of my work because I know people have had trouble wiring the factory amp but I was able to get it on the first attempt(with some help from members here of course!)
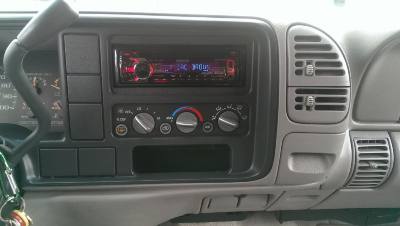
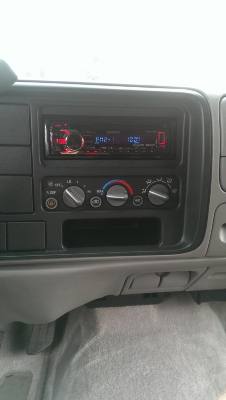
newradio_zps54047238.jpg
closeradio_zps15f0c128.jpg

I'm really pleased with the bluetooth. The call quality was great. Then I toyed around with playing music through bluetooth and it sounded great as well.
The bluetooth mic was a lot easier than I thought it would be to wire into the dash.I tucked it under the headliner, removed the pillar cover and strapped the wire to the existing wiring in there, and ran it down around the instrument cluster. I like the location it's in right above the mirror. Less road noise than on the pillar by the door and it can pick up everyone in the vehicle more clearly in that location.
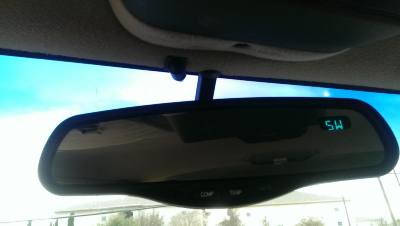
mic_zps5c1ad03d.jpg

All in all the install took about an hour for the whole thing. The soldering and heat shrink took about an hour as well. Two hours well spent!

I have some Alpine SPS-610C components on their way here that I can't wait to install! The rear door speakers are blown so I may move the front woofers back there(if they fit, although I bet they dont...) for now when I install these in the front until I can order some coax speakers for the rear doors. The very back speakers are busted as well so I'll eventually have to replace those as well.

So far that's all I got. Will also be getting new tires pretty soon. Going bigger than stock to get up off the ground a couple more inches. The current tires are too small and at the end of their lives!
 

NathanJax

Vacation Nathan
Staff member
Administrator
Supporting Member
Joined
May 9, 2009
Posts
49,134
Reaction score
943,577,160
Location
Jax, Fl
Off to a good start!!!
 

felixgun

Full Access Member
Joined
Oct 7, 2010
Posts
9,742
Reaction score
125
Location
Lafayette, LA
Welcome! Off to a good start in deed. It's nice seeing females enjoying mods like the rest of us guys do :)
 

RynoHarris

Full Access Member
Joined
Nov 18, 2011
Posts
149
Reaction score
8
Location
Texas
Very nice truck and great mileage! Those front speakers should fit in the rear doors with no problems too btw.

Sent from my HTC One X using Tapatalk
 
OP
OP
AlyssaB

AlyssaB

Member
Joined
Feb 24, 2014
Posts
45
Reaction score
0
Location
Austin, TX
Very nice truck and great mileage! Those front speakers should fit in the rear doors with no problems too btw.

Sent from my HTC One X using Tapatalk

awesome! Thanks for the confirmation. Although it will be difficult for me to resist ordering aftermarket speakers for the back doors

Received the Alpine components today by surprise! Thought they wouldn't be here until monday... apparently USPS does run saturdays? :shrug:

It's been raining all day so I probably won't get a chance to install until tomorrow. For now, I'm scratching my head trying to figure them out. Hopefully these bad boys are as easy to install as the radio was. I'll have all night to google I guess.

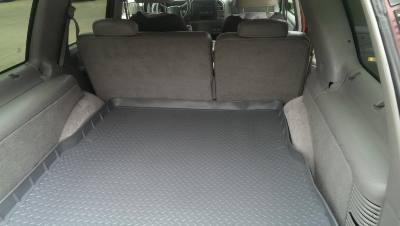
Also, my last job which we won't name (cough Cabela's cough) thought it would be neat to mass fire hundreds of full time employees including most of the HR departments at each store across the nation, TWO DAYS after the founder of the company passed away. So I took all the ugly work shirts in and customer service gave me a refund since they were 16$ a piece out of my pocket and with the store credit I ordered myself a custom floor liner for the cargo area. Basically a 120$ liner for free! Consider it severance pay :) Gotta do what I gotta do on a college budget I guess! The dogs love being back there, so I don't wanna mess up the carpet this summer going to the river and the park.
 

BXFERN

TYF Newbie
Joined
Aug 25, 2011
Posts
1
Reaction score
0
Very nice Yukon! I have a 99 Suburban myself & was wondering how did you hook up the radio to the factory amp? Only my front door speakers sound with my current sony head unit, but they all sounded with the old stock radio. Any info would be appreciated. Thanks


Sent from my iPad Air using Tapatalk
 
OP
OP
AlyssaB

AlyssaB

Member
Joined
Feb 24, 2014
Posts
45
Reaction score
0
Location
Austin, TX
Very nice Yukon! I have a 99 Suburban myself & was wondering how did you hook up the radio to the factory amp? Only my front door speakers sound with my current sony head unit, but they all sounded with the old stock radio. Any info would be appreciated. Thanks


Sent from my iPad Air using Tapatalk

The amp turn on wire coming from the truck(OEM wires) is PINK. That's what sent a signal from your original headunit to the factory amp to say "hey, turn on". So I cut the pink wire off of the factory harness right at the harness and crimped it to a power wire from the wiring harness that came with my new radio. There should have been a wiring harness supplied with the radio by Sony and there are power wires coming from it that you won't need for anything else. Mine had a blue wire labeled "power antenna" and I was told that wire only works when you're on FM/AM though I still saw some people suggest using it. Thankfully, there was another wire labeled "power control" and it was blue with a white stripe and Kenwood said it could be used to turn on an amp(thought it is not the actual power source)
I crimped the blue/white wire from the new radio harness to the pink wire from the truck side.
This should fix your problem and turn your factory amp on when the radio comes on.

The colors of the wires that came with your headunit might be different than Kenwood, so I would suggest reading the installation instructions that came with the new headunit. Kenwood had all their wires labeled by color in the user instruction manual at the back which was extremely helpful. If Sony didn't do that, I'd google what the colors are.

---------- Post added at 01:55 PM ---------- Previous post was at 01:37 PM ----------

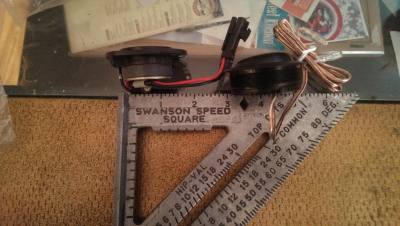
Well, after about 2 minutes into tearing apart my door, I hit a glaring problem. This 1" tweeter that came with these components is over 2 inches and MUCH larger than the factory tweeter.

1" my rear!!!! (New tweeter on the right, stock tweeter on the left)
tweeters_zps335acd27.jpg

Needless to say there's no way in hell that's going to fit. After re-reading crutchfield installation details, I see that it does in fact tell me "You'll have to custom mount the tweeters and crossovers..." but that must've gone right over my head when I first read it. I'm debating searching through nearby pawn shops for a dremel tool, but it may even be too wide to cut into the existing tweeter mount. I could always put it in the pillar, or the triangular area at the front corner of the windows... I'd really like to hide the tweeters though. And I'll need to go buy a drill... Still trying to decide if it would be a better idea monetarily to mail these components back to crutchfield and just put in coaxials. :(

I should've known that my first install would not have gone easily... :whymewhyme:

I'll just consider this a good learning experience! Off to the pawn shops!

---------- Post added at 01:57 PM ---------- Previous post was at 01:55 PM ----------

Nice truck

Polish it out. It will look new

We've had pretty crappy weather here lately, but as soon as I get a sunny day I'm going to do this. There's a few very shallow clear coat scratches that need to be fixed and then I'm waxing the whole thing! The local fancy car wash wants something like 60 bucks for a wax and there's no way I'm paying someone that much when I can do it for the cost of the wax.

---------- Post added at 03:57 PM ---------- Previous post was at 01:57 PM ----------

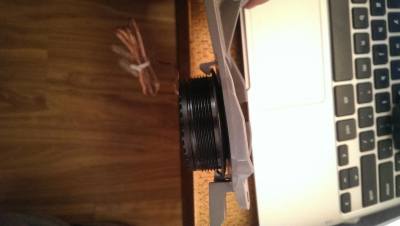
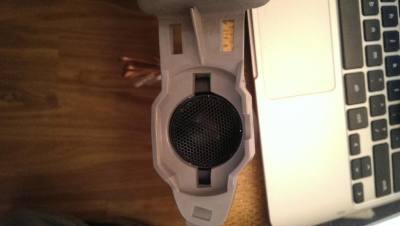
False alarm! I was looking at the pieces and it just hit me...

tweeterinplace_zps7ebb8836.jpg
IMAG0930_zpsktn0q3tk.jpg

With a little force I was able to pop it right into place and use the clips that held the old tweeter in. Good thing I saw this before I cut into it!
Wow do I feel silly... but I'm just happy I was able to fit it right in with no alterations. They fit pretty firmly as I had to force them in, so they aren't going anywhere.

Back outside to tear into my door.
 
Last edited:
OP
OP
AlyssaB

AlyssaB

Member
Joined
Feb 24, 2014
Posts
45
Reaction score
0
Location
Austin, TX
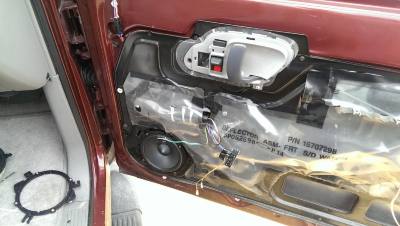
Well, finally got the speakers in. Ran out of light yesterday so had to do the passenger side today. All I can say is WOW. These speakers are awesome. Crutchfield's description said they were good even at "low" power (read:without amp) and they weren't kidding!! The first few songs were meh but after maybe 20-30 minutes these things really came alive. I picked the song I figured would be the biggest and pumped "Hedwig's Theme" (full orchestra Harry Potter theme song) through them multiple times. Let me tell you, I might as well had been sitting in a concert hall in front of the orchestra itself, it was that clear. I could hear things I've never heard in that song before, and at some points I'm almost positive I could hear the movements of the musicians playing the instruments.

Pics!

First things first, she got a bath and a fresh waxing today.
There's some beading in the second pic... It decided to get stormy after I started so I had to rush the waxing and was finishing up as the first drops began falling
Yukon6_zps481c4e39.jpg
waterbeading_zps9ebecc52.jpg

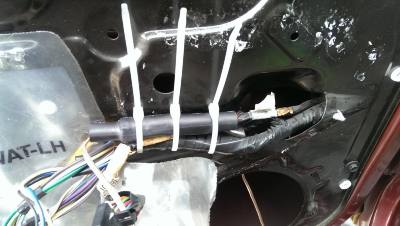
The crossovers were cylindrical and were inline, already mounted on the tweeter wire. I thought it would be more difficult to mount, but I simply zip tied them to the existing wire already mounted to the door.
crossovermount_zps2c2d402b.jpg

Passenger side in
passspeakers_zps263c8ea1.jpg

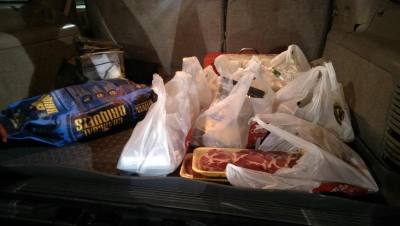
AND, my custom fit cargo liner came in! So I had to go to the grocery to give it some use
liner1_zpsef1b3b3a.jpg
grocerys_zps818fd0e2.jpg

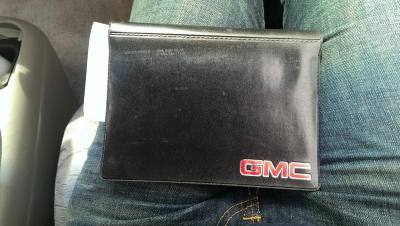
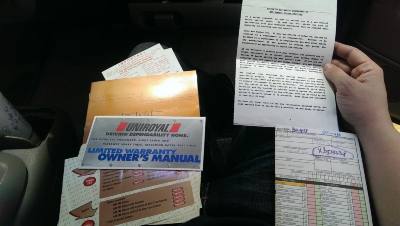
And lastly, I was digging around the glove box and came across these gems:
truckpapers_zpse7d22d63.jpg
papers_zpsf9721913.jpg

Original owner's manual, delivery receipt, and even a survey paper from the manufacturing warehouse asking if everything was put together okay! I was so giddy when I found those papers. Pretty cool to see that stuff. Original owner info too! It looks like it was first bought in Amarillo :D
 

BirchyBoy

Full Access Member
Joined
Jul 21, 2013
Posts
548
Reaction score
4
Great looking rig! I installed the next model-up Kenwood (X797) in my '99 SLT and love the Bluetooth as well. I had read quite a bit about the amp issue and was able to get everything working without having to cut the pink wire.
 

Forum statistics

Threads
132,288
Posts
1,865,356
Members
96,860
Latest member
tvray10
Top