First thing first, so I do not reinvent the wheel
Start here
http://www.tahoeyukonforum.com/forum/showthread.php?t=30772
It's pretty easy, you need:
1) small flat screwdriver,
2) 10mm socket, and wrench with an extension.
3) The only thing I would add is to use a plastic easy pry tool:
To fix your handles
4) 7mm nut driver - For removal
5) The easy pry tool
6) Hammer, and punch pin with large flat punch surface.
http://www.amazon.com/Steck-Autobod...&qid=1403813249&sr=1-1&keywords=easy+pry+tool
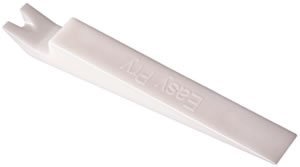
Best tool I have in my box for removing interior panels and parts without damaging your plastic pieces, or chipping your paint. Much better than using a screwdriver on the interior plastic panels that have a tendency to break or bend from metal.
.......................
Second thing to note is the Front and rear door handles are the same, I purchased two sets from Amazon http://www.amazon.com/gp/product/B00JHOS3NG/ref=oh_details_o04_s00_i00?ie=UTF8&psc=1
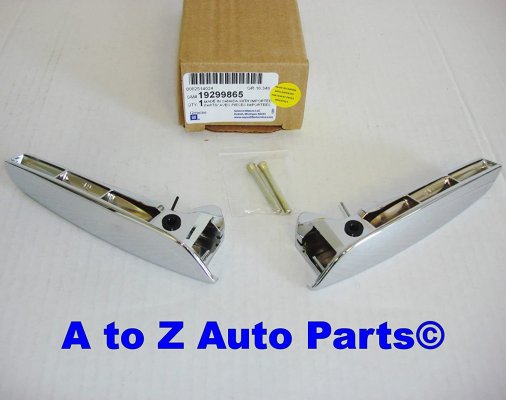
They fit perfectly both front and rear.
Once you get the door handles, and the door panels off, it is pretty much down hill.
1) Lay the panel flat face down on something. Use carpet or cardboard to not scuff the surface if you are really particular.
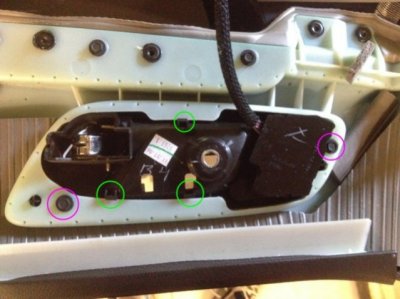
2) (Image 1 - purple circles) unscrew the 2 7mm screws holding the door handle assembly to the door panel.
3) (Image 1 - Green Circles) There are three clips that still hold the escussion to the door panel itself, Use the easy-pry to gently pop off the escussion. I found on mine that if I pulled toward the handle with the pry tool it came off easier than trying to pull outward. Do what you feel comfortable with. (Ref Image 2)
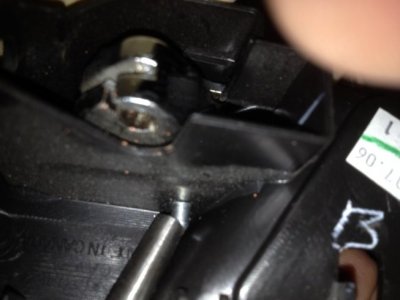
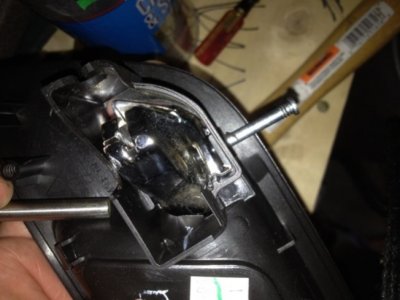
4) Once the door handle assembly is off, you locate the pin that holds the handle on the escussion
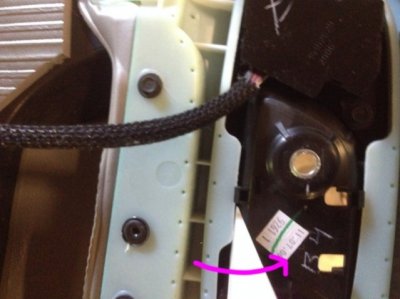
5) Use the hammer and the large punch to tap out the pin (Image 3 & 4). I put mine on the corner of a makeshift table. The table cannot be rounded, and you probably want to make sure the table edge gets as close to the pin as possible.
6) use pliers to pull the pin the rest of the way out if you have to.
7) install new handle, There is a small slot that the spring goes into, it is pretty hard to miss, it should just slide together.
8) install pin. Here is where I had a problem with the new pins. I could not get the NEW pin supplied with the handle to go all the way in. So I used the original pins, which worked fine, I still had to tap it all the way down flush with the punch. (Again, on the table, just make sure the table edge corner is close to the pin. It is more difficult than the removal because of where the pin is located on the escussion.)
9) pop in handle assy into door panel and replace the two screws. Make sure the clips are clipped onto the door panel.
10) reinstall door panels.
Done
All in all it took me about 20 min at most to do a single door panel after I did the first one, they are all the same in process, just different pieces.
Start here
http://www.tahoeyukonforum.com/forum/showthread.php?t=30772
It's pretty easy, you need:
1) small flat screwdriver,
2) 10mm socket, and wrench with an extension.
3) The only thing I would add is to use a plastic easy pry tool:
To fix your handles
4) 7mm nut driver - For removal
5) The easy pry tool
6) Hammer, and punch pin with large flat punch surface.
http://www.amazon.com/Steck-Autobod...&qid=1403813249&sr=1-1&keywords=easy+pry+tool

Best tool I have in my box for removing interior panels and parts without damaging your plastic pieces, or chipping your paint. Much better than using a screwdriver on the interior plastic panels that have a tendency to break or bend from metal.
.......................
Second thing to note is the Front and rear door handles are the same, I purchased two sets from Amazon http://www.amazon.com/gp/product/B00JHOS3NG/ref=oh_details_o04_s00_i00?ie=UTF8&psc=1

They fit perfectly both front and rear.
Once you get the door handles, and the door panels off, it is pretty much down hill.
1) Lay the panel flat face down on something. Use carpet or cardboard to not scuff the surface if you are really particular.
2) (Image 1 - purple circles) unscrew the 2 7mm screws holding the door handle assembly to the door panel.
3) (Image 1 - Green Circles) There are three clips that still hold the escussion to the door panel itself, Use the easy-pry to gently pop off the escussion. I found on mine that if I pulled toward the handle with the pry tool it came off easier than trying to pull outward. Do what you feel comfortable with. (Ref Image 2)
4) Once the door handle assembly is off, you locate the pin that holds the handle on the escussion
5) Use the hammer and the large punch to tap out the pin (Image 3 & 4). I put mine on the corner of a makeshift table. The table cannot be rounded, and you probably want to make sure the table edge gets as close to the pin as possible.
6) use pliers to pull the pin the rest of the way out if you have to.
7) install new handle, There is a small slot that the spring goes into, it is pretty hard to miss, it should just slide together.
8) install pin. Here is where I had a problem with the new pins. I could not get the NEW pin supplied with the handle to go all the way in. So I used the original pins, which worked fine, I still had to tap it all the way down flush with the punch. (Again, on the table, just make sure the table edge corner is close to the pin. It is more difficult than the removal because of where the pin is located on the escussion.)
9) pop in handle assy into door panel and replace the two screws. Make sure the clips are clipped onto the door panel.
10) reinstall door panels.
Done
All in all it took me about 20 min at most to do a single door panel after I did the first one, they are all the same in process, just different pieces.


Last edited:
