BlizzardX23
Supporting Member
Step 1 - Pop hood
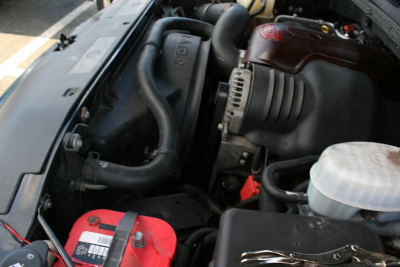
Step 2 - Remove intake tube (This is only IF you want extra space...I didnt pull mine this time but you might want to)
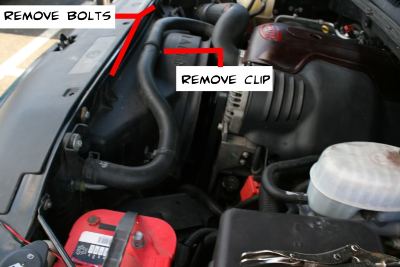
Step 3 - Remove two top bolts and pull coolant line clip out of shroud
Step 4 - The Fan Shroud is two pieces. A top and a bottom. They are connected in the middle by clips. This picture was taken out of the vehicle so that you could see...they are a pain to get out
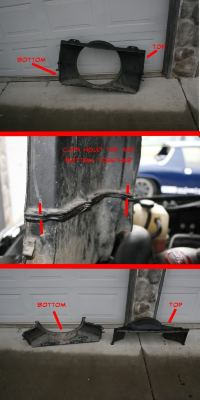
Step 5 - Remove the top shroud by pushing the coolant line and working the shroud side to side...Also, the shroud has a lip that holds it down...push it back towards the engine and you will see it come out from under the radiator support bar on top... it will be a pain in the ass, just be patient...dont be afraid to use some force and bend the shroud to get it out. (LEAVE BOTTOM SHROUD ALONE FOR NOW)
Step 7 - With the bottom shroud still in place, you can begin removing the Clutch Fan.
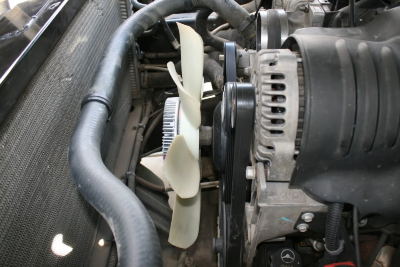
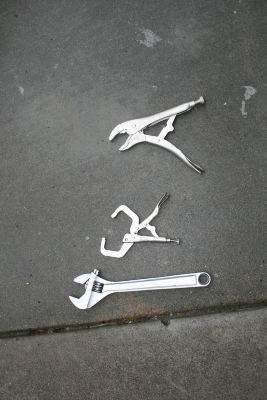
Lock the pulley? with one of these tools below (except the crescent wrench)
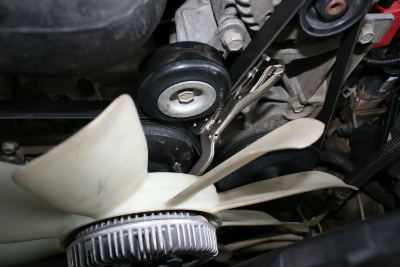
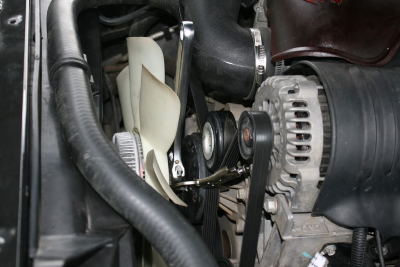
You can also use the Vise Grips...dont worry bout chewing up the pulley? because it wont harm it
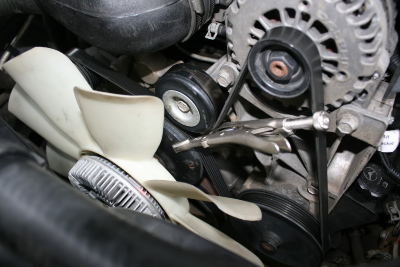
After locking the tool in place (to prevent the pulley? from spinning, throw your large crescent wrench on the nut
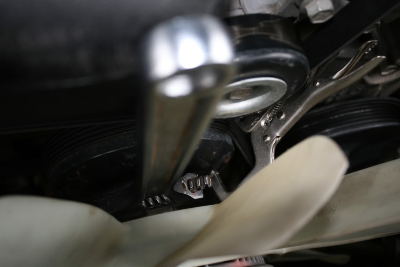
Your locking tool (vise grips or other) will slide off a few times if you dont have it clamped on well enough...be patient.
Remove the clutch fan by loosening the nut between the pulley? and the back of the fan. After you break it loose, you can spin it by hand to take it off...it'll probly fall if you dont grab it in time lol...
With the Clutch fan removed, you can now pull the bottom shroud out..BE SURE TO REMOVE the metal oil? line clip from the bottom shroud..it should now look like this..
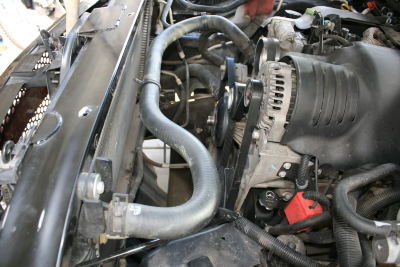
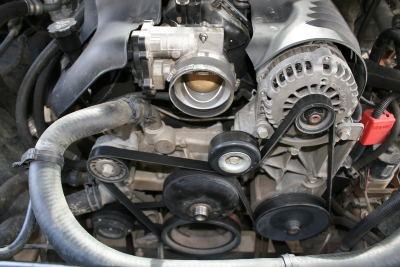
Now its time to connect the wiring harness that you received from Justin to the OEM 05+ Tahoe Radiator fans that you purchased.
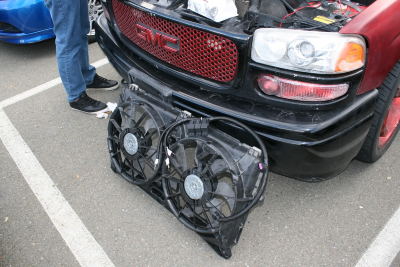
The LAST clip on the harness connects to the passenger side fan..duh
Look at the bottom of the fans...you will see 3 rubber feet with slits in them. Now look in your engine bay at the bottom of the radiator tray and notice the ridge. That ridge will slide into those rubber feet! Also notice the arm on the sides of the new fan assembly. You will see where they go when you start to install the fans.
Slide the fans down and get them into position..not much detail needs to be explained..you'll figure this part out pretty easy...bolt it back in, clip the metal oil lines back in at the bottom, clip the coolant line back on top...Your fans are now installed...
NOW on to installing the wiring harness..
Disconnect your battery if you want...I didnt...and nothing happened..but Im not taking the blame if you do something and fry your truck...
Your computer usually has a black cover over it...pull it off...theres little tabs you have you pull to remove it..good luck! haha
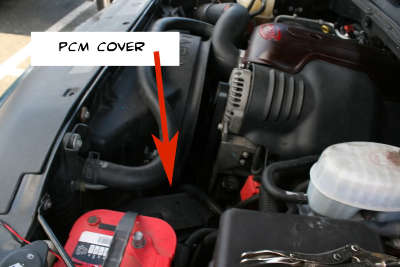
Then remove the tabs holding the PCM? in....unbolt the two connectors...and pull those POS gray covers OFF!!!
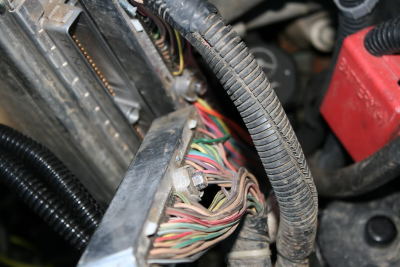
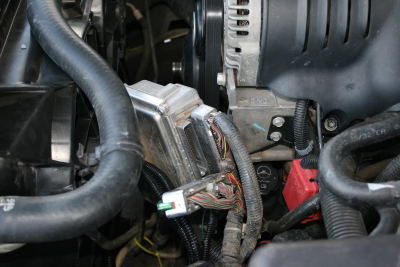
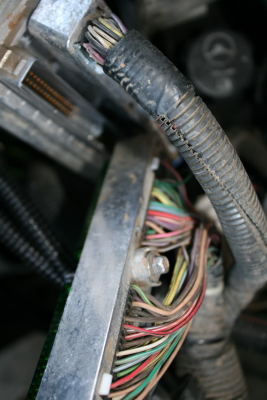
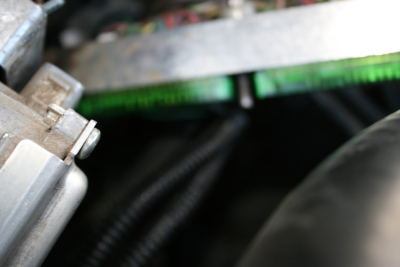
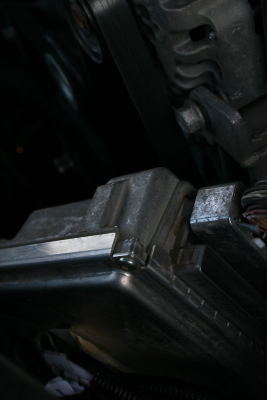
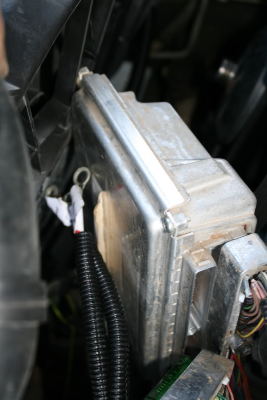
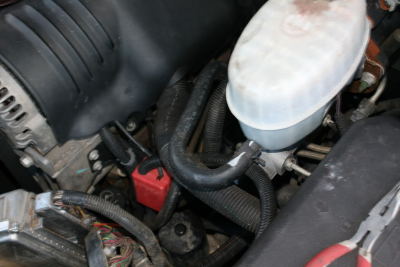
There are two long plugs...unbolt them both..(but ONLY work on ONE AT A TIME!!!!!!)
When you unbolt and pull each connection, one will have a green cover over the pins, and one will have a blue cover over the pins...
Pull whichever one you want first...unclip the colored cover...and slide the pin into the correct slot from the top...
(Green wire goes to green covered connection, Blue wire goes to the blue connection)
Blue wire gets pushed into the blue covered #42 slot (be sure to take the colored covers off while doing this, then put them back on when done)
Green wire gets pushed into the green covered #33?? slot (Im not 100% sure if thats the correct pin number...someone chime in)
*the wires will have tags on them, telling you what slots to put them in*
Its a pain in the ass to get them all the way through the clip...I had to push the pin in as far as I could by hand, grab something thin and long (no jokes please lol)..like a toothpick or something like that and push it in a little more till I could grab the metal connection and pull it through the other side with needle nose pliers...I did bend the with teeth on the connection plug a little bit so that I could grab a hold of the wire

Step 2 - Remove intake tube (This is only IF you want extra space...I didnt pull mine this time but you might want to)
Step 3 - Remove two top bolts and pull coolant line clip out of shroud

Step 4 - The Fan Shroud is two pieces. A top and a bottom. They are connected in the middle by clips. This picture was taken out of the vehicle so that you could see...they are a pain to get out

Step 5 - Remove the top shroud by pushing the coolant line and working the shroud side to side...Also, the shroud has a lip that holds it down...push it back towards the engine and you will see it come out from under the radiator support bar on top... it will be a pain in the ass, just be patient...dont be afraid to use some force and bend the shroud to get it out. (LEAVE BOTTOM SHROUD ALONE FOR NOW)
Step 7 - With the bottom shroud still in place, you can begin removing the Clutch Fan.

Lock the pulley? with one of these tools below (except the crescent wrench)


You can also use the Vise Grips...dont worry bout chewing up the pulley? because it wont harm it

After locking the tool in place (to prevent the pulley? from spinning, throw your large crescent wrench on the nut

Your locking tool (vise grips or other) will slide off a few times if you dont have it clamped on well enough...be patient.
Remove the clutch fan by loosening the nut between the pulley? and the back of the fan. After you break it loose, you can spin it by hand to take it off...it'll probly fall if you dont grab it in time lol...
With the Clutch fan removed, you can now pull the bottom shroud out..BE SURE TO REMOVE the metal oil? line clip from the bottom shroud..it should now look like this..


Now its time to connect the wiring harness that you received from Justin to the OEM 05+ Tahoe Radiator fans that you purchased.

The LAST clip on the harness connects to the passenger side fan..duh
Look at the bottom of the fans...you will see 3 rubber feet with slits in them. Now look in your engine bay at the bottom of the radiator tray and notice the ridge. That ridge will slide into those rubber feet! Also notice the arm on the sides of the new fan assembly. You will see where they go when you start to install the fans.
Slide the fans down and get them into position..not much detail needs to be explained..you'll figure this part out pretty easy...bolt it back in, clip the metal oil lines back in at the bottom, clip the coolant line back on top...Your fans are now installed...
NOW on to installing the wiring harness..
Disconnect your battery if you want...I didnt...and nothing happened..but Im not taking the blame if you do something and fry your truck...
Your computer usually has a black cover over it...pull it off...theres little tabs you have you pull to remove it..good luck! haha

Then remove the tabs holding the PCM? in....unbolt the two connectors...and pull those POS gray covers OFF!!!


There are two long plugs...unbolt them both..(but ONLY work on ONE AT A TIME!!!!!!)
When you unbolt and pull each connection, one will have a green cover over the pins, and one will have a blue cover over the pins...
Pull whichever one you want first...unclip the colored cover...and slide the pin into the correct slot from the top...
(Green wire goes to green covered connection, Blue wire goes to the blue connection)
Blue wire gets pushed into the blue covered #42 slot (be sure to take the colored covers off while doing this, then put them back on when done)
Green wire gets pushed into the green covered #33?? slot (Im not 100% sure if thats the correct pin number...someone chime in)
*the wires will have tags on them, telling you what slots to put them in*
Its a pain in the ass to get them all the way through the clip...I had to push the pin in as far as I could by hand, grab something thin and long (no jokes please lol)..like a toothpick or something like that and push it in a little more till I could grab the metal connection and pull it through the other side with needle nose pliers...I did bend the with teeth on the connection plug a little bit so that I could grab a hold of the wire
Last edited:
