MechEng813
Member
- Joined
- Jan 11, 2017
- Posts
- 74
- Reaction score
- 70
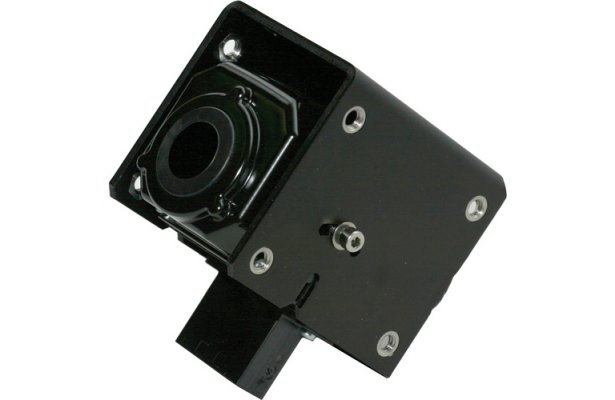
Wanted to share some pics of my thermal imager install incase anyone was looking for mounting ideas.
![vBsWCv1.jpg vBsWCv1.jpg](https://www.tahoeyukonforum.com/data/attachments/303/303137-bee8b7ce5beea3ad350d07f313fb6cc0.jpg)
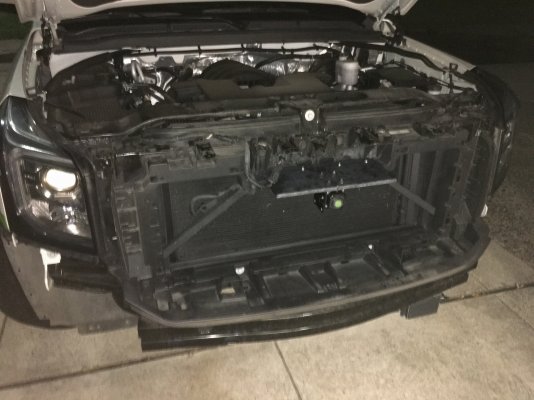
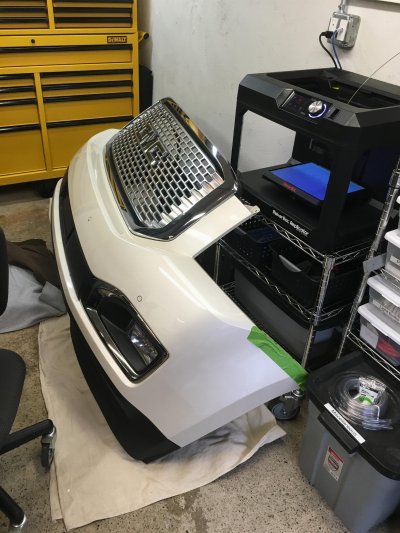
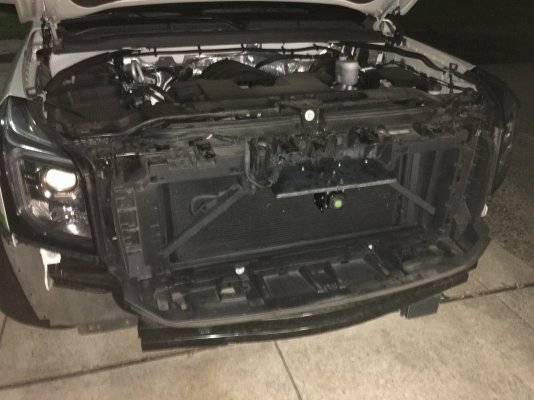
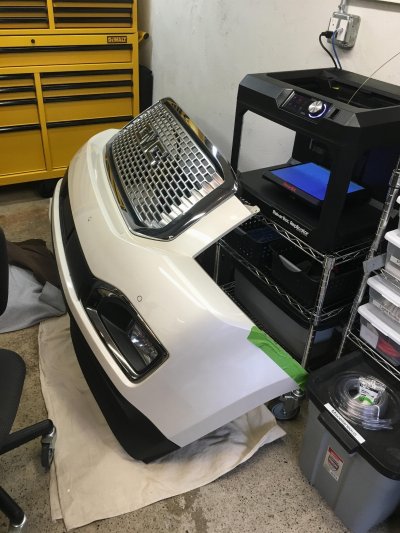
Started with taking the entire front bumper off.
![vl4B51R.jpg vl4B51R.jpg](https://www.tahoeyukonforum.com/data/attachments/303/303138-e225babc35d7d46ab5beaa47f03fa2f7.jpg)
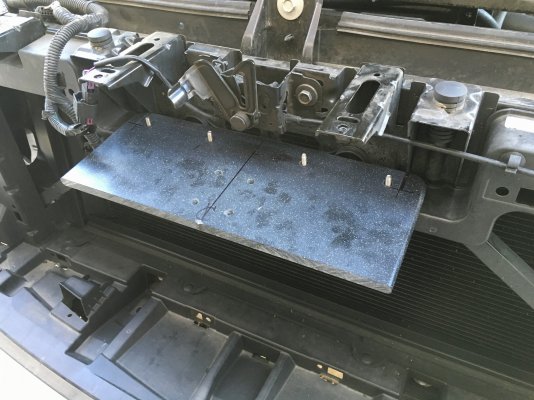
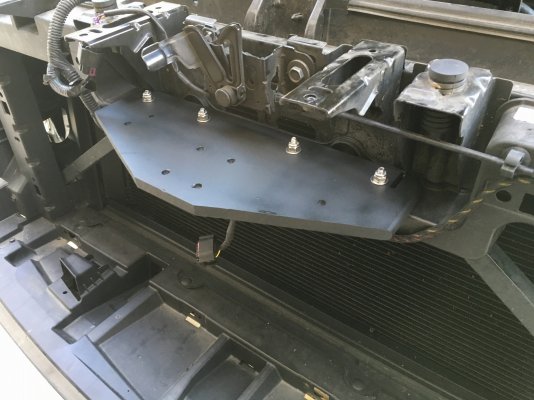
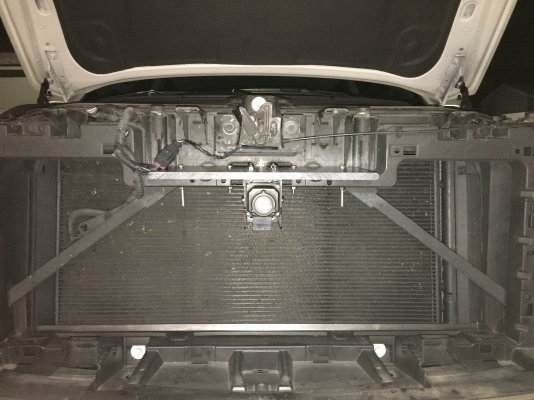
Along the upper radiator mount drilled 4x thru holes and used 1/4-20 stainless screws
and locknuts to create a series of four mounting studs.
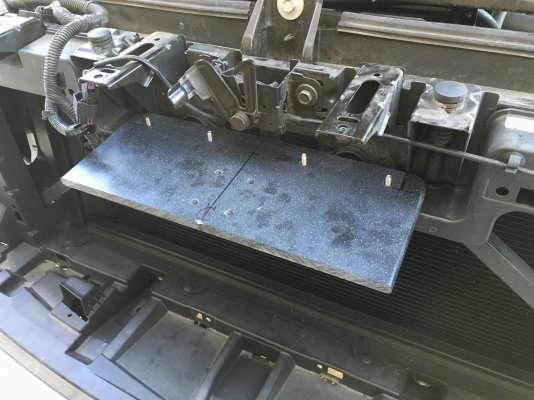
Because the radiator mount is hollow, i used plastic spacers to fill in the void.
![pU1wRcA.jpg pU1wRcA.jpg](https://www.tahoeyukonforum.com/data/attachments/303/303139-6b636c532d3507df1fe38e2db8330811.jpg)
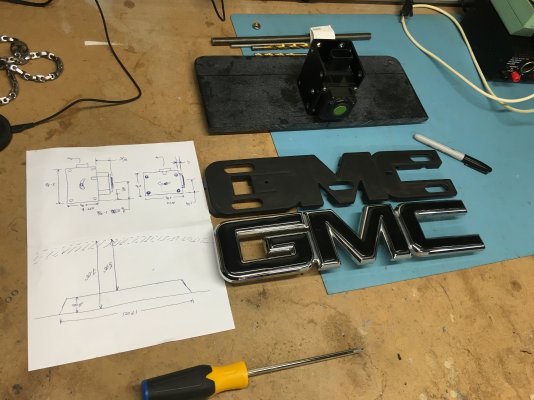
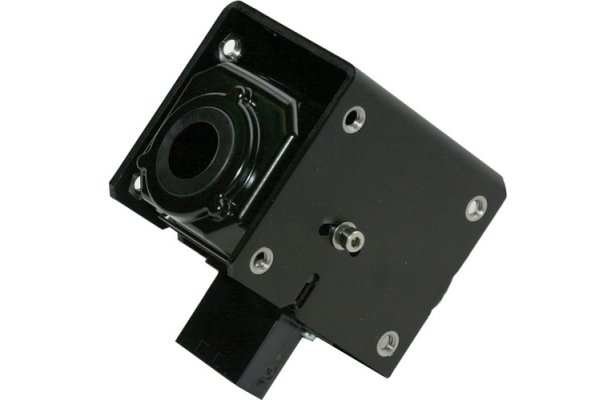
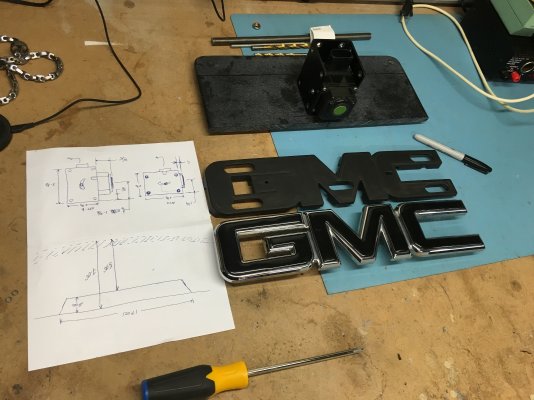
Using a piece of black Corian counter top scrap, I started building the mounting plate that would hold the camera.
![qrI5d9E.jpg qrI5d9E.jpg](https://www.tahoeyukonforum.com/data/attachments/303/303140-1474ac1b533f82970a3bf7b2f78c7e4d.jpg)
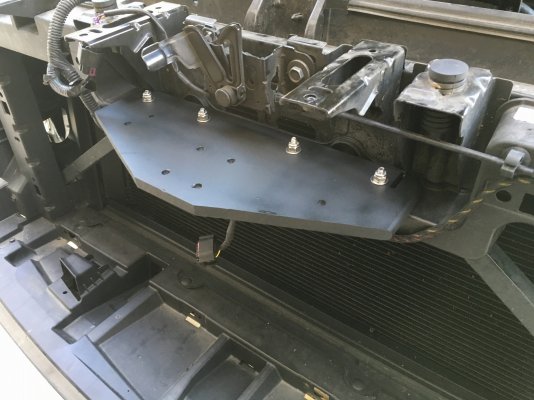
I trimmed the Corian down a bit to decrease the total mass of the bracket
(and to prevent unwanted vibration)
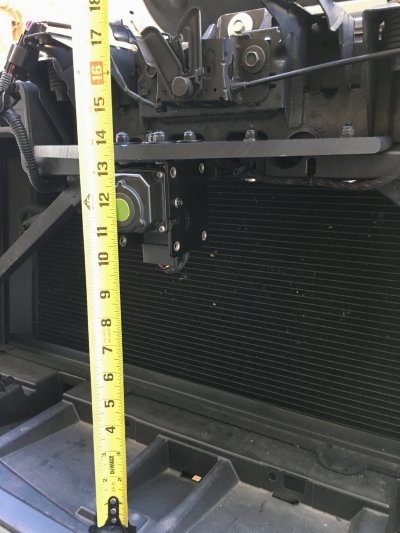
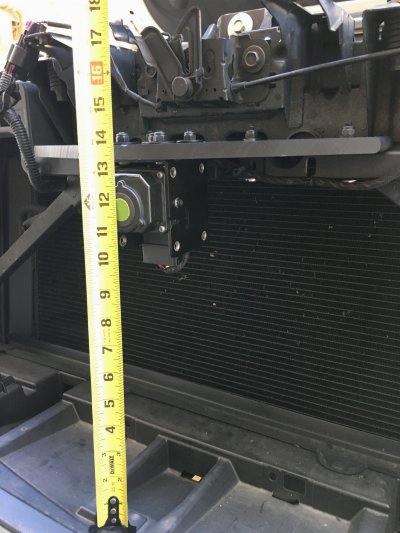
After temporarily fitting the bumper back in place, I was able to figure out how far back from the grill the camera needed to sit.
![1nnhWAi.jpg 1nnhWAi.jpg](https://www.tahoeyukonforum.com/data/attachments/303/303141-a022c5734e61e7382cbf4e08668a25c3.jpg)
![coLdSfl.jpg coLdSfl.jpg](https://www.tahoeyukonforum.com/data/attachments/303/303142-1ae58a8bdc9fb269c68b2c13a99daa52.jpg)
![rqycTe2.jpg rqycTe2.jpg](https://www.tahoeyukonforum.com/data/attachments/303/303143-077a13cd41310a09679d5ec1ac951a58.jpg)
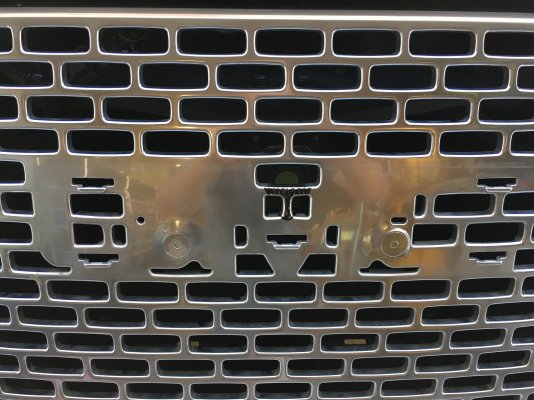
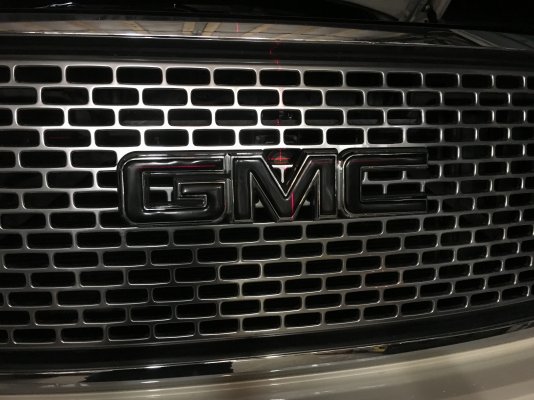
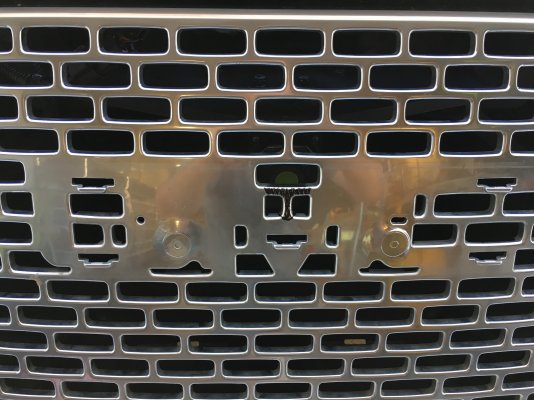
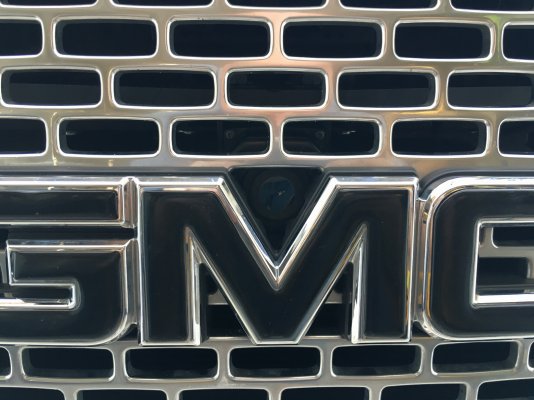
By carefully keeping the camera bracket centered I was able to have the lens sit just above the "M" emblem.
![Z08mxSj.jpg Z08mxSj.jpg](https://www.tahoeyukonforum.com/data/attachments/303/303144-868885e016351df33f809ab0922e8949.jpg)
![rCPJwYW.jpg rCPJwYW.jpg](https://www.tahoeyukonforum.com/data/attachments/303/303145-aab9475f5c0297c7964f52976ae4f04c.jpg)
![UXto6KL.jpg UXto6KL.jpg](https://www.tahoeyukonforum.com/data/attachments/303/303146-966a01f8d9602aafffb3f090d4c9a5ef.jpg)
Just a slight modification to the grille and the camera is exactly where it needs to be.
![fLA9gci.jpg fLA9gci.jpg](https://www.tahoeyukonforum.com/data/attachments/303/303147-62384bc257c918915a3bf0fda7c35eaa.jpg)
Electrical hook up was very straight forward.
Accessory 12v, ground and a composite video output.
I picked up a 5" LCD and mounted it high along the headliner, keeping it just within my peripheral vision
![NoqbVLh.jpg NoqbVLh.jpg](https://www.tahoeyukonforum.com/data/attachments/303/303148-ccdff92918aef5eea3125a8afe236e53.jpg)
Added a switch to the screen power, to shut it off when not needed.
And I also keep a piece of Green lens gel in the center console incase the white starts to bother me while I'm driving
![vBsWCv1.jpg vBsWCv1.jpg](https://www.tahoeyukonforum.com/data/attachments/303/303137-bee8b7ce5beea3ad350d07f313fb6cc0.jpg)
Started with taking the entire front bumper off.
![vl4B51R.jpg vl4B51R.jpg](https://www.tahoeyukonforum.com/data/attachments/303/303138-e225babc35d7d46ab5beaa47f03fa2f7.jpg)
Along the upper radiator mount drilled 4x thru holes and used 1/4-20 stainless screws
and locknuts to create a series of four mounting studs.
Because the radiator mount is hollow, i used plastic spacers to fill in the void.
![pU1wRcA.jpg pU1wRcA.jpg](https://www.tahoeyukonforum.com/data/attachments/303/303139-6b636c532d3507df1fe38e2db8330811.jpg)
Using a piece of black Corian counter top scrap, I started building the mounting plate that would hold the camera.
![qrI5d9E.jpg qrI5d9E.jpg](https://www.tahoeyukonforum.com/data/attachments/303/303140-1474ac1b533f82970a3bf7b2f78c7e4d.jpg)
I trimmed the Corian down a bit to decrease the total mass of the bracket
(and to prevent unwanted vibration)
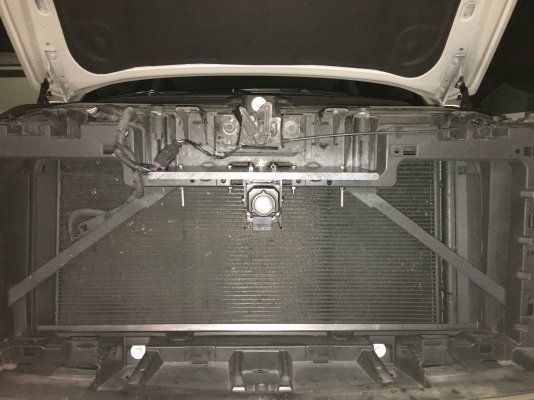
After temporarily fitting the bumper back in place, I was able to figure out how far back from the grill the camera needed to sit.
![1nnhWAi.jpg 1nnhWAi.jpg](https://www.tahoeyukonforum.com/data/attachments/303/303141-a022c5734e61e7382cbf4e08668a25c3.jpg)
![coLdSfl.jpg coLdSfl.jpg](https://www.tahoeyukonforum.com/data/attachments/303/303142-1ae58a8bdc9fb269c68b2c13a99daa52.jpg)
![rqycTe2.jpg rqycTe2.jpg](https://www.tahoeyukonforum.com/data/attachments/303/303143-077a13cd41310a09679d5ec1ac951a58.jpg)
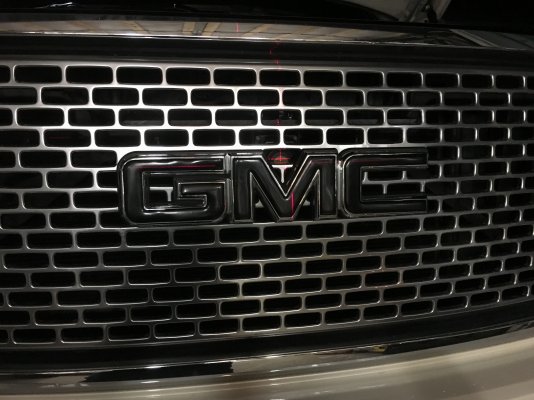
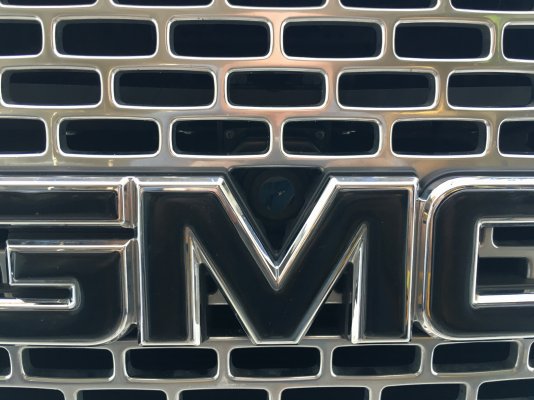
By carefully keeping the camera bracket centered I was able to have the lens sit just above the "M" emblem.
![Z08mxSj.jpg Z08mxSj.jpg](https://www.tahoeyukonforum.com/data/attachments/303/303144-868885e016351df33f809ab0922e8949.jpg)
![rCPJwYW.jpg rCPJwYW.jpg](https://www.tahoeyukonforum.com/data/attachments/303/303145-aab9475f5c0297c7964f52976ae4f04c.jpg)
![UXto6KL.jpg UXto6KL.jpg](https://www.tahoeyukonforum.com/data/attachments/303/303146-966a01f8d9602aafffb3f090d4c9a5ef.jpg)
Just a slight modification to the grille and the camera is exactly where it needs to be.
![fLA9gci.jpg fLA9gci.jpg](https://www.tahoeyukonforum.com/data/attachments/303/303147-62384bc257c918915a3bf0fda7c35eaa.jpg)
Electrical hook up was very straight forward.
Accessory 12v, ground and a composite video output.
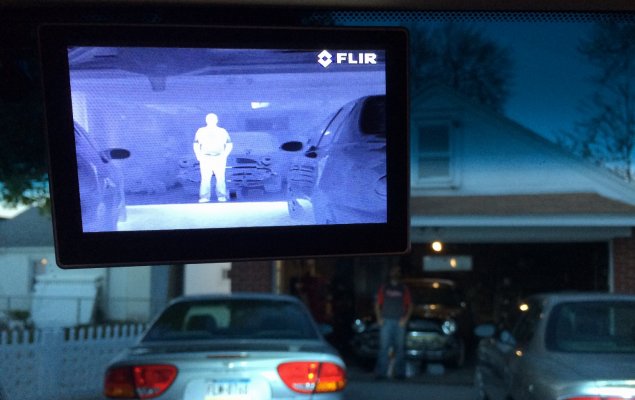
I picked up a 5" LCD and mounted it high along the headliner, keeping it just within my peripheral vision
![NoqbVLh.jpg NoqbVLh.jpg](https://www.tahoeyukonforum.com/data/attachments/303/303148-ccdff92918aef5eea3125a8afe236e53.jpg)
Added a switch to the screen power, to shut it off when not needed.
And I also keep a piece of Green lens gel in the center console incase the white starts to bother me while I'm driving
Last edited: