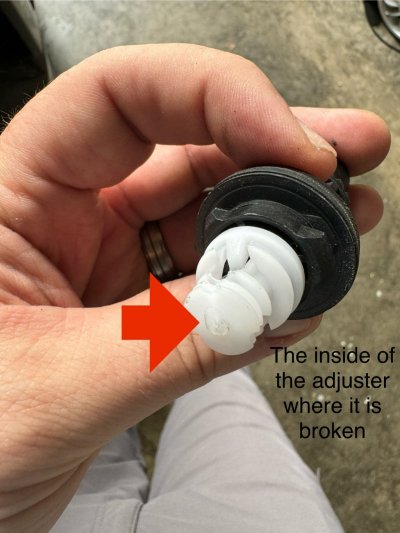
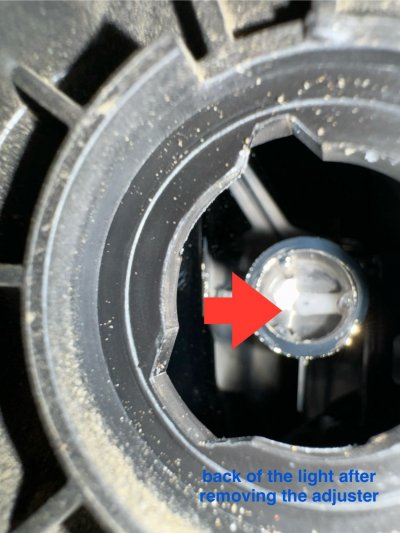
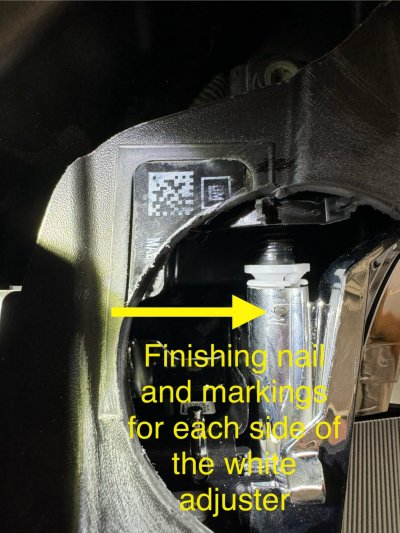
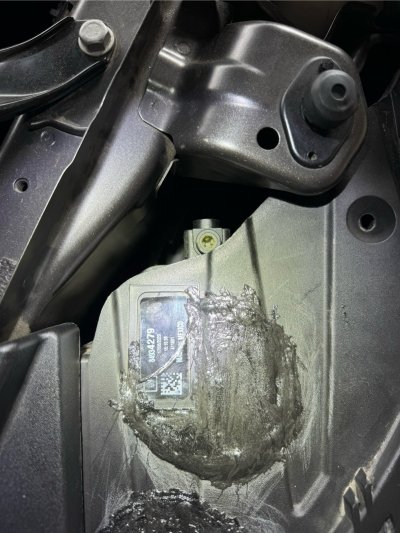
I think I found the problem. I have a 2021 Suburban LT. Same exact issue. You can remove the adjustment knob by using a wrench and turn the whole adjustment assembly Clockwise 45°. It will pull out. Be very careful from dropping it as it is crazy hard to retrieve! You will notice that the adjustment screw end is connected to a white pin (don't know a better word). This pin is ribbed that connects to the actual interior light assembly. The pin literally is 1/8" of plastic and any hard bump from rough roads will break it. This is destined for failure. All we need is a replacement part and easy fix. But I can't find this part anywhere. Should be a $5 part considering the way it is made. I cut a hold in the top of the headlight about 1.5" in size directly above where the pin connects to the interior light assembly. Screw the adjuster all the way out to extend as far as possible with the pin attached. Hold the adjuster with pin into the hole. Drill a 1/16" hole in the assembly and through the adjuster pin. Put a 1/16" nail in the hole through the pin. Screw in the adjuster until it starts lifting the interior light assembly and remount the adjuster by turning counter clockwise 45°. Adjust your headlights to the proper height. Seal the hole with good duct tape or whatever you find best. Been working now for 6 months.
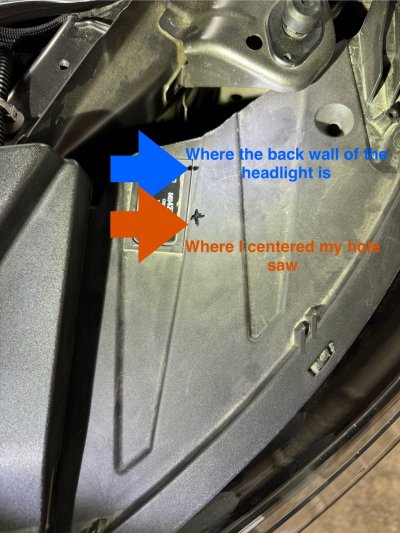
I too used this as my fix. Thanks for the suggestion! It worked really well, make sure to measure before cutting, ensure you don’t cut too deep and hit the electrical work inside (look through the headlight lens to verify), and the hardest part was cleaning out the debris after opening up the top of the headlight. I used a small shop vac with an attachment to get plastic out. I used a hole saw so I could JB plastic bond it back together, make sure to let the epoxy harden a little so it doesn’t drip down in the reflection surface. I used a 1” finishing nail and a 5/64 drill bit for the fix.
I did this because I can’t stand the thought of paying $2000 to have the same problem because they install a light with the same engineering problem. Not only that but it’s only a matter of time before the other light does the same. Instead this is a stronger fix for $25 between the JB Plastic bond, the box of nails, and the drill bit. I did use a drill, a 3” hole saw bit, a shop vac, a microfiber cloth (to wipe smudges inside the light), and a measuring caliper (to measure and mark where to drill the finishing nail hole as to not puncture the black ball). These were all items I already had.
Here are photos of what the inside of the adjuster looks like when broken, what the inside of the headlight area where the adjuster connects to it. Also, here’s a picture on how I decided where to cut my hole, where I drilled/pinned the adjuster, and a picture of the hole sealed back up with the JB plastic bond.
Take your time and focus, it’s not too hard. Hopefully this helps! Lord knows it’s worth saving $2k!!!!


