3rd row seat removal Premier Edit:deck added

Disclaimer: Links on this page pointing to Amazon, eBay and other sites may include affiliate code. If you click them and make a purchase, we may earn a small commission.

Dave Jr

Member
Joined
Apr 11, 2018
Posts
44
Reaction score
69
Location
South Florida
Tools needed:
15mm socket and ratchet
Small screwdriver

Start with removing the accessory tray:
Remove Matt
Remove “thumb” screws
https://www.flickr.com/gp/163893409@N03/13jcz8
https://www.flickr.com/gp/163893409@N03/3fw880
After removing screws simply lift out container

Remove the aft 4 10x1.5mm hex bolts (silver) using 15mm ratchet.
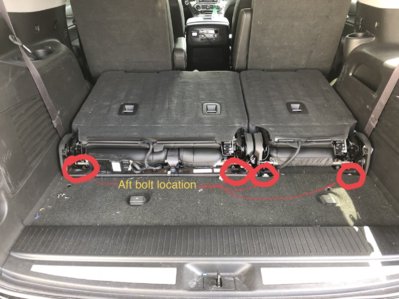
F92DF71F-32B4-4B10-84EE-E578C8C2E2C0.jpeg

***Raise the seats
Remove 3 access covers and 3 forward retaining bolts
https://www.flickr.com/gp/163893409@N03/Qr2Y70
After bolt remove I replaced the covers
***Lower the seats
Have your screwdriver handy and roll the seat section up
https://www.flickr.com/gp/163893409@N03/WT98d8
Unplug the electrical connection lifting the tab with screwdriver
https://www.flickr.com/gp/163893409@N03/0dhW4N
Your all set! Remove the seat assembly
https://www.flickr.com/gp/163893409@N03/AiJ23r

I will be adding a proper deck with spacers I’ll add to this post
Just remember to bag your bolts and wrap the seats for storage...
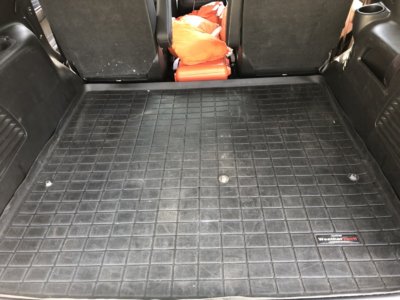
For now a weathertech insert works fine
 

cardude2000

Full Access Member
Joined
Nov 12, 2015
Posts
2,931
Reaction score
1,037
Impressive. Nice work and great pics.

Now you almost have as much room as a small minivan! ;-)


Sent from my iPhone using Tapatalk
 

Undeserving

Mitch and Murray sent me.
Joined
Sep 17, 2017
Posts
81
Reaction score
25
Location
Triad Area NC
interesting. Not sure I am ready to remove my rear seat but would like to flatten the rear cargo area. It seems to me that the under cover storage are is about useless for anything othern than stashing a couple of pizza boxes and that it slopes to the rear hatch. Can you just remove the storage area and be left with what looks like a finished flat floor???
 
OP
OP
Dave Jr

Dave Jr

Member
Joined
Apr 11, 2018
Posts
44
Reaction score
69
Location
South Florida
My biggest hassle was the slope aft, not to mention the height. Was surprised how easy seat section came out. Worth taking out for day to day driving and installing in the rare occasion you need it. Just ordered the plywood to make a deck. I’ll post dimensions, bolt locations, spacer heights and such.
 
OP
OP
Dave Jr

Dave Jr

Member
Joined
Apr 11, 2018
Posts
44
Reaction score
69
Location
South Florida
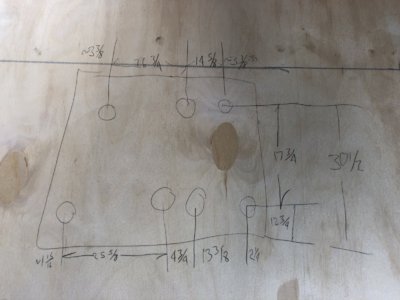
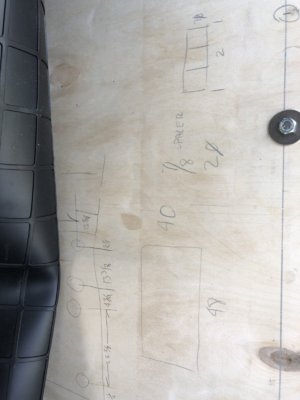
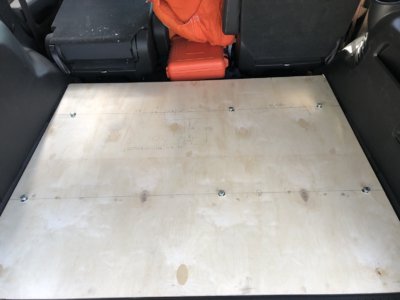
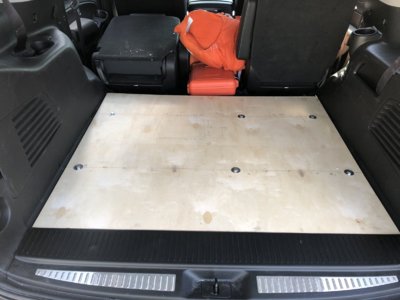
Deck added, quick post will add more legible dimensions later
Tools/equipment needed:
3/8 plywood 48x40 inch
T45 torq to remove seat belt retainer
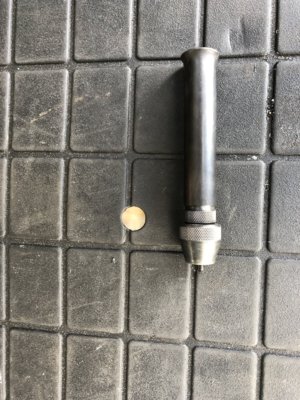
5/8 hole saw
6 10x1.5x60mm bolts
Hot glue gun or double sided tape
Fender washers
7/8 inch spacer material
1/4 inch spacer material
302F7BDE-5963-41C0-A829-B8195DD62B8C.jpeg 5342E7AB-D726-4439-8C8A-0249C1AFB097.jpeg
Basic dimensions
42A929D2-94C0-45BB-B9BF-0BB4637BF2A9.jpeg
Showing holes, made it pretty close. Will refine the dimensions later
 
Last edited:
OP
OP
Dave Jr

Dave Jr

Member
Joined
Apr 11, 2018
Posts
44
Reaction score
69
Location
South Florida
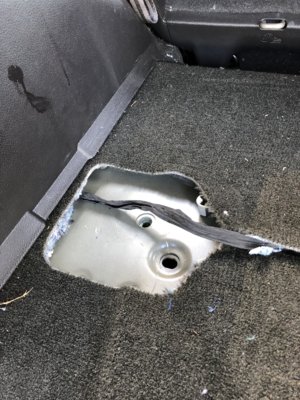
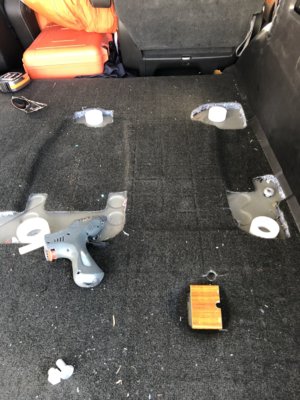
Tuck the plug for the motor control under the trim panel
61ECEA65-F475-4B50-88FD-8E2A928E2169.jpeg
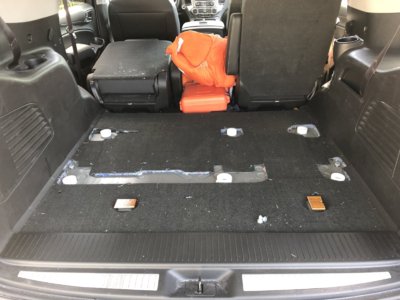
I used a hot glue gun to secure the spacers. Double sided tape works too. I used cut-offs from a bushing project using a lathe and some scrap teak.
D5C90B6A-5A25-4ABD-9FBE-7583C76AC39E.jpeg 38286DC9-BC28-424D-AD62-A8FE9985C2E3.jpeg
 

BEIS

Member
Joined
Jun 21, 2017
Posts
41
Reaction score
34
Just an idea: maybe get a piece of carpet (like the rest of the truck) cut, and bolted down, then the Weather Tech mat on top. That way, you won't catch/rip any objects in the back placed on the protruding bolts. Also, this would enable you to easily dump out/clean the removable mat (instead of having to unbolt it like shown). Just an idea, but I really like what you did here. Great job!
 
OP
OP
Dave Jr

Dave Jr

Member
Joined
Apr 11, 2018
Posts
44
Reaction score
69
Location
South Florida
Just an idea: maybe get a piece of carpet (like the rest of the truck) cut, and bolted down, then the Weather Tech mat on top. That way, you won't catch/rip any objects in the back placed on the protruding bolts. Also, this would enable you to easily dump out/clean the removable mat (instead of having to unbolt it like shown). Just an idea, but I really like what you did here. Great job!

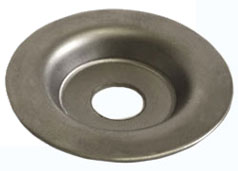
I’m probably going to go with some cup style or counter sunk washers to put a positive hold on the liner. When I have my tools in the back the liner slides all over and winds up folding.
But your right, a flush solution is better!

Something like this with a plastic cap
8988F7DE-3CDE-4830-8543-B3CDE2FC40CB.jpeg
 

Undeserving

Mitch and Murray sent me.
Joined
Sep 17, 2017
Posts
81
Reaction score
25
Location
Triad Area NC
Was the ops vehicle a swb or lab to begin with? The behind the 3rd row space has me guessing swb
 

Forum statistics

Threads
132,412
Posts
1,867,629
Members
97,075
Latest member
tanguycryms

Latest posts

Top