I tried just editing my old color matching post but it wouldn't let me. So I'll just make a new one.
This time when I painted my mirrors I tried something different since the bumper didn't turn out as good as I would've liked. Last time I used adhesion promoting primer. Do not use that, it doesn't fill in scratches and dimples. Here's what I did this time....
1. Sand part with 200 grit sandpaper. You are trying to get it as smooth as possible. Try to sand until all the dimples in the plastic are gone(those are what makes it textured). Doing it by hand would take way too long so I used a power sander, but be very carful with 200 grit because it can burn the plastic away if you use too much pressure and hold it in one spot for too long.
2. Rinse all dust off and dry, then switch to 400 grit sandpaper. You don't need to sand it as much since dimples are already gone but, again, get it as smooth as possible.
3. Rinse and dry, then switch to 1500 grit. Just copy step 2 but with 1500 grit.
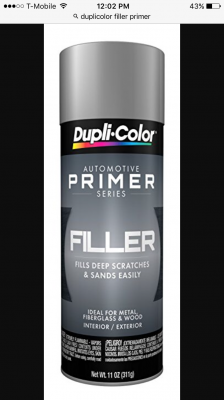
4. Rinse very well and dry very well. Now you're going to spray it with FILLER PRIMER. This is where I messed up last time. Filler primer will fill in any dimples still left over and all the scratches from sanding. This is what I used
5. Let the primer dry for at least an hour
6. The surface of the primer should be smooth but if not you can lightly wet sand with 1500 grit, dry it, and spray another coat of primer
7. Once the primer is dry you can paint it. Go over the whole thing twice with 2 light coats. Then 2 medium coats and finish with one heavy coat.
8. Give the paint at least 30 mins to dry then spray it with clear coat and follow the same directions in step 7 but you're using clear coat. Don't drive with the part on your truck until the tackiness is gone.
9. The clear coat will have an orange peel finish and won't have the mirror finish you're looking for, but don't worry you can fix it. Give the clear coat 6-7 days to cure, then lightly wet sand with 1500-2000 grit sandpaper, dry it, then polish. I haven't tried this step yet because my mirrors haven't cured yet but I will update once I try it.
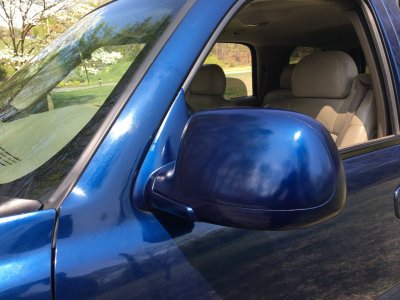
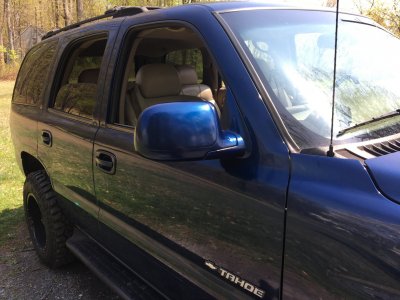
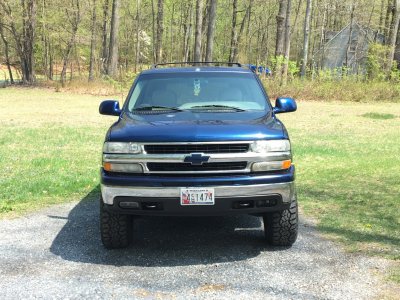
Final product before wet sand and polish
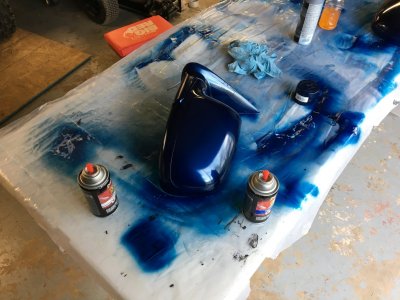
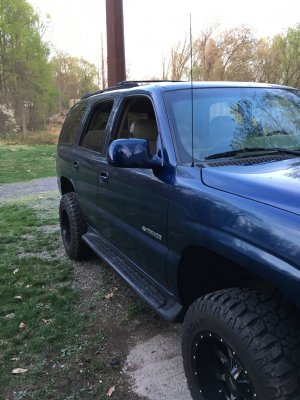
You can see it's got a slight shine to it but not like a mirror finish like the rest of the paint, and that's what the wet sand and polish does, it creates a mirror finish.
This time when I painted my mirrors I tried something different since the bumper didn't turn out as good as I would've liked. Last time I used adhesion promoting primer. Do not use that, it doesn't fill in scratches and dimples. Here's what I did this time....
1. Sand part with 200 grit sandpaper. You are trying to get it as smooth as possible. Try to sand until all the dimples in the plastic are gone(those are what makes it textured). Doing it by hand would take way too long so I used a power sander, but be very carful with 200 grit because it can burn the plastic away if you use too much pressure and hold it in one spot for too long.
2. Rinse all dust off and dry, then switch to 400 grit sandpaper. You don't need to sand it as much since dimples are already gone but, again, get it as smooth as possible.
3. Rinse and dry, then switch to 1500 grit. Just copy step 2 but with 1500 grit.
4. Rinse very well and dry very well. Now you're going to spray it with FILLER PRIMER. This is where I messed up last time. Filler primer will fill in any dimples still left over and all the scratches from sanding. This is what I used

5. Let the primer dry for at least an hour
6. The surface of the primer should be smooth but if not you can lightly wet sand with 1500 grit, dry it, and spray another coat of primer
7. Once the primer is dry you can paint it. Go over the whole thing twice with 2 light coats. Then 2 medium coats and finish with one heavy coat.
8. Give the paint at least 30 mins to dry then spray it with clear coat and follow the same directions in step 7 but you're using clear coat. Don't drive with the part on your truck until the tackiness is gone.
9. The clear coat will have an orange peel finish and won't have the mirror finish you're looking for, but don't worry you can fix it. Give the clear coat 6-7 days to cure, then lightly wet sand with 1500-2000 grit sandpaper, dry it, then polish. I haven't tried this step yet because my mirrors haven't cured yet but I will update once I try it.
Final product before wet sand and polish


You can see it's got a slight shine to it but not like a mirror finish like the rest of the paint, and that's what the wet sand and polish does, it creates a mirror finish.

