- Joined
- Jun 9, 2009
- Posts
- 8,744
- Reaction score
- 608
Customer had a 2011 tahoe and wanted a kit where front is minor drop while rear is about a 2 inch drop. So i set him up with this kit (did not need camber bushings because only .5 drop in front)
http://www.tbssowners.com/store/index.php?act=viewProd&productId=187
For the 2 inch drop set ups I use the suburban rear springs from belltech better ride due to spring rate plus he will load up truck so helper bags worked perfect.
After lowering was 34.5 frong and 35.5 rear. Just a little clean drop and this is what you end up with.
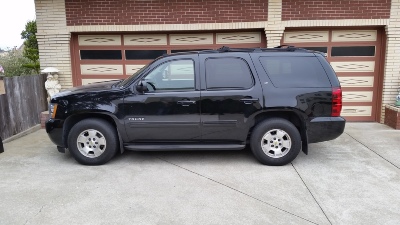
BUT HOW DID WE GET TO THAT FINISHED LOOK??? Well come along for a lowering escape with Tony.
Ok first thing you will need to do is put the frame on jackstands and have the rear end hang freely and then put the floor jack under the rear end to support it. Next thing you will need to do is pop off the shocks which held on by 21mm nuts/bolts. The top can be a little pain sometimes so be patient.
Next on the list you want to make sure you pop off the sensor lines on both sides of the frame rails. If you dont do this and drop the rear end you can damage them. So you want these things to look like this
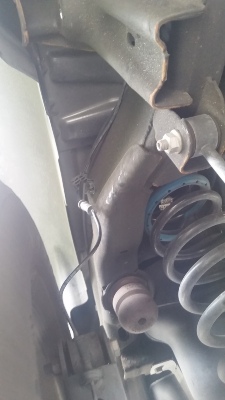
Next before you drop the rear end you want to make sure to take the brake cable line off the diff with the 13mm socket. Once again if you dont do this and drop the rear end you can snap the line which ive seen a few people do. Heres what the bracket looks like taken off.
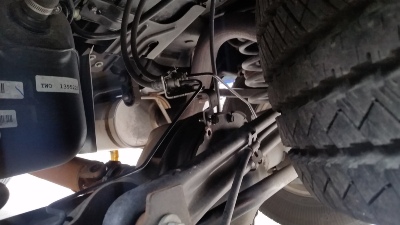
Last but not least use a 3/4 inch wrench on inside nut and use 18mm socket to take the endlink nuts off
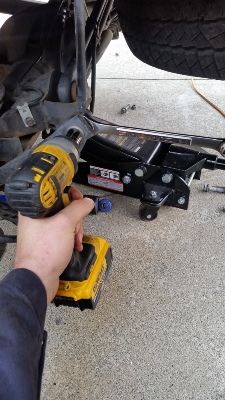
Now you can drop the rear end and it will come down far enough where the springs you can just pull out
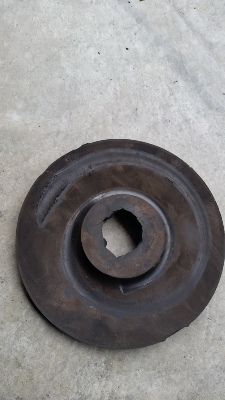
On this customers truck he wanted airlift helper bags installed. When doing these bags you will need to open up the top rubber isolators. If you do not do this when pressure is applied to them they will cruch the airline in the small hole so i just open it up like this.
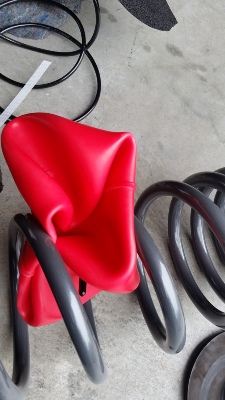
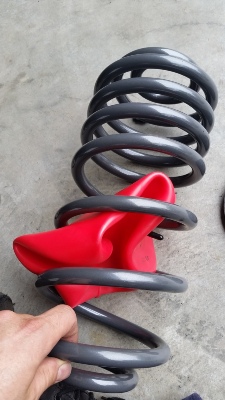
Now its time to slide the bag into the coils. Just collapse the bag in halfs and then put the rubber cover back on the air inlet. This prevents air getting sucked in. Now fish the helper bag in the coil. REMEMBER THE AIRBAG SITS ON THE BOTTOM OF THE SPRINGS SO THE SPRINGS HAVE TO HAVE THE CLOSER COILS UP TOP AND WIDER COILS ON BOTTOM
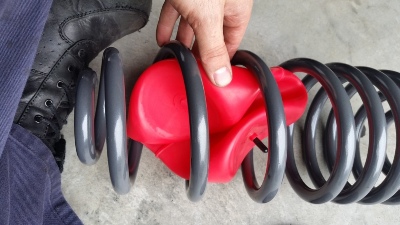
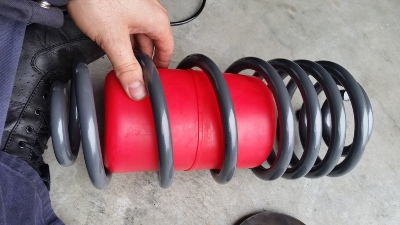
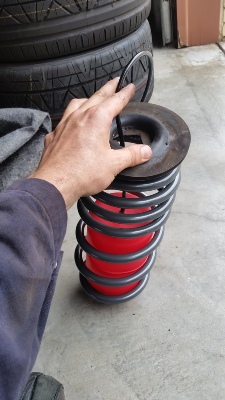
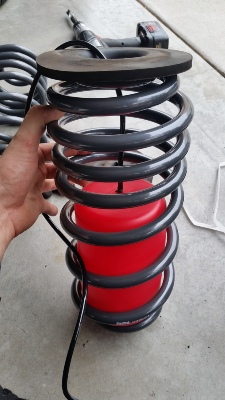
So you put the coils back in and you run them thru the top and pass side i go back and zip tie on metal lines and then route over spare tire to drivers side gas tank door area and then on drivers same thing. Drill a hole and mount your fill valves
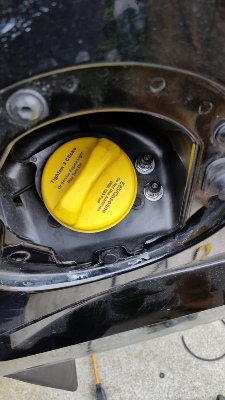
Pop off old bumpstops and put in the new ones that come with the kit. The pull right out and new ones you push right in.
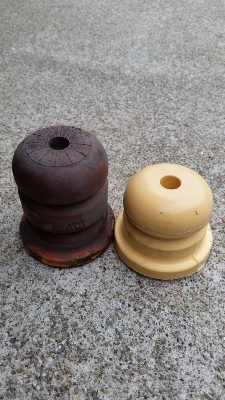
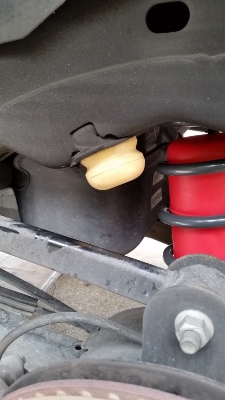
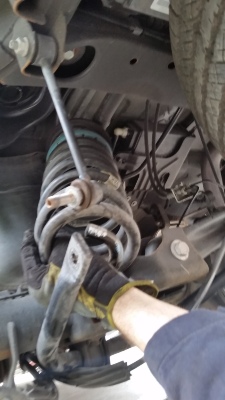
Now onto the front. Lift truck up put frame on jackstands and take tires off. Next unloosen both side swaybar links with 15mm socket and then take off the 18mm nuts on the top engine bay compartment.
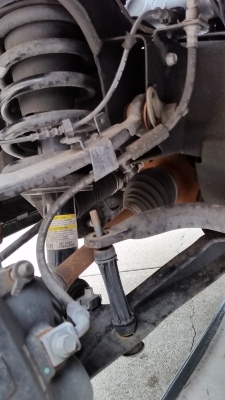
You will then push down on the lower a arm and the strut/spring assembly come right out. NOT THE RED LINE UP TOP. MAKE SURE TO MARK LOCATION OF TOP MOUNT SO UNIT WILL GO BACK SAME WAY
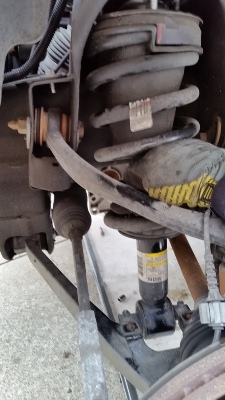
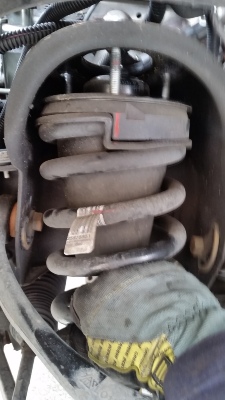
THIS NEXT PART IS IMPORTANT. IF YOU DONT DO THIS YOU CAN LOSE YOUR FINGERS/FACE/**** ETC IF THE SPRING POPS OUT. YOU NEED A SPRING COMPRESSOR. Set spring compressor up to hold the spring and then zip off the 18mm nut on top. i just lay the strut on the ground facing away from me so if it pops open it wil go either to left or right side of me
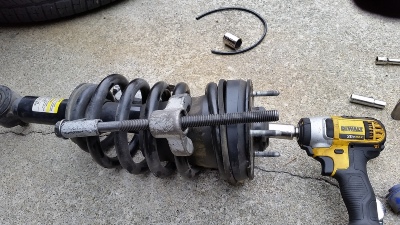
i put the new belltech bumpstop in top mount
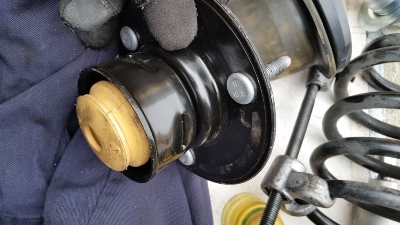
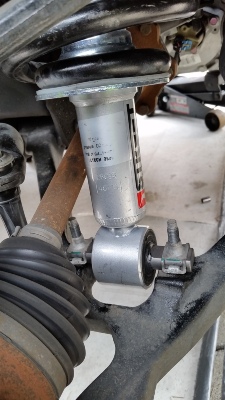
Figure out how many spacers you will use on belltech drop strut then put it all back together and tighten top nut. Then take the lower brackets off old strut and put it onto the new strut and use a 15mm socket to tighten it up
http://www.tbssowners.com/store/index.php?act=viewProd&productId=187
For the 2 inch drop set ups I use the suburban rear springs from belltech better ride due to spring rate plus he will load up truck so helper bags worked perfect.
After lowering was 34.5 frong and 35.5 rear. Just a little clean drop and this is what you end up with.

BUT HOW DID WE GET TO THAT FINISHED LOOK??? Well come along for a lowering escape with Tony.
Ok first thing you will need to do is put the frame on jackstands and have the rear end hang freely and then put the floor jack under the rear end to support it. Next thing you will need to do is pop off the shocks which held on by 21mm nuts/bolts. The top can be a little pain sometimes so be patient.
Next on the list you want to make sure you pop off the sensor lines on both sides of the frame rails. If you dont do this and drop the rear end you can damage them. So you want these things to look like this

Next before you drop the rear end you want to make sure to take the brake cable line off the diff with the 13mm socket. Once again if you dont do this and drop the rear end you can snap the line which ive seen a few people do. Heres what the bracket looks like taken off.

Last but not least use a 3/4 inch wrench on inside nut and use 18mm socket to take the endlink nuts off

Now you can drop the rear end and it will come down far enough where the springs you can just pull out

On this customers truck he wanted airlift helper bags installed. When doing these bags you will need to open up the top rubber isolators. If you do not do this when pressure is applied to them they will cruch the airline in the small hole so i just open it up like this.

Now its time to slide the bag into the coils. Just collapse the bag in halfs and then put the rubber cover back on the air inlet. This prevents air getting sucked in. Now fish the helper bag in the coil. REMEMBER THE AIRBAG SITS ON THE BOTTOM OF THE SPRINGS SO THE SPRINGS HAVE TO HAVE THE CLOSER COILS UP TOP AND WIDER COILS ON BOTTOM


So you put the coils back in and you run them thru the top and pass side i go back and zip tie on metal lines and then route over spare tire to drivers side gas tank door area and then on drivers same thing. Drill a hole and mount your fill valves

Pop off old bumpstops and put in the new ones that come with the kit. The pull right out and new ones you push right in.


Now onto the front. Lift truck up put frame on jackstands and take tires off. Next unloosen both side swaybar links with 15mm socket and then take off the 18mm nuts on the top engine bay compartment.

You will then push down on the lower a arm and the strut/spring assembly come right out. NOT THE RED LINE UP TOP. MAKE SURE TO MARK LOCATION OF TOP MOUNT SO UNIT WILL GO BACK SAME WAY


THIS NEXT PART IS IMPORTANT. IF YOU DONT DO THIS YOU CAN LOSE YOUR FINGERS/FACE/**** ETC IF THE SPRING POPS OUT. YOU NEED A SPRING COMPRESSOR. Set spring compressor up to hold the spring and then zip off the 18mm nut on top. i just lay the strut on the ground facing away from me so if it pops open it wil go either to left or right side of me

i put the new belltech bumpstop in top mount

Figure out how many spacers you will use on belltech drop strut then put it all back together and tighten top nut. Then take the lower brackets off old strut and put it onto the new strut and use a 15mm socket to tighten it up

Last edited:
