Lee's HID Rerrofit 
Truck:
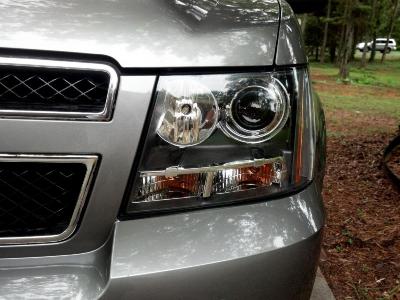
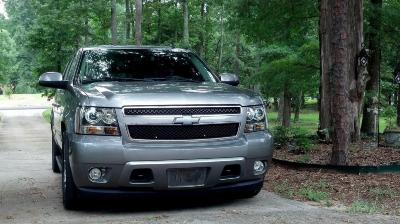
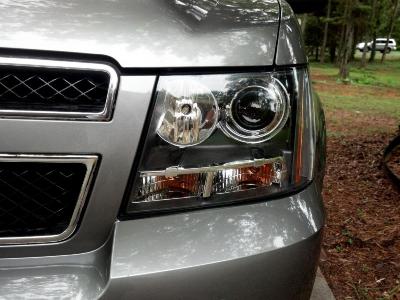
2009 Suburban LT1
Post Update: DONE
Setup:
Morimoto Mini H1 6.0 Projectors from TRS
5K XB35 HID Bulbs
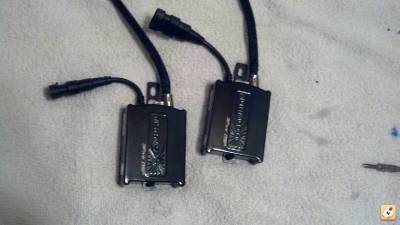
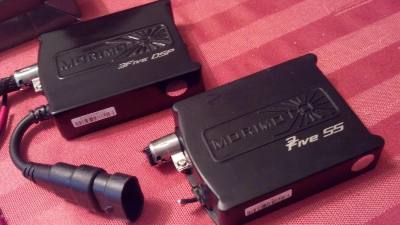
New version DSP Ballasts
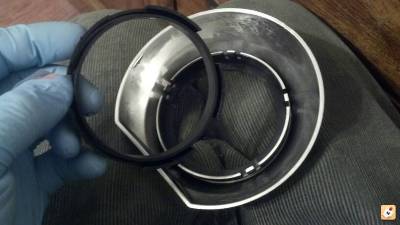
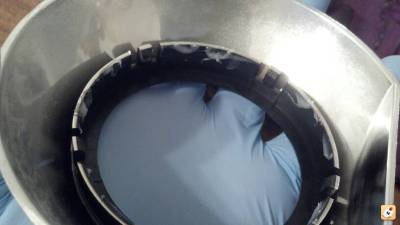
IRIS Shrouds (VW Tiguan inspired)
Replica headlights
Recommended tools:
Dremel with Shaft attachment
Air Compressor (blow dust)
Heat Gun with square nozzle attachment
Basic hand tools etc. Screw drivers pliers etc. Drill bits
Disposable gloves
Respiratory masks. (A LOT of fine particulate dust is created when grinding the reflector bowls. Wear a mask and don't breathe the crap in).
This is not a “build type” thread. We all have seen plenty of those from other members here, and anyways..... HIDPlanet is the best place for that. I am just posting this as a pseudo journal so anybody else out there stupid enough to do this by themselves has something to read up on.
By no means is this going to be a complete how to. I suck at those, so I am not going to even attempt one. I just wanted to try to add something of value to this forum, and basically just share my experience.
I would like to thank (REALLY BIG THANK YOU Calvin) iCalvin (Member) and Papa Sergio for answering my many questions along the way.
I would also like to thank JB at Black Flame Customs as well
About TRS.
First time order, and great people to deal with.
I ordered during the Black Friday Sale. Got like 25% off.
I did have a few disappointments that were promptly corrected.
My problems were:
1. I ordered 5K Bulbs. I received one 5K and one 6K in the same box. The box was labeled as 5K.
2. No test leads........ arrggghhhhhhhhh Alligator clips = A huge pain. Apparently they stopped sending them because people did not know what to do with them. That's what Matt said.
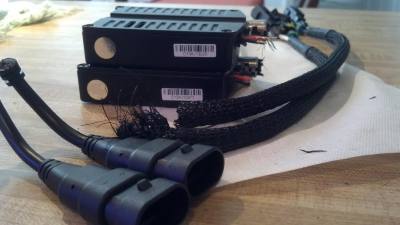
3. Bad Ballasts..... Both. Apparently I was a victim of the recent ballast recall ongoing at TRS. This is all well and good, but being my first retrofit, I was thinking that I was doing something wrong. As temperatures hit 50 or lower they fail to fire. I did manage to “jump start” them. I have new Ballasts now and they say DSP not SS on them.
All of the above concerns were promptly fixed by TRS. For the ballast warranty I had to send off pictures of the serial number showing and the leads cut. I spoke with Matt, the president of TRS. He is VERY accessible and a friendly person to deal with. EXCELLENT customer service overall.
About Replica Housings.
I now have had experience with TYC and Depo Tahoe style housings. TYC Replica Housings are a BEAR to open. I had to stick them in the oven NUMEROUS times. They use a aftermarket type of Perma-Seal. I really don't know exactly what it is, but it sure as heck is NOT Butyl Rubber.
In my opinion the TYC reps are a slightly better build quality, but the extra effort needed to open is a offset. Both lights show slight imperfections in the reflector bowl's chrome. The TYC lights had dust type “stuff” floating around in there. On the DEPOs I could see the finger prints of the Chinese guy who made them (I assume he was Chinese).
Both pieces show slight casting flaws in the reflector bowl, unlike the factory version. Will you notice this after the fact? No..... unless you are a moron with nothing else to do.
My advice is that if you are buying them as “replacements” for factory lights.........then get TYCs.
If you are buying them to modify for a HIDRetro, get DEPOs.
Eagle Eyes are also said to be easy to open as they are said to use Butyl.
Member iCalvin has reported this amongst numerous exchanges.
This is NOT Butyl.
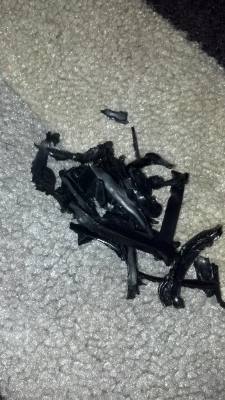
If you are going to get TYC lights you NEED to put them in the electric oven at 285 for 10-12 minutes.
If you are going to get Depo or Eagle Eyes lights, then 265 for 10-12 minutes in a electric oven should open them easily. May have to do another 3-4 minutes after getting started.
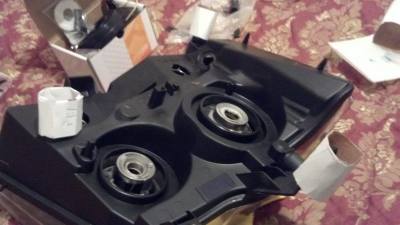
A tip for the oven: I made these cute homo booties for my lights legs .
These from a 6 Pack beer carrying thing. I rolled the cardboard up and stapled the ends.
This prevents the legs from touching the cookie sheet, and supports the weight of the light better so the mounting legs don't buckle from the heat of the oven.
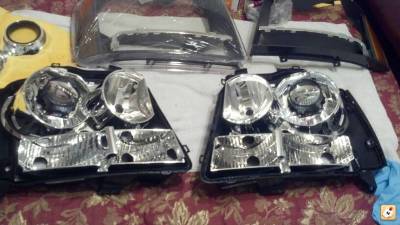
Lights stripped before going into the oven.
Put the lights on a solid cookie sheet and place 2 pieces of cardboard on the sheet. Then the lights.
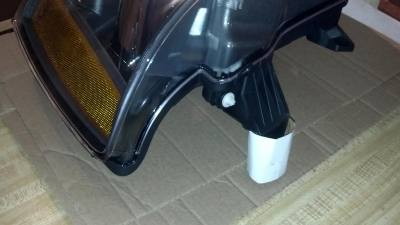
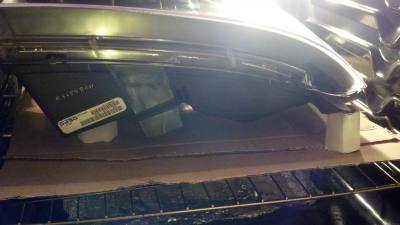
Trust me, the legs WILL buckle at 285. This is why I do not recommend the TYCs.
The higher heat needed to melt the PermaSeal type adhesive takes a toll on the Black Plastic Housing, which IN MY EXPERIENCE deforms easily.
BTW, if parts of your housing deform, it is easily formed back into shape via a heat gun.
Small Tweaks.
Few Things that I have done that some people may or may not like.
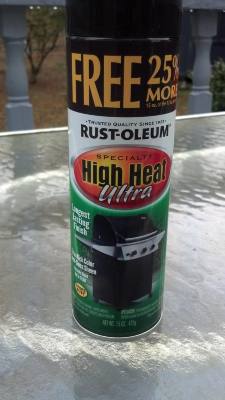
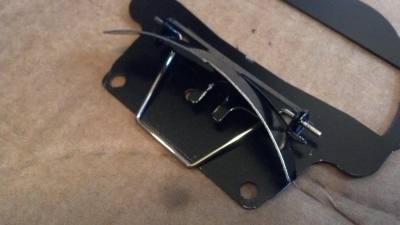
1. I painted the cutoff shield. I wanted to projector “eyes” to appear black.......8 ball Style. Some people have done this in red, “Demon Eyes”. I think red looks a little played already. I used Black High Temperature paint from Lowes. Then baked the paint with a heat gun. Also, after painting I used a fine grade sandpaper to VERY CAREFULLY sand the top edge of the cutoff shield.
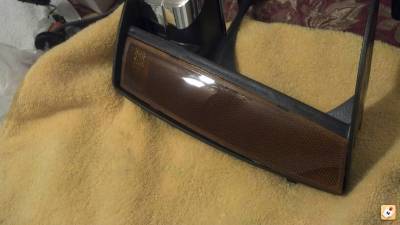
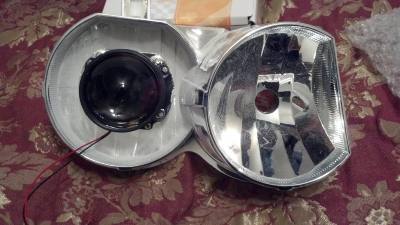
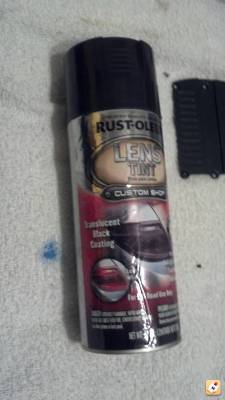
2. Smoke the Amber reflector. Stock orange looks silly. I used Rustoleom tint. Sprayed a REALLY light coat. Any mistakes can be corrected by removing the tint with 90% ISP Alcohol. I held the can 2 feet away to get a VERY light smoke effect. 2 light coats.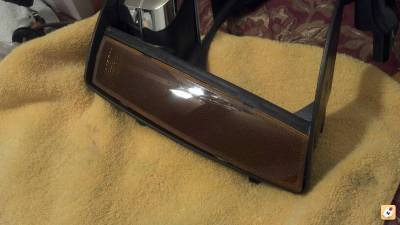
3. I used Blue Loc-Tite on the screws that hold the lens onto the body/bowl of the MH1 6.0. Vibrations=loose screws.....etc.
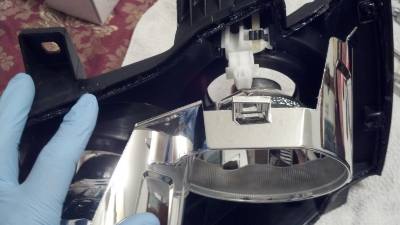
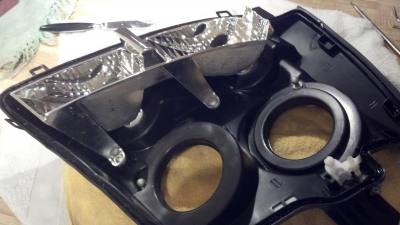
Taking apart the light after lens comes off.
I take the top piece off first.
Then work on the two lower points after that. Careful here to not break this crap.
Mounting the Projector.
NEED a Dremel tool first and foremost. I have the shaft attachment thing. Makes it A LOT easier to use and control.
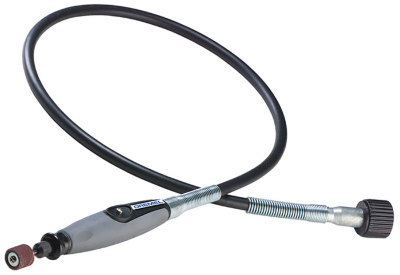
Here is my shaft tool. Its a older version and skinnier so it gets into tighter areas.
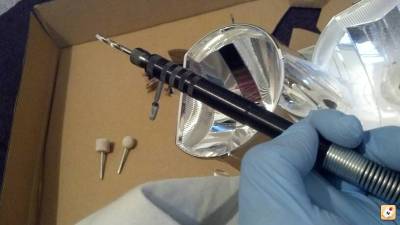
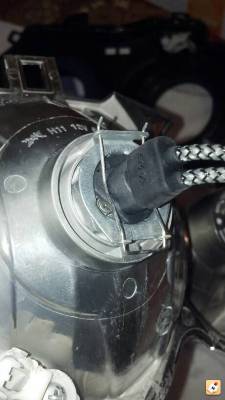
You need to sink to projector into the reflector bowl so enough threads are exposed on the backside. There has to be enough threads on the back with one of the small silcone washers so the bulb rings can sit flush into the 3 mounting recesses.
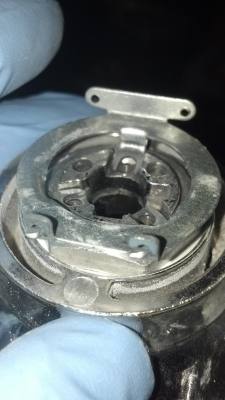
Dremel the mounting perch.
Needs to look like this towards the end.
I use these two Dremel bits the most for this part.
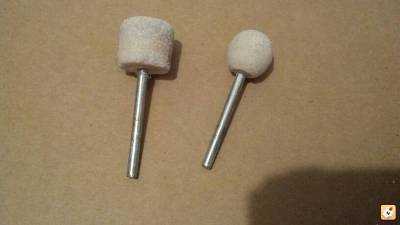
The square one to grind down the mounting perch and the round one to bevel the reflector bowl. The round fits the contours great and leaves a nice finish.
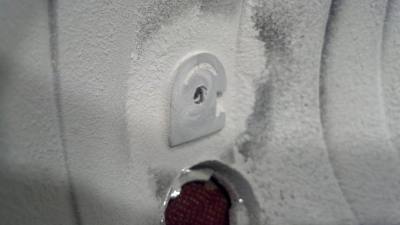
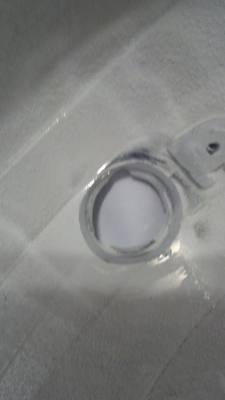
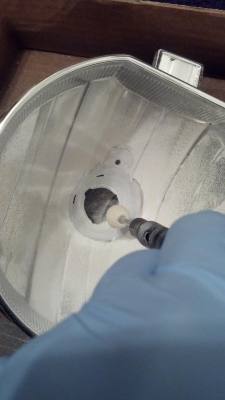
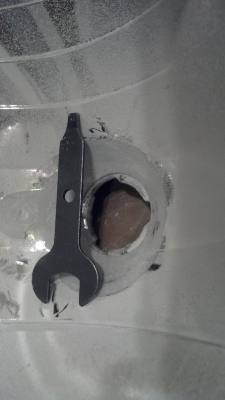
Nut placed on the inside For Reference.
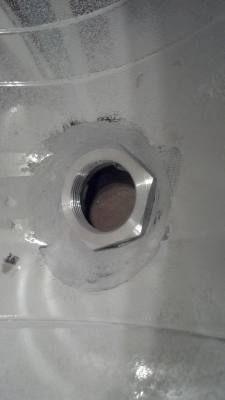
A LOT of dust is created during the process. Don't breathe this crap in.
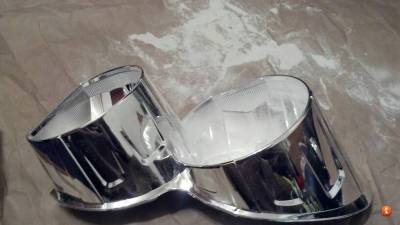
I drilled a hole for the cutoff solenoid wires. You may use the casting marks on the back of the reflector bowl as a guide.
See the round casting mark? Drill there.
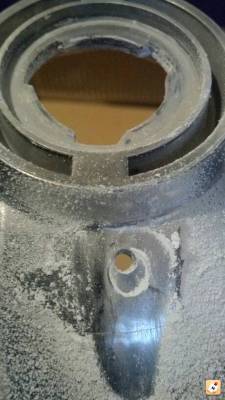
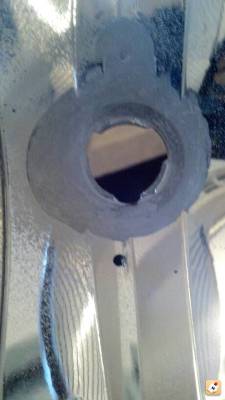
After that widen the hole so the solenoid wires may easily pass through.
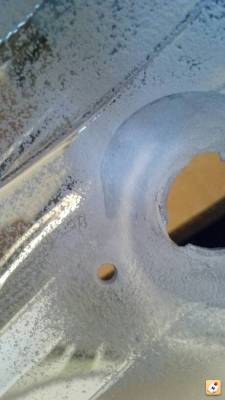
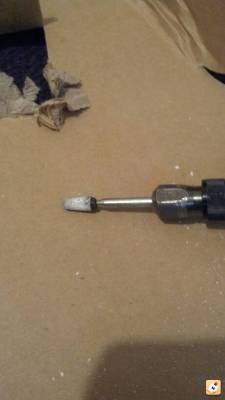
I used this bit to widen the hole.
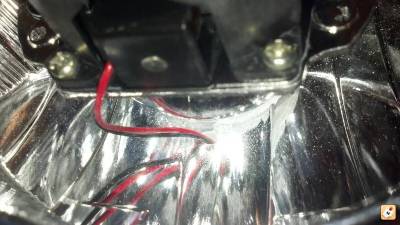
When done.... should look a little like this.
That's all for now. I will be updating as I go along.
This project is only partially complete at this point in time......
Key to making this all look professional is minimal handling. The more you touch stuff the more it will look like butt. Use gloves.
This is my first thread like this and I have only made it to share some insight. I believe in sharing knowledge gained and helping others.
Thanks for looking.
Truck:
2009 Suburban LT1
Post Update: DONE


Setup:
Morimoto Mini H1 6.0 Projectors from TRS
5K XB35 HID Bulbs
New version DSP Ballasts
IRIS Shrouds (VW Tiguan inspired)
Replica headlights
Recommended tools:
Dremel with Shaft attachment
Air Compressor (blow dust)
Heat Gun with square nozzle attachment
Basic hand tools etc. Screw drivers pliers etc. Drill bits
Disposable gloves
Respiratory masks. (A LOT of fine particulate dust is created when grinding the reflector bowls. Wear a mask and don't breathe the crap in).
This is not a “build type” thread. We all have seen plenty of those from other members here, and anyways..... HIDPlanet is the best place for that. I am just posting this as a pseudo journal so anybody else out there stupid enough to do this by themselves has something to read up on.

By no means is this going to be a complete how to. I suck at those, so I am not going to even attempt one. I just wanted to try to add something of value to this forum, and basically just share my experience.
I would like to thank (REALLY BIG THANK YOU Calvin) iCalvin (Member) and Papa Sergio for answering my many questions along the way.
I would also like to thank JB at Black Flame Customs as well
About TRS.
First time order, and great people to deal with.
I ordered during the Black Friday Sale. Got like 25% off.
I did have a few disappointments that were promptly corrected.
My problems were:
1. I ordered 5K Bulbs. I received one 5K and one 6K in the same box. The box was labeled as 5K.
2. No test leads........ arrggghhhhhhhhh Alligator clips = A huge pain. Apparently they stopped sending them because people did not know what to do with them. That's what Matt said.

3. Bad Ballasts..... Both. Apparently I was a victim of the recent ballast recall ongoing at TRS. This is all well and good, but being my first retrofit, I was thinking that I was doing something wrong. As temperatures hit 50 or lower they fail to fire. I did manage to “jump start” them. I have new Ballasts now and they say DSP not SS on them.
All of the above concerns were promptly fixed by TRS. For the ballast warranty I had to send off pictures of the serial number showing and the leads cut. I spoke with Matt, the president of TRS. He is VERY accessible and a friendly person to deal with. EXCELLENT customer service overall.


About Replica Housings.
I now have had experience with TYC and Depo Tahoe style housings. TYC Replica Housings are a BEAR to open. I had to stick them in the oven NUMEROUS times. They use a aftermarket type of Perma-Seal. I really don't know exactly what it is, but it sure as heck is NOT Butyl Rubber.
In my opinion the TYC reps are a slightly better build quality, but the extra effort needed to open is a offset. Both lights show slight imperfections in the reflector bowl's chrome. The TYC lights had dust type “stuff” floating around in there. On the DEPOs I could see the finger prints of the Chinese guy who made them (I assume he was Chinese).

Both pieces show slight casting flaws in the reflector bowl, unlike the factory version. Will you notice this after the fact? No..... unless you are a moron with nothing else to do.
My advice is that if you are buying them as “replacements” for factory lights.........then get TYCs.
If you are buying them to modify for a HIDRetro, get DEPOs.
Eagle Eyes are also said to be easy to open as they are said to use Butyl.
Member iCalvin has reported this amongst numerous exchanges.
This is NOT Butyl.


If you are going to get TYC lights you NEED to put them in the electric oven at 285 for 10-12 minutes.
If you are going to get Depo or Eagle Eyes lights, then 265 for 10-12 minutes in a electric oven should open them easily. May have to do another 3-4 minutes after getting started.
A tip for the oven: I made these cute homo booties for my lights legs .
These from a 6 Pack beer carrying thing. I rolled the cardboard up and stapled the ends.
This prevents the legs from touching the cookie sheet, and supports the weight of the light better so the mounting legs don't buckle from the heat of the oven.
Lights stripped before going into the oven.
Put the lights on a solid cookie sheet and place 2 pieces of cardboard on the sheet. Then the lights.


Trust me, the legs WILL buckle at 285. This is why I do not recommend the TYCs.
The higher heat needed to melt the PermaSeal type adhesive takes a toll on the Black Plastic Housing, which IN MY EXPERIENCE deforms easily.
BTW, if parts of your housing deform, it is easily formed back into shape via a heat gun.
Small Tweaks.
Few Things that I have done that some people may or may not like.
1. I painted the cutoff shield. I wanted to projector “eyes” to appear black.......8 ball Style. Some people have done this in red, “Demon Eyes”. I think red looks a little played already.
 I used Black High Temperature paint from Lowes. Then baked the paint with a heat gun. Also, after painting I used a fine grade sandpaper to VERY CAREFULLY sand the top edge of the cutoff shield.
2. Smoke the Amber reflector. Stock orange looks silly. I used Rustoleom tint. Sprayed a REALLY light coat. Any mistakes can be corrected by removing the tint with 90% ISP Alcohol. I held the can 2 feet away to get a VERY light smoke effect. 2 light coats.

3. I used Blue Loc-Tite on the screws that hold the lens onto the body/bowl of the MH1 6.0. Vibrations=loose screws.....etc.


Taking apart the light after lens comes off.
I take the top piece off first.
Then work on the two lower points after that. Careful here to not break this crap.


Mounting the Projector.
NEED a Dremel tool first and foremost. I have the shaft attachment thing. Makes it A LOT easier to use and control.

Here is my shaft tool. Its a older version and skinnier so it gets into tighter areas.

You need to sink to projector into the reflector bowl so enough threads are exposed on the backside. There has to be enough threads on the back with one of the small silcone washers so the bulb rings can sit flush into the 3 mounting recesses.

Dremel the mounting perch.
Needs to look like this towards the end.

I use these two Dremel bits the most for this part.

The square one to grind down the mounting perch and the round one to bevel the reflector bowl. The round fits the contours great and leaves a nice finish.


Nut placed on the inside For Reference.

A LOT of dust is created during the process. Don't breathe this crap in.

I drilled a hole for the cutoff solenoid wires. You may use the casting marks on the back of the reflector bowl as a guide.
See the round casting mark? Drill there.


After that widen the hole so the solenoid wires may easily pass through.

I used this bit to widen the hole.

When done.... should look a little like this.

That's all for now. I will be updating as I go along.
This project is only partially complete at this point in time......

Key to making this all look professional is minimal handling. The more you touch stuff the more it will look like butt. Use gloves.

This is my first thread like this and I have only made it to share some insight. I believe in sharing knowledge gained and helping others.
Thanks for looking.
Last edited:

