Physh1
Full Access Member
- Joined
- Jul 29, 2010
- Posts
- 773
- Reaction score
- 24
Ok, I'm breaking this up into 2 parts. Rumors of this being a bolt on mod with a little trimming is not accurate. To do this correctly, bolting up everything, this is simply NOT a bolt on upgrade.
The driver side is not hard to do with the right tools or access to the right tools...just requires some sectioning & welding. The passenger side will be a totally different animal. I will likely have to hybridize the stock brackets with the Escalade ones in order to clear the ac lines & securely bolt the board into place. Part 2 will happen when I decide how to hybridize the brackets of come up with a custom solution.
Part 1: Driver Side Running Board...
This is by far the easier side to do. No ac lines to contend with & plenty of room for removal & installation.
Removal, sectioning, welding, re-installation = 3 hours or so of work...
Tools needed to remove & reinstall the driver side stock running board...
3/8 rachet w/ 4"-6" extension
10mm socket
10mm combo wrench
T40 Torx socket
Chop saw or grinder with cut-off wheels
Welder
Hardware needed to reinstall the driver side Escalade board...
4 of the original T40 Torx bolts...
4 3/8" washers for T40 Torx bolts...
4 of the original 10mm nuts & bolts...
4 1/4" fender washers for the 10mm hardware...
4 1/4" standard washers for the 10mm hardware...
1 original 10 mm bolt (no nut)
The driver side running board has 6 support brackets & 11 total bolts holding it in place.
-these 6 brackets are bolted to the underside of the body using 6 T40 Torx bolts.
-there are also 4 10mm nut & bolt combos accessible on the underside of the running board & under the body. You'll need your 10mm socket & combo wrench to remove these.
-there is also 1 10mm bolt on under the front of the running board by the driver side wheel. There is a body clip here...no nut.
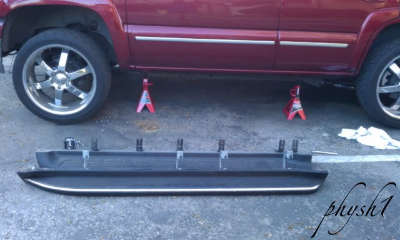
Board removed. Escalade board in front...stock in back. Notice the Escalade board only uses 4 brackets...not 6...
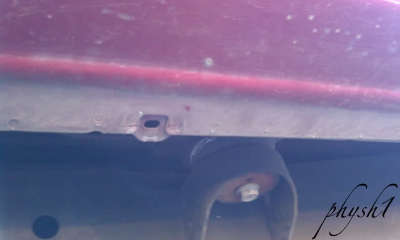
Here is one of the holes in the body the 10mm nuts & bolts go through. The bolt goes through the board from the bottom, through this hole, then the nut secures it above...
Stock board/bracket on the right, Escalade board/bracket on the left...notice that the stock brackets have 1/4" holes for the hardware...the Escalade boards have HUGE provisions. This is why we need to use fender washers with the stock hardware to make things fit & be safe...
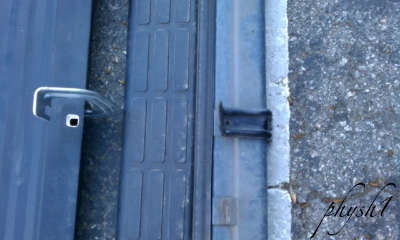
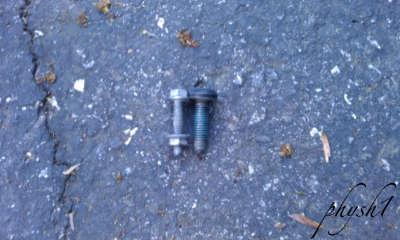
This is the hardware you're removing...T40 Torx bolt on the right, 10mm body bolt on the left...
The body bolt locations on both boards are the same. You can use the stock hardware but washers will be needed. With the Escalade board held into place with 2 body bolts you can see we have an issue with the Escalade brackets being too tall. These, at this point, cannot be bolted up...
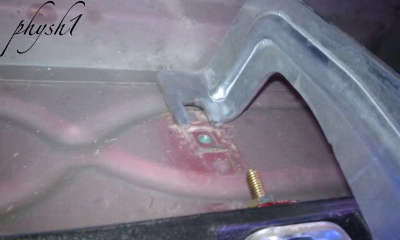
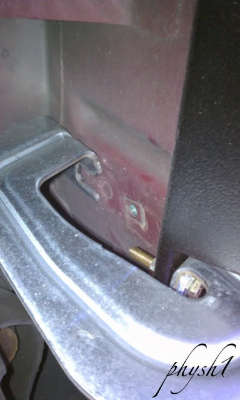
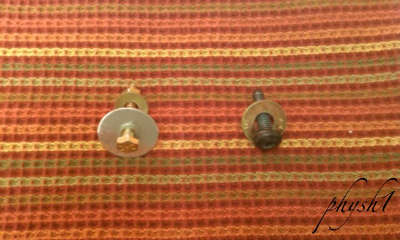
Here is the hardware I'm using. The T40 bolt (right) now sports a 3/8" G8 washer. I replaced the 10mm nut & bolt with 1/4" G8 hardware as mine looked a little rough. You don't need to do that BUT you do NEED washers! I used a 1/4" fender washer & a 1/4" standard washer...
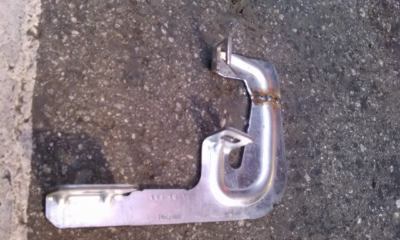
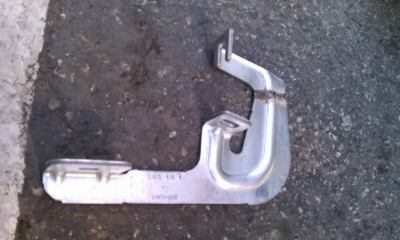
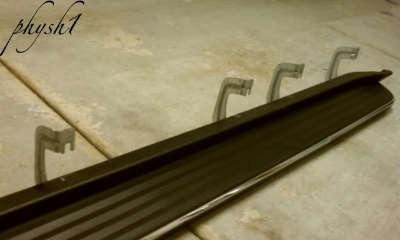
In order to bolt the board hangers to the body each bracket has to be sectioned. In my case, from front hanger to rear, they needed to be sectioned 1", 1", 1", & 1.5". Here is the stock setup...
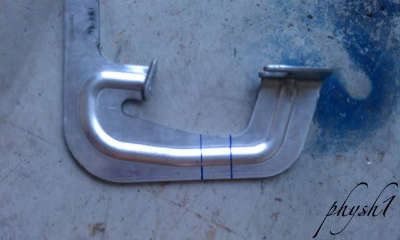
Here is 1 bracket with the 1" section to be removed marked in blue...
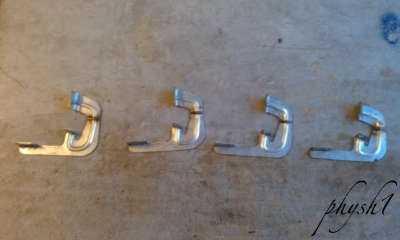
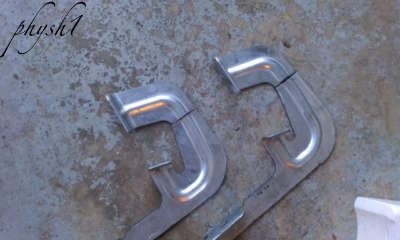
Two sectioned & ready to get welded...
All 4 sectioned, welded, & ready for install...

Sectioned brackets now bolt up to factory locations...note the washers...the T40 bolt head could slip through the bolt slot on the bracket...you can clearly see the body bolt as well...I replaced mine but the factory hardware will work perfectly fine with washers too!
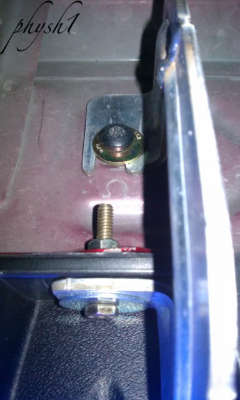
Underside of Escalade board...
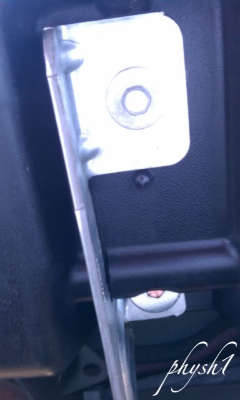
Driver side board re-installed with 9 total bolts. These boards have a much better build than our stockers, better brackets, & only 9 bolt holes. No more needed...
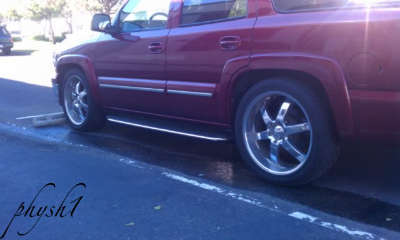
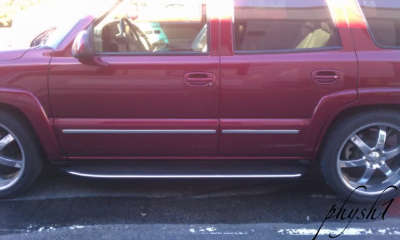
Cameron
The driver side is not hard to do with the right tools or access to the right tools...just requires some sectioning & welding. The passenger side will be a totally different animal. I will likely have to hybridize the stock brackets with the Escalade ones in order to clear the ac lines & securely bolt the board into place. Part 2 will happen when I decide how to hybridize the brackets of come up with a custom solution.
Part 1: Driver Side Running Board...
This is by far the easier side to do. No ac lines to contend with & plenty of room for removal & installation.
Removal, sectioning, welding, re-installation = 3 hours or so of work...
Tools needed to remove & reinstall the driver side stock running board...
3/8 rachet w/ 4"-6" extension
10mm socket
10mm combo wrench
T40 Torx socket
Chop saw or grinder with cut-off wheels
Welder
Hardware needed to reinstall the driver side Escalade board...
4 of the original T40 Torx bolts...
4 3/8" washers for T40 Torx bolts...
4 of the original 10mm nuts & bolts...
4 1/4" fender washers for the 10mm hardware...
4 1/4" standard washers for the 10mm hardware...
1 original 10 mm bolt (no nut)
The driver side running board has 6 support brackets & 11 total bolts holding it in place.
-these 6 brackets are bolted to the underside of the body using 6 T40 Torx bolts.
-there are also 4 10mm nut & bolt combos accessible on the underside of the running board & under the body. You'll need your 10mm socket & combo wrench to remove these.
-there is also 1 10mm bolt on under the front of the running board by the driver side wheel. There is a body clip here...no nut.
Board removed. Escalade board in front...stock in back. Notice the Escalade board only uses 4 brackets...not 6...

Here is one of the holes in the body the 10mm nuts & bolts go through. The bolt goes through the board from the bottom, through this hole, then the nut secures it above...

Stock board/bracket on the right, Escalade board/bracket on the left...notice that the stock brackets have 1/4" holes for the hardware...the Escalade boards have HUGE provisions. This is why we need to use fender washers with the stock hardware to make things fit & be safe...

This is the hardware you're removing...T40 Torx bolt on the right, 10mm body bolt on the left...

The body bolt locations on both boards are the same. You can use the stock hardware but washers will be needed. With the Escalade board held into place with 2 body bolts you can see we have an issue with the Escalade brackets being too tall. These, at this point, cannot be bolted up...


Here is the hardware I'm using. The T40 bolt (right) now sports a 3/8" G8 washer. I replaced the 10mm nut & bolt with 1/4" G8 hardware as mine looked a little rough. You don't need to do that BUT you do NEED washers! I used a 1/4" fender washer & a 1/4" standard washer...

In order to bolt the board hangers to the body each bracket has to be sectioned. In my case, from front hanger to rear, they needed to be sectioned 1", 1", 1", & 1.5". Here is the stock setup...

Here is 1 bracket with the 1" section to be removed marked in blue...

Two sectioned & ready to get welded...

All 4 sectioned, welded, & ready for install...

Sectioned brackets now bolt up to factory locations...note the washers...the T40 bolt head could slip through the bolt slot on the bracket...you can clearly see the body bolt as well...I replaced mine but the factory hardware will work perfectly fine with washers too!

Underside of Escalade board...

Driver side board re-installed with 9 total bolts. These boards have a much better build than our stockers, better brackets, & only 9 bolt holes. No more needed...


Cameron
Last edited:


