KC Light bar project thread!

Disclaimer: Links on this page pointing to Amazon, eBay and other sites may include affiliate code. If you click them and make a purchase, we may earn a small commission.

LittlePearl13

Full Access Member
Joined
Mar 23, 2011
Posts
181
Reaction score
0
Location
The Central Coast (SLO county), California.
Hi guys! So as most of you may have noticed me asking tons of dumb questions on here recently on how to wire a light bar... well, now that I think I've gathered enough information and advice to get started (shout out to The Big Blue Bus for all his help) I'm diving head-first into this project. Keep watching for updates.

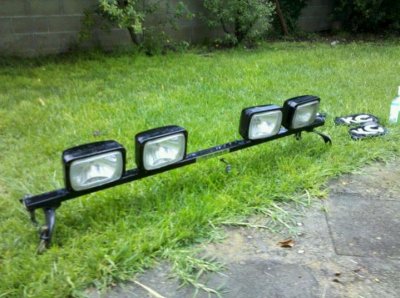
Update 1) Yesterday I took a decent little drive to go pick up this light bar. When I got it, the whole thing was in decent condition, but I knew it needed some work. The add also did not specify what type of KC light they are, but I did some research and I landed myself a set of 4 KC 69 series lights. I'm stoked. He also had 4 leather covers for them.

I've attached a picture of the rack without me doing anything to it but giving it a quick rinse with the hose.

So the light bar already has these nice little mounting feet on it that in theory should just attach right to the stock luggage racks. Wrong. It didn't fit at all. Luckily, it was just held on by a strong bolt, so I took it off, and I already have some alternative mounting ideas.

Also, the previous owner had it wired up along with a CB antenna, so there was an enormous mass of jumbled wires in there. I just cut it out, so I could start fresh. All in all, despite it being in questionable condition, it really isn't going to take much work to get it cleaned up and in working condition. I am going to need to replace the lens on the far right light, but hey, I only paid $35 bucks for the whole thing, so I'm not too concerned about the cost of that :)

Anyway, my next update will have pictures of the disassembled lights and rack, and the first steps of the cleanup.
 

Attachments

  • 267968_1652735016761_1788625906_1076766_6632782_n.jpg
    267968_1652735016761_1788625906_1076766_6632782_n.jpg
    72.1 KB · Views: 89
OP
OP
LittlePearl13

LittlePearl13

Full Access Member
Joined
Mar 23, 2011
Posts
181
Reaction score
0
Location
The Central Coast (SLO county), California.
Day 2

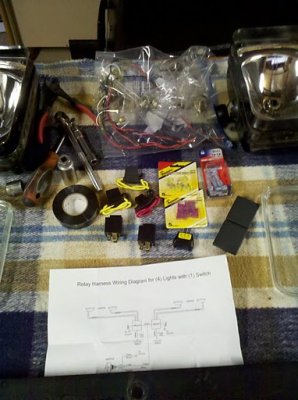
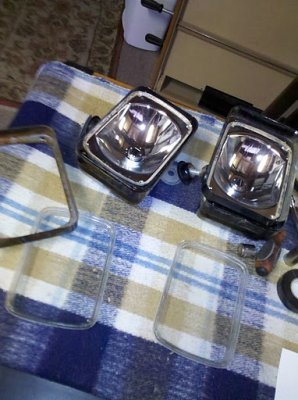
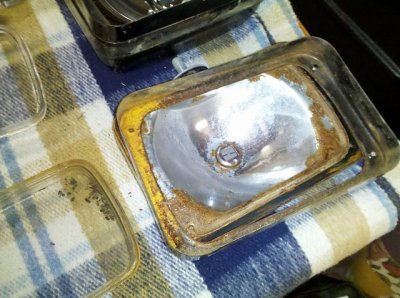
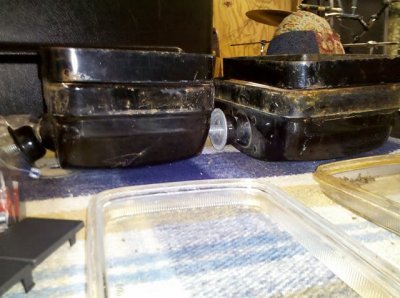
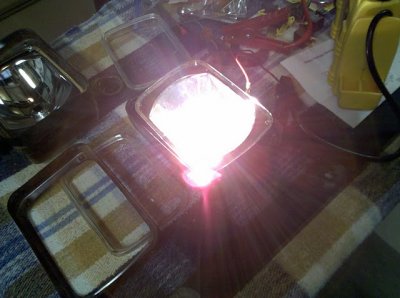
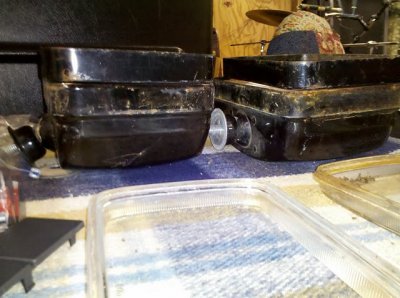
So today I woke up early before school to get a head start on this project. I tore out all of the old wiring (the previous owner didn't know anything, and had all 8 wires spliced into 3... I know, doesn't make any sense) and started pulling it apart. Turns out, that, for what I paid, I got a really good deal. I got my battery charger, and tested them out, and all of the lights function, and I don't need to replace any bulbs. However, one light's reflector lens is really rusted out, and I am going to replace that. That's going to cost about $35. I also printed out a copy of the diagram I'm going to use, took it to AutoZone, and picked up all the necessary hardware for the wiring. I.e., the switch, the relays, the in-line fuse holders, the extra fuses, lots of electrical tape, the works. Ironically, that also cost exactly $35... weird, right? That's exactly how much I paid for the whole rack o_0 The bad news is that the bar is pretty dinged up, and the housing for the lights are all pretty rusty and the paint is flaking. So I decided I'm going to re-paint the whole rack with a weather proof flat or sating black. I'm buying the paint tomorrow, and expect to see some 'after' pictures up tomorrow night, or the next morning.

Edit: Forgot to mention: I found out the model of the lights: KC HiLites 100w 69 series. Now my problem is going to be finding out whether they are the driving or long range version so I can buy the proper replacement lens.
 

Attachments

  • IMG_20110629_160555.jpg
    IMG_20110629_160555.jpg
    53.1 KB · Views: 49
  • IMG_20110629_160609.jpg
    IMG_20110629_160609.jpg
    57.6 KB · Views: 47
  • IMG_20110629_160623.jpg
    IMG_20110629_160623.jpg
    90.3 KB · Views: 45
  • IMG_20110629_160948.jpg
    IMG_20110629_160948.jpg
    72.7 KB · Views: 49
  • IMG_20110629_161501.jpg
    IMG_20110629_161501.jpg
    56.6 KB · Views: 44
OP
OP
LittlePearl13

LittlePearl13

Full Access Member
Joined
Mar 23, 2011
Posts
181
Reaction score
0
Location
The Central Coast (SLO county), California.
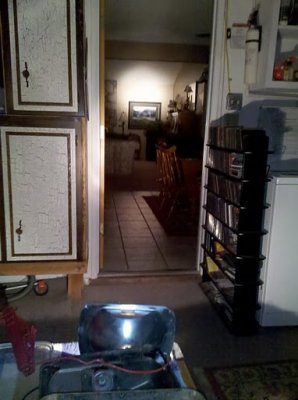
Judging by this picture, I'm pretty sure these are long range, and not driving lenses, haha. The light is in my garage, and the illuminated spot is maybe forty or fifty feet away on the far living room wall.
 

Attachments

  • IMG_20110630_000451.jpg
    IMG_20110630_000451.jpg
    40.5 KB · Views: 57

the big blue bus

Full Access Member
Joined
Apr 18, 2010
Posts
1,049
Reaction score
1
Location
richmond, va
looks like your making progress. keep the pics comming. working on all my wiring now it can gte annoying trust me haha
 
OP
OP
LittlePearl13

LittlePearl13

Full Access Member
Joined
Mar 23, 2011
Posts
181
Reaction score
0
Location
The Central Coast (SLO county), California.
Hi guys. Sorry this update has taken so long. I spent two days painting, and a few days ago had some unexpected news that family was going to just 'drop in' for a week. They're staying in the garage, so I had to clear out my workbench and everything. Ugh, distant relatives... who needs 'em?

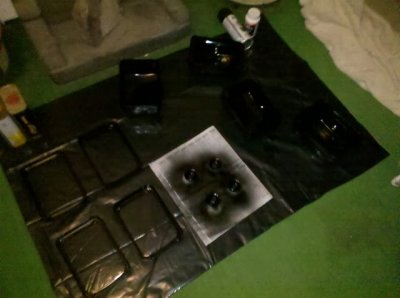
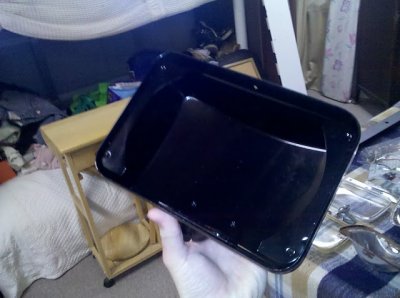
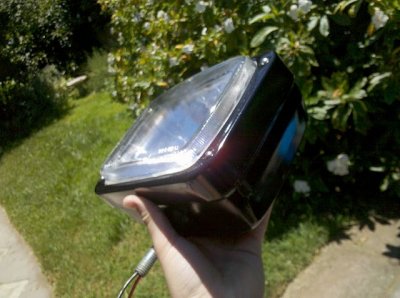
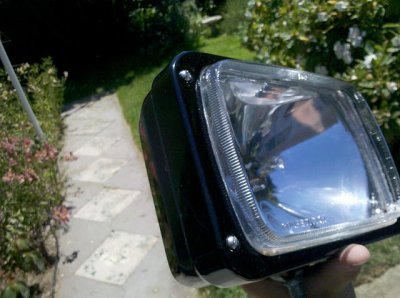
Anyway, back to the light bar. So late last week I did all the painting on the lights and rack, and totally restored it. First, I used some Loctite naval jelly, and it literally took off all of the rust, that stuff is amazing. Then I put 8 coats of oil-based paint that was designed to paint BBQ grills with, so it is very heat resistant. I also bought the hardware and devised a new method to mount the bar to my stock luggage racks. I am still waiting for one replacement lens to come in, so I'll have to have to upload fully rebuilt pictures next time. Anyway, take a look at the paint, and glass, I think it cleaned up pretty damn well considering how scratched, ugly, and rusty everything was.

If you can't tell, I've re-posted a 'before' picture just for comparison.

I also thought my newly-painted lights deserved a fresh set of non-rusty stainless steel hardware :p payed for the whole bag with pocket change.
 

Attachments

  • IMG_20110629_160948.jpg
    IMG_20110629_160948.jpg
    72.7 KB · Views: 47
  • IMG_20110701_211635.jpg
    IMG_20110701_211635.jpg
    40.1 KB · Views: 44
  • IMG_20110703_112700.jpg
    IMG_20110703_112700.jpg
    56.3 KB · Views: 46
  • IMG_20110703_123901.jpg
    IMG_20110703_123901.jpg
    66.7 KB · Views: 44
  • IMG_20110703_123908.jpg
    IMG_20110703_123908.jpg
    66.9 KB · Views: 44

Forum statistics

Threads
132,720
Posts
1,873,159
Members
97,546
Latest member
Steven94
Top