It’s been about a month and 1200 miles since I cleaned the one ground on the frame under the drivers seat and two on the left side back by the bumper. No electrical issues since.I think I fixed intermittent electrical gremlins that started a day or two ago (radio didn't turn on a couple of times without a key cycle, couple of random door locks while driving, Service Trailer Brake System once). I was going to find ALL the grounds and clean them, but is was 90 degrees out, so I found three of the most likely culprits on the under chassis and cleaned and reinstalled them. (ALWAYS disconnect the negative battery cable when you are disconnecting grounds or even hots - some sensitive or poorly designed electrical components can be damaged if they the get an imbalanced ground). They were not TOO bad but definitely some corrosion, maybe as you would expect after 11 years. But I know they are good now. I have had a couple of restarts since and some driving with no issues. Fingers crossed. No pics, it WAS 90 degrees out.
ALSO I decided that my 1Mitchel subscription sucks. I should be able to easily type in "electrical ground locations", it should find the thread, then I should be able to print the thread with a couple of clicks. NOT a bunch of open print close next open print close next etc. Or if anybody knows how to do so please tell me.
You are using an out of date browser. It may not display this or other websites correctly.
You should upgrade or use an alternative browser.
You should upgrade or use an alternative browser.
What did you do to your NNBS GMT900 Tahoe/Yukon Today?
- Thread starter phattyford
- Start date
Disclaimer: Links on this page pointing to Amazon, eBay and other sites may include affiliate code. If you click them and make a purchase, we may earn a small commission.
iamdub
Full Access Member
gooffeyguy
Tom
Spent $75 putting in 22.5 gallons of E85
Also used it to bring home a new king size bed foundation, mattress, and headboard
Also used it to bring home a new king size bed foundation, mattress, and headboard
992dr
Full Access Member
Rotated my tires last weekend, effed up a couple of lugs nuts thinking it was 15/16 when itis actually 7/8.
Changed my oil and replaced my lugs nut today. I forgot to get my miles, be right back
254,321
Changed my oil and replaced my lugs nut today. I forgot to get my miles, be right back
254,321
iamdub
Full Access Member
Cancelled a date yesterday to play with my Hoe.
I've been apprehensive to install the filter retrofit because (1) It's a difficult location to work in and (2) I was afraid of what I might find and the subsequent snowball. Well, "it ain't gonna install itself" so I decided to just get it over with.
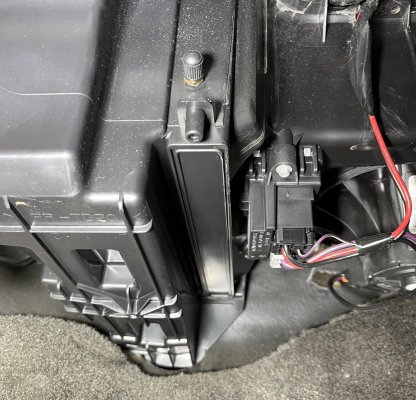
The target:

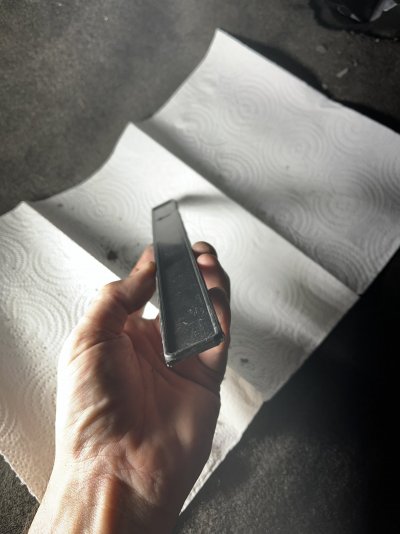
I used my EDC utility knife with a fresh blade to score the four straight parts until I could press the blade through and drag it to cut straight lines. Then, pushed up on the center a few times until the rectangle piece cracked loose on one end. I worked it up and down until the other end cracked loose then let it fall out:

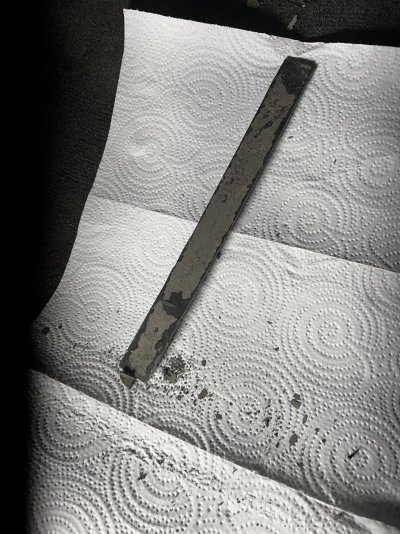
Seeing the flakes of dirt fall out confirmed my suspicions of what I was getting in to. Flipping the removed piece over, the dried "mud" indicated that someone had used an evaporator coil cleaner at one time, which is what that port with the valve stem cap just above the screw boss is for:

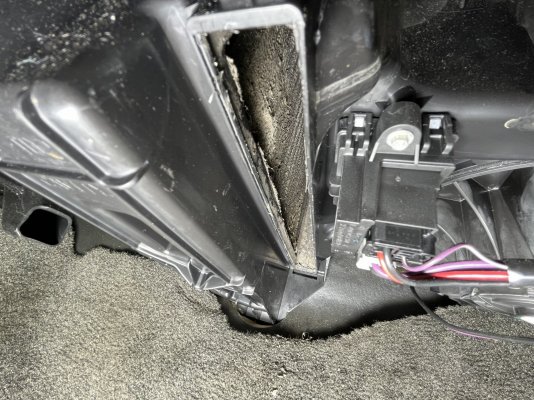
Either the cleaner didn't really work or it was done long ago. I was worried that adding the filter would reduce the air flow. After seeing this, I doubt the filter would reduce the flow any more than what this build-up is doing. It was late so I stopped at this point to formulate a plan to clean it out without pushing anything deeper into the fins. I'm thinking a strong initial vacuuming followed by a gentle brushing with vacuum, then spray cleaner, more vacuuming, etc. would be best. If I knew how thick the coil was and what was on the other side, I wouldn't be above cutting an access slot on the other side to back-blow it with compressed air:

Until then, I'm just gonna install the lid from the filter retrofit kit so it's operable. I'll leave the HVAC cover in the second row floorboard as a nagging reminder to finish this project.
I've been apprehensive to install the filter retrofit because (1) It's a difficult location to work in and (2) I was afraid of what I might find and the subsequent snowball. Well, "it ain't gonna install itself" so I decided to just get it over with.
The target:

I used my EDC utility knife with a fresh blade to score the four straight parts until I could press the blade through and drag it to cut straight lines. Then, pushed up on the center a few times until the rectangle piece cracked loose on one end. I worked it up and down until the other end cracked loose then let it fall out:

Seeing the flakes of dirt fall out confirmed my suspicions of what I was getting in to. Flipping the removed piece over, the dried "mud" indicated that someone had used an evaporator coil cleaner at one time, which is what that port with the valve stem cap just above the screw boss is for:

Either the cleaner didn't really work or it was done long ago. I was worried that adding the filter would reduce the air flow. After seeing this, I doubt the filter would reduce the flow any more than what this build-up is doing. It was late so I stopped at this point to formulate a plan to clean it out without pushing anything deeper into the fins. I'm thinking a strong initial vacuuming followed by a gentle brushing with vacuum, then spray cleaner, more vacuuming, etc. would be best. If I knew how thick the coil was and what was on the other side, I wouldn't be above cutting an access slot on the other side to back-blow it with compressed air:

Until then, I'm just gonna install the lid from the filter retrofit kit so it's operable. I'll leave the HVAC cover in the second row floorboard as a nagging reminder to finish this project.
Last edited:
I would make a right angle vacuum tip on a tube and use a nylon brush and vacuum while using the brush to get most of the dry material out, tedious but effectiveCancelled a date yesterday to play with my Hoe.
I've been apprehensive to install the filter retrofit because (1) It's a difficult location to work in and (2) I was afraid of what I might find and the subsequent snowball. Well, "it ain't gonna install itself" so I decided to just get it over with.
The target:
View attachment 410238
I used my EDC utility knife with a fresh blade to score the four straight parts until I could press the blade through and drag it to cut straight lines. Then, pushed up on the center a few times until the rectangle piece cracked loose on one end. I worked it up and down until the other end cracked loose then let it fall out:
View attachment 410239
Seeing the flakes of dirt fall out confirmed my suspicions of what I was getting in to. Flipping the removed piece over, the dried "mud" indicated that someone had used an evaporator coil cleaner at one time, which is what that port with the valve stem cap just above the screw boss is for:
View attachment 410240
Either the cleaner didn't really work or it was done long ago. I was worried that adding the filter would reduce the air flow. After seeing this, I doubt the filter would reduce the flow any more than what this build-up is doing. It was late so I stopped at this point to formulate a plan to clean it out without pushing anything deeper into the fins. I'm thinking a strong initial vacuuming followed by a gentle brushing with vacuum, then spray cleaner, more vacuuming, etc. would be best. If I knew how thick the coil was and what was on the other side, I wouldn't be above cutting an access slot on the other side to back-blow it with compressed air:
View attachment 410241
Until then, I'm just gonna install the lid from the filter retrofit kit so it's operable. I'll leave the HVAC cover in the second row floorboard as a nagging reminder to finish this project.
HOLY MACKEREL!!!!!Cancelled a date yesterday to play with my Hoe.
I've been apprehensive to install the filter retrofit because (1) It's a difficult location to work in and (2) I was afraid of what I might find and the subsequent snowball. Well, "it ain't gonna install itself" so I decided to just get it over with.
The target:
View attachment 410238
I used my EDC utility knife with a fresh blade to score the four straight parts until I could press the blade through and drag it to cut straight lines. Then, pushed up on the center a few times until the rectangle piece cracked loose on one end. I worked it up and down until the other end cracked loose then let it fall out:
View attachment 410239
Seeing the flakes of dirt fall out confirmed my suspicions of what I was getting in to. Flipping the removed piece over, the dried "mud" indicated that someone had used an evaporator coil cleaner at one time, which is what that port with the valve stem cap just above the screw boss is for:
View attachment 410240
Either the cleaner didn't really work or it was done long ago. I was worried that adding the filter would reduce the air flow. After seeing this, I doubt the filter would reduce the flow any more than what this build-up is doing. It was late so I stopped at this point to formulate a plan to clean it out without pushing anything deeper into the fins. I'm thinking a strong initial vacuuming followed by a gentle brushing with vacuum, then spray cleaner, more vacuuming, etc. would be best. If I knew how thick the coil was and what was on the other side, I wouldn't be above cutting an access slot on the other side to back-blow it with compressed air:
View attachment 410241
Until then, I'm just gonna install the lid from the filter retrofit kit so it's operable. I'll leave the HVAC cover in the second row floorboard as a nagging reminder to finish this project.
I can imagine what mine looks like holy moly.
iamdub
Full Access Member
I would make a right angle vacuum tip on a tube and use a nylon brush and vacuum while using the brush to get most of the dry material out, tedious but effective
Great minds! This is actually what I was planning. I have extra vacuum ends for my shop vac, saved when a previous vac died. I was thinking of modding the end of a crevice tool, like putting a simple 45° or flatter edge in the long side.
You might try using a soft or extra soft toothbrush while gentle swiping in line with the fins.Great minds! This is actually what I was planning. I have extra vacuum ends for my shop vac, saved when a previous vac died. I was thinking of modding the end of a crevice tool, like putting a simple 45° or flatter edge in the long side.
Similar threads
- Replies
- 3
- Views
- 3K
- Replies
- 56
- Views
- 8K
- Replies
- 35
- Views
- 11K

