AFM lifter fail on my 2018 Yukon Denali

Disclaimer: Links on this page pointing to Amazon, eBay and other sites may include affiliate code. If you click them and make a purchase, we may earn a small commission.

OP
OP
MrMonte

MrMonte

Full Access Member
Joined
Jun 23, 2022
Posts
204
Reaction score
505
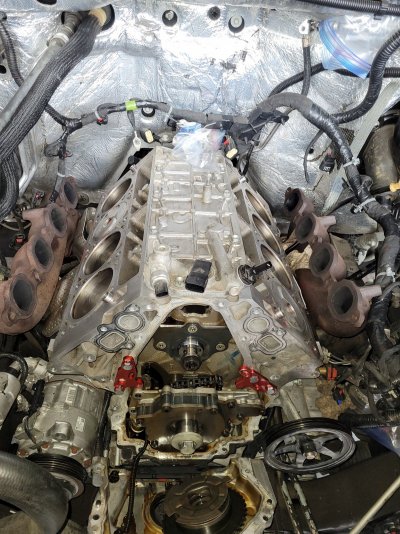
Cleaned up the heads before heading to work today. Seems like a lot of buildup for 90K miles.

Another takeaway - When I pulled the water pump I took my leaf blower & blew the water out of the block so when I pulled the heads no water went into the cylinders.
20230924_105748.jpg20230924_112311.jpg20230924_124125.jpg20230924_124150.jpg
 
OP
OP
MrMonte

MrMonte

Full Access Member
Joined
Jun 23, 2022
Posts
204
Reaction score
505
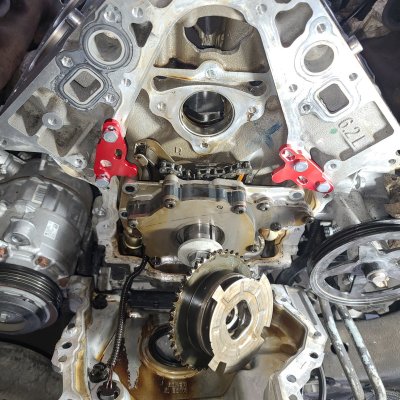
The $25 oil pump alignment brackets arrived so instead of sleeping like I should be since I just worked 15hrs & have to go back to work soon I had to try to get that timing chain off. Loosing the oil pump gives very little extra room but enough to walk off the chain in less than 1 min with minimal effort.
Pulled the cam & looks good so no metal shavings concern. So want to call out so I can play with the Yukon but that dang work ethic inside me says no. LOL

20230925_164115.jpg
 
OP
OP
MrMonte

MrMonte

Full Access Member
Joined
Jun 23, 2022
Posts
204
Reaction score
505
Had a few minutes before headed out to work and installed the cam, fuel pump & valley cover. New cam retaining plate should arrive by end of today (Wednesday).

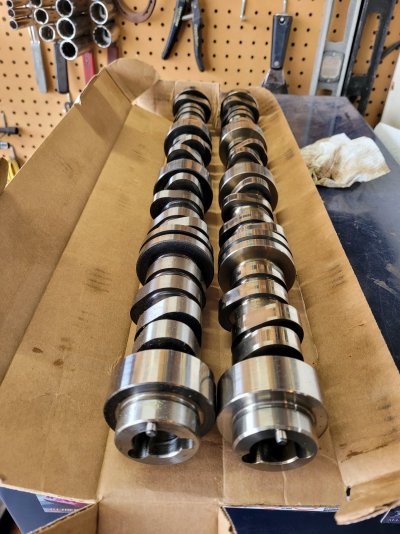
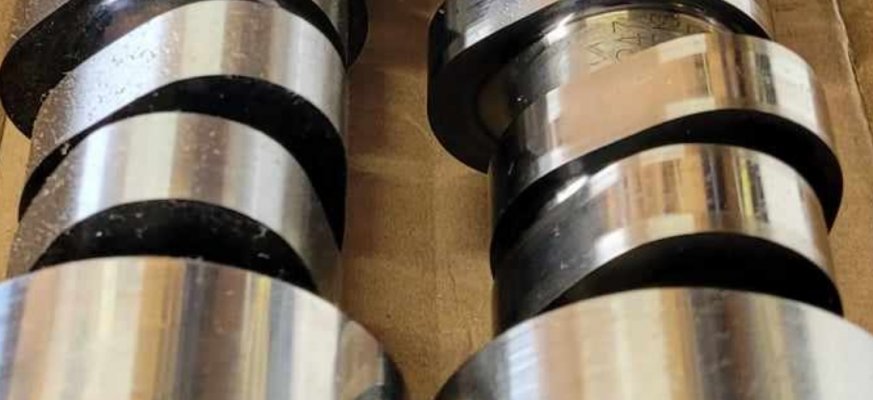
The non AFM cam vs AFM cam shows the lobe difference. When I 1st looked into the AFM delete saw many articles where factory AFM cam was not replaced. The ones that said the cam had to be replaced didn't say why. After learned the lobe difference now all I see are articles that explain why you have to change the cam. Weird how that works.
20230926_171149.jpg20230926_163224.jpgScreenshot_20230926_173459_Messenger.jpg
 

Attachments

  • 20230926_163246.jpg
    20230926_163246.jpg
    283.9 KB · Views: 14
Last edited:
OP
OP
MrMonte

MrMonte

Full Access Member
Joined
Jun 23, 2022
Posts
204
Reaction score
505
Worked last night so didn't play much today. Took about 5 minutes to walk the timing chain back on with very little effort. It was more like a dance between 3 small screw drivers & a pick. I'm off tomorrow so plan on putting it all back together then.
20230927_165828.jpg
 

tom3

Full Access Member
Joined
Jul 15, 2019
Posts
1,044
Reaction score
1,601
Looks like that new cam will add some serious performance to the engine. And cleaning those ports should do something too. Sure a clean engine!
 
OP
OP
MrMonte

MrMonte

Full Access Member
Joined
Jun 23, 2022
Posts
204
Reaction score
505
Made good progress today. Couple of life events sidetracked me a bit. Harmonic balancer went on without any issues with the installer I bought. Ready for water pump & the rest of the front bits tomorrow.
20230928_194142.jpg
 
Last edited:
OP
OP
MrMonte

MrMonte

Full Access Member
Joined
Jun 23, 2022
Posts
204
Reaction score
505
All back together, it's abit more peppy than before and no check engine light. That was quite the adventure. Once the radiator was in I poured almost 2 gallons of antifreeze in the thermostat hole before installing a new GM thermostat then filled the rest thru normal spot.
20230929_153016.jpg
 
Last edited:
OP
OP
MrMonte

MrMonte

Full Access Member
Joined
Jun 23, 2022
Posts
204
Reaction score
505
My takeaway after doing this cam swap:

I took lots of pictures & a video plus bagged & tagged bolts as removed & kept then in order of removal which made it easier when putting everything back together

The intake cover has 4 wire holder connections on the back that are a pain to remove. Cover is best to be left attached to the intake. The hardest part was disconnecting the various electrical connections.

Removing #8 coil pack makes removing/installing that valve cover much easier.

Removing fender liners makes the spark plugs & exhaust easy access.

The 2 stretch belts are easy to remove & reinstall by using a small screwdriver to guide the belts off as you manually turn the crank.

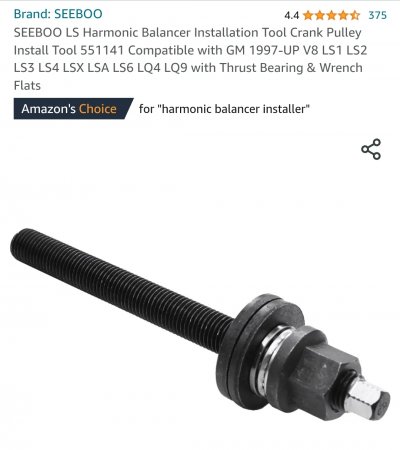
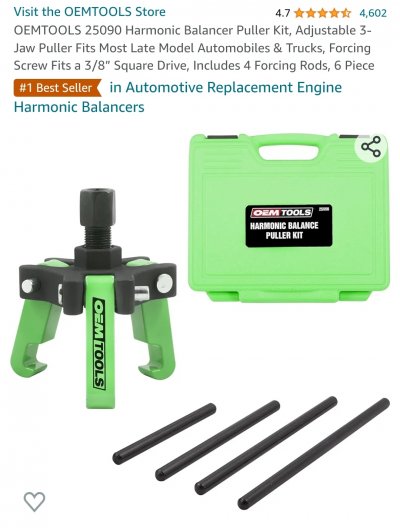
These 2 made easy work removing & installing the harmonic balancer. Took about 1 minute to remove or install.
Screenshot_20230930_044236_Amazon Shopping.jpgScreenshot_20230930_044319_Amazon Shopping.jpg

After removing water pump blow out the antifreeze from each head. This will save you later when removing the heads so no antifreeze goes into the cylinders.

Front bolts of air pump need to be removed. The back 2 bolts need to be loosened abit to allow it to push back a little to allow room to remove 1 of the timing cover bolts.

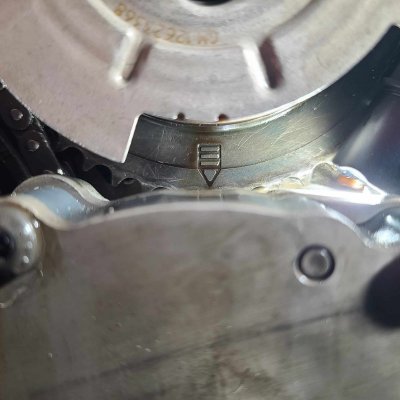
After removing timing cover aligh the timing mark on the cam gear up.

Remove cam bolt then cam gear from cam. You can walk the timing chain off without removing the oil pan. I used the oil pump alignment brackets then loosened the oil pump then moved the oil pump counter down & forward. Doesn't move much but helps. To get all the chain slack to 1 side rotate crank counter clockwise about 1°(very little). Using 2 small flat blade screwdrivers and a pick the chain walks off with very little effort. This takes some practice but now I can take off or put back on is less than 1 minute.

Disconnection the exhaust manifolds from the heads gives enough room to remove the head bolts so I didn't completely remove them.

When installing the cam gear on the cam get at least a 4" long bolt to screw into the cam to handle it better, pull cam forward as possible then rotated cam until dowel goes into cam gear. Repeated just to make sure. LOL

Failure to get the dowel in the cam gear correctly will result in 8 bent intake valves.

With new cam installed and assuming the crank has not been rotated walk the timing chain back on the cam gear with the timing mark up. Once chain is partly on the cam gear (installing clockwise) rotate the crank about 1° counter clockwise to get all the slack to the one side. This is what makes walking the chain on/off easy.

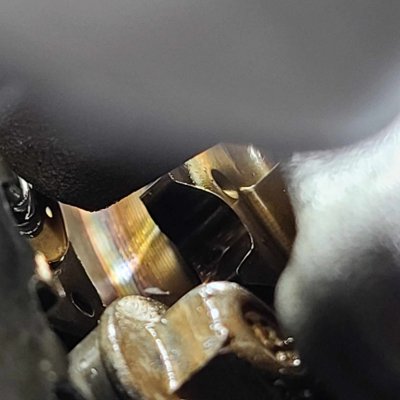
Once timing chain is on install cam gear to cam. Make sure pushrods & rockers are NOT installed yet. Rotate crank until cam & crank alignment marks are pointing to each other. The best view for the crank is from the passenger side.
received_841655077662600.jpegreceived_712510954099473.jpeg

There are many videos on AFM delete / cam swaps. My intent here was to add things that might be helpful that may not get talked about in those videos.
 
Last edited:

Thrust

Full Access Member
Joined
Oct 23, 2020
Posts
518
Reaction score
674
Location
ICT
Great write up and glad to see you got it all back together and running.
What did you use for cleaning the heads?
 
OP
OP
MrMonte

MrMonte

Full Access Member
Joined
Jun 23, 2022
Posts
204
Reaction score
505
Great write up and glad to see you got it all back together and running.
What did you use for cleaning the heads?
For the pistons & block I used WD40 + green Scoth Brite pads. For the heads I used carb cleaner + green Scotch Brite pads. To clean the runners I cut the pads into 2x2, folded in 1/2 then used a small grab-all to hold the pad so I could scrub the runners. For the stubborn spots I used a plastic razor blade.

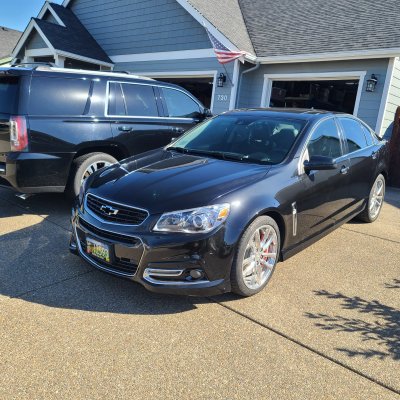
I removed the 10 year old clear bar a couple of weeks ago on my wife's 2014 SS Sedan with 130K miles on it. Used a spray to soften the remaining adhesive then removed that with a plastic razor blade without any damage to the paint.
20230909_154932.jpg
 
Last edited:

Forum statistics

Threads
132,072
Posts
1,861,894
Members
96,537
Latest member
PD2770
Top