Wills.WindowsAndWheels
TYF Newbie
Hey everyone,
Just wanted to sort of a 'how to' write up on engine detailing. It really gives your ride that last 'edge' that it needs to look complete after having the paint polished and all the other little detailing goodies done to it (trim,tires,rims etc)
An engine detail can actually be a lot easier than you think if you are just careful, do a little prep work and have a couple decent products to work with.
My typical engine detail consists of the following supplies/products:
Hose (duh) with nozzle or pressure washer if available (Steam cleaner can also be used but pressurized water is nice for lower parts that need cleaning)
Microfiber and terry cloth towels
Gloves (latex/rubber or something equivalent)
All Purpose Cleaner and/or Degreaser (i use meguiars APC+ and Degreaser diluted 4:1)
A few brushes (old tooth brush, cheap paint brushes and spray gun cleaning brushes are all good choices, especially the paint brushes)
Bucket of water (to rinse out your brushes with if your engine is really bad)
Plastic bags or aluminum foil (for protecting alternator and other sensitive electrical components)
Shade!
Flashlight/work light (working in the shade is a must, but it also makes seeing just how clean things REALLY are rather difficult).
A final dressing (I use Meguiars Hyper-Dressing but other rubber/vinyl dressings can also be used).
A wax or spray wax for painted areas.
Now for this write up I"m not going to be picky as far as what model engine I use to demonstrate what to do lol, I just picked a couple of the dirtiest engines I've worked on.
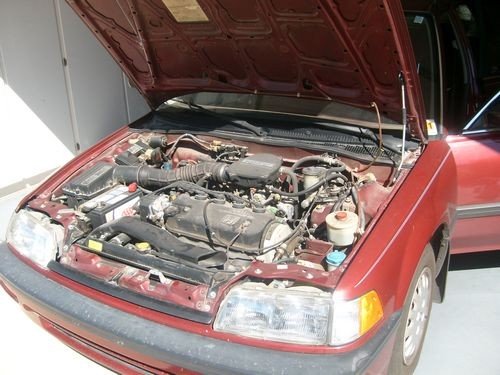
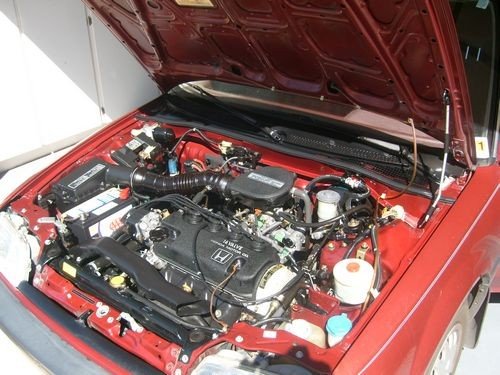
For starters, lets look at what you'll probably end up seeing when you lift the hood if you've never had your engine detailed...in this case, it hadn't been detailed in a couple decades
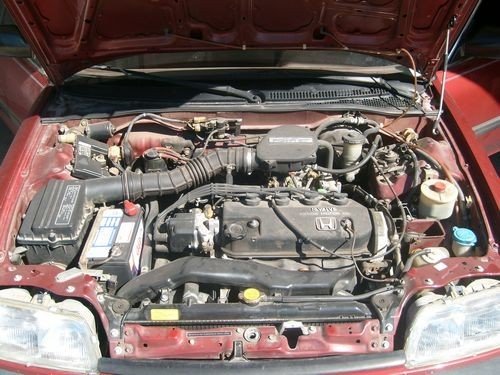
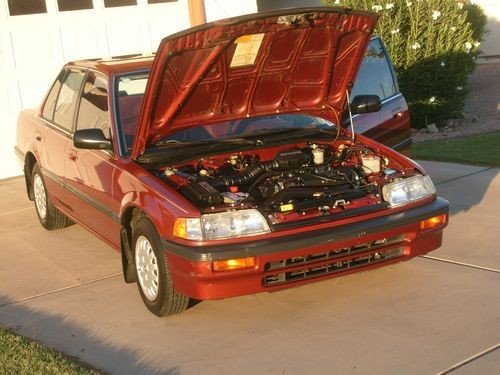
This is a 1988 Honda Civic engine. The paint itself had more swirls than you can imagine and quite frankly matched how bad the engine looked lol. So as I'm sure you can figure, if the paint wasn't even cared for, the engine wasn't even thought of until we talked to the owner.
Now looking at all this might at first be a little overwhelming, but you absolutely can make it MUCH better with a little time and patience.
Important things: DO NOT get your alternator, spark plugs, fuse box or other sensitive electrical equipment wet. A pressure washer, while very strong...actually uses less water than a garden hose (most times) so you will use LESS water, but still have power to cut dirt. Use it at a distance if you do go this route, you want it to be almost more 'air pressure' coming from it to help w/cleaning than an actual heavy flow of water. If you go with a pressure washer...I advise you to be careful what parts you use it on. Usually I'll even when working with one, i'll still go with just wiping certain areas down by hand till i get them clean, such as fuse boxes or around spark plug connections.
A Garden hose set on 'mist' can be very helpful for sensitive areas like NEAR (not on) the alternator or fuse box etc. I sometimes like to use a stronger setting for lower areas where there isn't so much electrical equipment around, but up top near the plugs etc...the less water you can use the better....thats why we use degreasers!
If you want to be extra careful, take a plastic bag (like from wal-mart) and bag off your alternator, air intake and any other electrical things that you don't want to get wet. Aluminum foil works great too because you can mold it around anything. If a little water hits something it wont be the end of the world, but a good amount can do damage. I've done quite a few engines ranging from this little Honda, all the way up to very expensive Vettes and Challengers with custom modifications under the hood...and so far (knock on wood) have had no issues...just use common sense and take your time and all should be fine.
SO, after you have bagged off the caution areas, whats next? Well i'd say assess what you're working with. In the case of this honda, it is very DIRTY, but not so greasy. There is a difference.
I'd recommend putting your gloves on at this point to save yourself the hassle of scrubbing God knows what offer your hands later. Plus, these degreasers and all purpose cleaners can dry your skin out and make it peel (i know trust me), so use the gloves, they help.
If you're dealing with just dirt, then i'll usually go with the All Purpose Cleaner. Make SURE the engine is cool, make sure you are in the shade because if you spray a cleaner onto a hot surface, especially if you have some nice chrome mod's, the cleaner can stain the surface. On rubber and plastic you usually don't have to worry, but do a test area on any painted/chromed pieces under the hood to make sure the cleaner will not stain the finish.
Next, if you have any big things like leaves, sticks, small animals or other unwanted large items lol....either brush them off by hand, use a shop-vac to suck them up, or use some compressed air to blow them out or call animal control to give you a hand (hey i've heard of snakes and alligators making engine bays their homes!)
I would recommend cleaning the underside of the hood next...so that way if you end up having any dirt etc. rinse down..its only going to run onto a small area thats already dirty, not onto a clean area that you'll have to RE-clean.
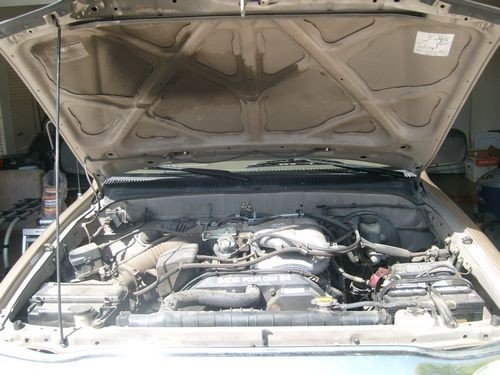
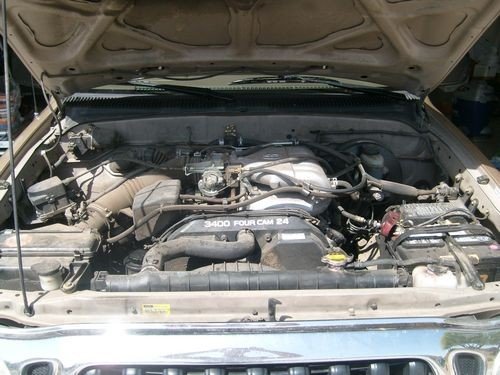
(Toyota Tacoma Engine, looked like someone refilled the oil but forgot to put the cap back on when they finished...oil bomb!)
I usually divide areas into sections. So i'll spray about 1/4 of the engine with APC (or degreaser if you're dealing with heavy grease like on the engine above).
Let the cleaner set for a few seconds, then start working with your brushes to agitate the dirt. If its light dirt, not a lot of pressure is needed, you're just loosening it up. Now if its caked on grease like what is seen on the hood in the above picture...you will need to work it.
In the case of the hood, you're dealing with PAINT...and you don't want to scrub the paint too hard because you can scratch it OR even remove it. So go slowly. Same goes for any finished pieces with chrome or paint...don't scrub it like you're scrubbing your tub...use force but don't kill it...you don't want to mar anything. Now with those rubber hoses and such, they're pretty tough so you can lay into them a little more if needed. Just make sure no matter what you're cleaning, try not to let the cleaner COMPLETELY dry...if its drying faster than you can work...spray a smaller section next time or just rinse as you go.
In the case of the hood above, i used a steamer to loosen the grease (pressure washer would have blasted it off faster but a lot of water would have run uncontrolled onto the engine) and a soft tooth brush to scrub it.
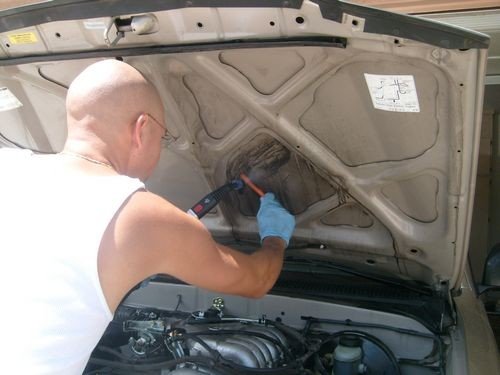
If a steamer is unavailable, don't fret. Just use a spray bottle with your cleaner in it. Just be sure to clean your brush often in a bucket of water, or else you'll just end up smearing the grease all over.
If you look closely, you can see the left half of the hood has already been cleaned (nice and gold)...but the whole right half (the part im working on) is quite black.
If you're dealing with just dirt, after using your brushes on the areas, go ahead and rinse the area you cleaned. Try not to get too much water on the area you haven't yet cleaned. The reason for this is, if you get water onto an area you havent used your cleaner on yet, the water is going to dilute your cleaner after you spray it and thus weakening its cleaning ability.
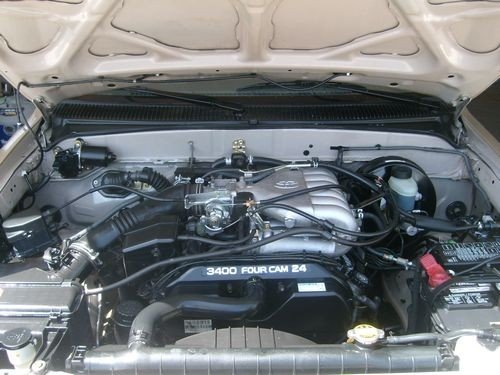
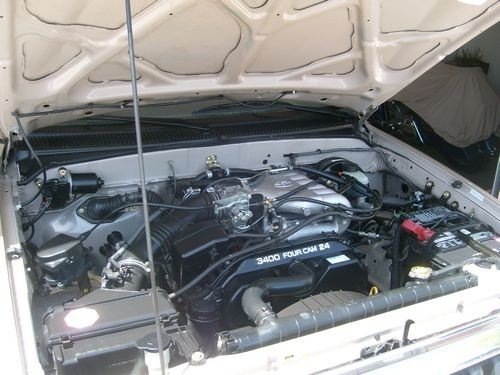
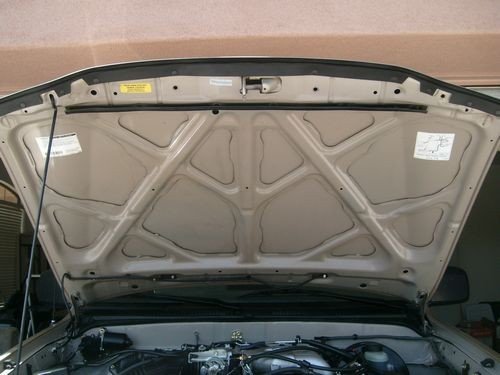
When you're finished it should look like this :
Next, move to your next 1/4 of the engine. Remember to work from the top down...so clean the higher parts first...wash the dirt down, and if you see anything lower you want cleaned work on it second.
Go ahead and complete all of your 4 quarter sections, then give a general dry of everything. Not perfect but, enough to tell if its REALLY clean, or if it just looks clean because its wet. Plus the wipe down will help remove any leftover dirt that the rinse may not have washed away. Use your light to really inspect everything. Obviously some places are just impossible to reach...thats a given, but if you're crafty most areas you can get to in one way or another...just do the best you can.
If you have any places that need more work...go ahead and address them and make sure everything is as clean as possible. The better the prep work/cleaning, the better the finished product will be after you apply the dressing.
*CONTINUED BELOW*
Just wanted to sort of a 'how to' write up on engine detailing. It really gives your ride that last 'edge' that it needs to look complete after having the paint polished and all the other little detailing goodies done to it (trim,tires,rims etc)
An engine detail can actually be a lot easier than you think if you are just careful, do a little prep work and have a couple decent products to work with.
My typical engine detail consists of the following supplies/products:
Hose (duh) with nozzle or pressure washer if available (Steam cleaner can also be used but pressurized water is nice for lower parts that need cleaning)
Microfiber and terry cloth towels
Gloves (latex/rubber or something equivalent)
All Purpose Cleaner and/or Degreaser (i use meguiars APC+ and Degreaser diluted 4:1)
A few brushes (old tooth brush, cheap paint brushes and spray gun cleaning brushes are all good choices, especially the paint brushes)
Bucket of water (to rinse out your brushes with if your engine is really bad)
Plastic bags or aluminum foil (for protecting alternator and other sensitive electrical components)
Shade!
Flashlight/work light (working in the shade is a must, but it also makes seeing just how clean things REALLY are rather difficult).
A final dressing (I use Meguiars Hyper-Dressing but other rubber/vinyl dressings can also be used).
A wax or spray wax for painted areas.
Now for this write up I"m not going to be picky as far as what model engine I use to demonstrate what to do lol, I just picked a couple of the dirtiest engines I've worked on.
For starters, lets look at what you'll probably end up seeing when you lift the hood if you've never had your engine detailed...in this case, it hadn't been detailed in a couple decades

This is a 1988 Honda Civic engine. The paint itself had more swirls than you can imagine and quite frankly matched how bad the engine looked lol. So as I'm sure you can figure, if the paint wasn't even cared for, the engine wasn't even thought of until we talked to the owner.
Now looking at all this might at first be a little overwhelming, but you absolutely can make it MUCH better with a little time and patience.
Important things: DO NOT get your alternator, spark plugs, fuse box or other sensitive electrical equipment wet. A pressure washer, while very strong...actually uses less water than a garden hose (most times) so you will use LESS water, but still have power to cut dirt. Use it at a distance if you do go this route, you want it to be almost more 'air pressure' coming from it to help w/cleaning than an actual heavy flow of water. If you go with a pressure washer...I advise you to be careful what parts you use it on. Usually I'll even when working with one, i'll still go with just wiping certain areas down by hand till i get them clean, such as fuse boxes or around spark plug connections.
A Garden hose set on 'mist' can be very helpful for sensitive areas like NEAR (not on) the alternator or fuse box etc. I sometimes like to use a stronger setting for lower areas where there isn't so much electrical equipment around, but up top near the plugs etc...the less water you can use the better....thats why we use degreasers!
If you want to be extra careful, take a plastic bag (like from wal-mart) and bag off your alternator, air intake and any other electrical things that you don't want to get wet. Aluminum foil works great too because you can mold it around anything. If a little water hits something it wont be the end of the world, but a good amount can do damage. I've done quite a few engines ranging from this little Honda, all the way up to very expensive Vettes and Challengers with custom modifications under the hood...and so far (knock on wood) have had no issues...just use common sense and take your time and all should be fine.
SO, after you have bagged off the caution areas, whats next? Well i'd say assess what you're working with. In the case of this honda, it is very DIRTY, but not so greasy. There is a difference.
I'd recommend putting your gloves on at this point to save yourself the hassle of scrubbing God knows what offer your hands later. Plus, these degreasers and all purpose cleaners can dry your skin out and make it peel (i know trust me), so use the gloves, they help.
If you're dealing with just dirt, then i'll usually go with the All Purpose Cleaner. Make SURE the engine is cool, make sure you are in the shade because if you spray a cleaner onto a hot surface, especially if you have some nice chrome mod's, the cleaner can stain the surface. On rubber and plastic you usually don't have to worry, but do a test area on any painted/chromed pieces under the hood to make sure the cleaner will not stain the finish.
Next, if you have any big things like leaves, sticks, small animals or other unwanted large items lol....either brush them off by hand, use a shop-vac to suck them up, or use some compressed air to blow them out or call animal control to give you a hand (hey i've heard of snakes and alligators making engine bays their homes!)
I would recommend cleaning the underside of the hood next...so that way if you end up having any dirt etc. rinse down..its only going to run onto a small area thats already dirty, not onto a clean area that you'll have to RE-clean.

(Toyota Tacoma Engine, looked like someone refilled the oil but forgot to put the cap back on when they finished...oil bomb!)
I usually divide areas into sections. So i'll spray about 1/4 of the engine with APC (or degreaser if you're dealing with heavy grease like on the engine above).
Let the cleaner set for a few seconds, then start working with your brushes to agitate the dirt. If its light dirt, not a lot of pressure is needed, you're just loosening it up. Now if its caked on grease like what is seen on the hood in the above picture...you will need to work it.
In the case of the hood, you're dealing with PAINT...and you don't want to scrub the paint too hard because you can scratch it OR even remove it. So go slowly. Same goes for any finished pieces with chrome or paint...don't scrub it like you're scrubbing your tub...use force but don't kill it...you don't want to mar anything. Now with those rubber hoses and such, they're pretty tough so you can lay into them a little more if needed. Just make sure no matter what you're cleaning, try not to let the cleaner COMPLETELY dry...if its drying faster than you can work...spray a smaller section next time or just rinse as you go.
In the case of the hood above, i used a steamer to loosen the grease (pressure washer would have blasted it off faster but a lot of water would have run uncontrolled onto the engine) and a soft tooth brush to scrub it.

If a steamer is unavailable, don't fret. Just use a spray bottle with your cleaner in it. Just be sure to clean your brush often in a bucket of water, or else you'll just end up smearing the grease all over.
If you look closely, you can see the left half of the hood has already been cleaned (nice and gold)...but the whole right half (the part im working on) is quite black.
If you're dealing with just dirt, after using your brushes on the areas, go ahead and rinse the area you cleaned. Try not to get too much water on the area you haven't yet cleaned. The reason for this is, if you get water onto an area you havent used your cleaner on yet, the water is going to dilute your cleaner after you spray it and thus weakening its cleaning ability.
When you're finished it should look like this :

Next, move to your next 1/4 of the engine. Remember to work from the top down...so clean the higher parts first...wash the dirt down, and if you see anything lower you want cleaned work on it second.
Go ahead and complete all of your 4 quarter sections, then give a general dry of everything. Not perfect but, enough to tell if its REALLY clean, or if it just looks clean because its wet. Plus the wipe down will help remove any leftover dirt that the rinse may not have washed away. Use your light to really inspect everything. Obviously some places are just impossible to reach...thats a given, but if you're crafty most areas you can get to in one way or another...just do the best you can.
If you have any places that need more work...go ahead and address them and make sure everything is as clean as possible. The better the prep work/cleaning, the better the finished product will be after you apply the dressing.
*CONTINUED BELOW*

