Damn, that bumper looks ****** SWEET!!
You should start a thread detailing the process of building that bumper. Hopefully you took a lot of pics during the process.
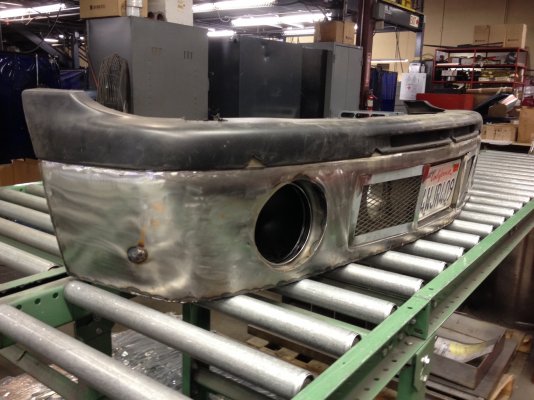
So, I didn't take any progress pictures during the build except for the one posted below. I am terrible with keeping up on taking pictures when I'm working on a project....
Any how, so it was a very long process to get the bumper the way I wanted and it would be kind of hard to explain in to much detail especially enough detail to start a build thread on it. I will do my best to explain what I did though.
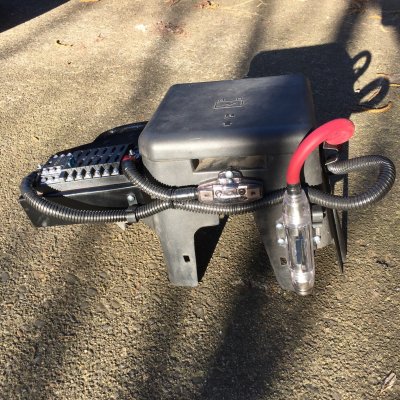
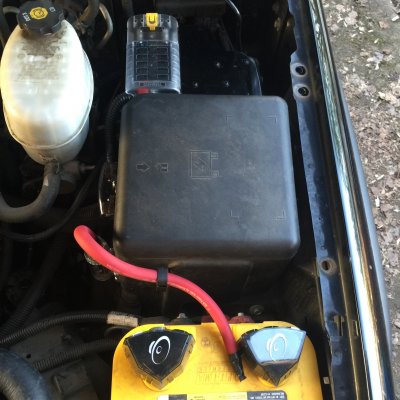
So first off, I went to the local junk yard and picked up a cheap dented up front bumper. My plan was to be able to use the stock or HD upper bumper cap and the 05/06 lower Tahoe air damn. Once I got the bumper to the shop, we cut the bumper just below the seam where the upper cap mounts and removed the whole lower part of the bumper. We made sure to leave any mounting points still connected at the top. I then got a sheet of metal cut to my desired size and put through a roll form machine until I was able to get the curve pretty close to the same curvature of the stock bumper. We then welded that sheet to the upper chunk of the junk yard bumper. This gave me the shape I was looking for. I the had to sheets of metal cut so that I could roll form them for the 7" round lights to mount inside. After bracing the bumper so it would not deform, I next proceeded to cut out the spots for the lights, grilles, and license plate. The grilles are blocked off with a removable backer plate in case I want some sort of air ducting sometime down the road. After I was happy with the basic design, I mounted it for the first time to check fitment. I also used that time to form up some brackets to mount to utilize the factory frame mounts at the bottom of the bumper. The next step was to finish metal working it and then some bondo and some sanding. Then some primer to keep it from getting any surface rust. I then had to take 2 of the 05/06 lower air damns and plastic weld them together to get the right size. I then handed it over to a buddy and he painted the bumper, grille, and hood. It was then time for some electrical wiring under the hood to make the JW led lights work with the lows on as fogs and for the highs to come on when I turn on my factory high beams. I did the "big 3" upgrade and then some as well as adding an auxiliary fuse block as pictured below. All my lights have their own heavy duty relay harnesses pulling from their power from the battery instead of the factory wiring.
Hopefully that makes some sense but if you have any questions please let me know and I will try to better explain any of the above steps.


Sent from my iPhone using Tapatalk


