Hurlz07Tahoe
Full Access Member
Ok. So I did it. I spent some time thinking and wandering around my local hardware store and came up with this.
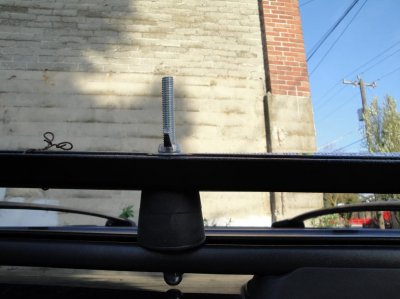
I got 6 a inch long, threaded 3/8" steel rods, washers, rubber washers, nuts, rubber stoppers (which I later drilled holes through), and wing nuts.
I drilled holes in the metal roof rails, near the foot pads for increased support. I put a metal puddy knife under the rail to stop the drill bit when it finally broke through to the other side. Then slid the rod down through the hole and tightened on the lower, capped nut (had to file the rounded top of the nut down so it wouldn't rub on my roof when the rail was loaded). Then tightened down a hex nut, a metal washer, and a rubber washer on top of the rail. Next slid two rubber stoppers (couldn't find one that was big enough so I took two, one slightly larger to keep the tapper the same) on top of the rail. I notched out the bottom of the lower rubber stopper so that it would sit flush on the rail and wrap around the nut.
Then a locking nut on top of the rubber stoppers to hold it all in place. Then the hi-lift jack and two rubber washers, a metal washer, and a wing nut to hold it all together.
Next I'll drill a small hole near the top of the rod, just above the wing nuts so that I can put a small lock on it for safety.
I know it doesn't look great but it's only for when I need it and I can quickly put it on and take it off.
I didn't go across to the other rail because its a 48" jack and the roof rails are just 48" apart so it wouldn't fit. I also carry a roof box on the cross rails so it would just get in the way if I ever had both on at the same time.


