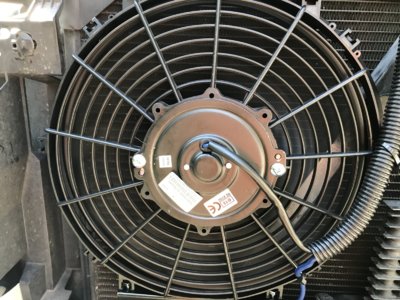
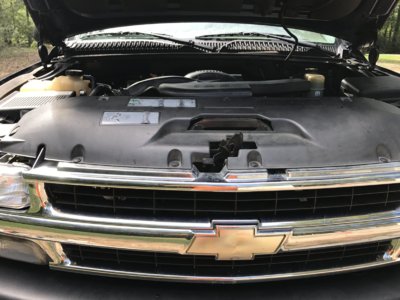
How To : Aux cooling fan/ condenser fan install with pics!

Disclaimer: Links on this page pointing to Amazon, eBay and other sites may include affiliate code. If you click them and make a purchase, we may earn a small commission.

Knightstormz

TYF Newbie
Joined
Jul 12, 2017
Posts
10
Reaction score
10
Ok guys,
My first thread here is going to be a how-to after some info. I will begin the how-to in the next post.

The story goes like this. I recently bought a clean 2002 Tahoe for hauling my kayaks and dogs and to keep the miles off my new Tundra. The air conditioning is cold while driving but at stop lights and idling here in the hot southeast the air leaves a lot to be desired.
I checked the refrigerant charge and it was good, replaced the fan clutch with oem, then replaced that clutch with a heavy duty version , cleaned the condenser and radiator fins, etc. After all this the air was the same, great idling at 1000 rpm or going down the highway but still sucking bad at low speed idle or in slow moving heavy traffic.

Then I came here , and elsewhere to read and find a fix and stumbled onto the TSB # 01-01-39-004A for adding an aux fan to the front side of the condenser. I still have not found a single instruction thread with pics , only the TSB text. So , I decided to do the reading and then do the install, take pics, and share here with people who might be able to use the info.
My apologies for all the reading you have to do prior to getting to the install but you have made it through the boring stuff.
I'm at work and will start the install shortly and in a separate post.
 
OP
OP
Knightstormz

Knightstormz

TYF Newbie
Joined
Jul 12, 2017
Posts
10
Reaction score
10
Parts needed to do the install.

Fan - AcDelco 15-8686 or similar . I used Dorman 621-300.
Harness- GM 88880045 .
1 15"-18" piece of 12-14 gauge wire
2 14-16 gauge butt splices
1 quick splice
4 feet of split wire loom
1 14-16 gauge ring terminal
8" section of heat shrink tubing
zip ties
electrical tape


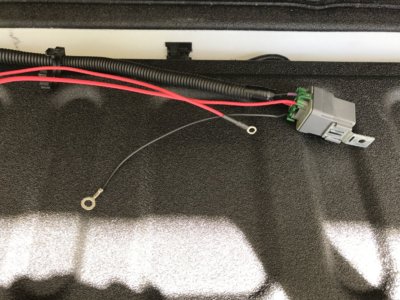
The first thing we want to do is separate one wire out of the harness. There are two red wires coming out of the relay. Remove the electrical tape from the wires and loom. Look at the bottom of the relay and find the number 87 marked there with one red wire beside it. Take this wire out of the wire loom but leave it connected to the relay.
IMG_0748.JPG

When you get this wire out go ahead and put electrical tape back in the spots you removed it from.

Now go to the truck and disconnect the negative battery cable. Remove the upper radiator cover , headlights, grille , core support to fender brace over the battery( mine was missing) , cowl to fender brace right at the underhood fuse box, fuse box cover, and fuse box housing( just snaps on ).
This is what it should look like now.
IMG_0815.JPG
Next take one of your core support to fender bolts and put it through the ring terminal on the black wire from your harness and then through the relay mount bracket and temporarily mount it where the brace mounts next to the radiator.
IMG_0762.JPG
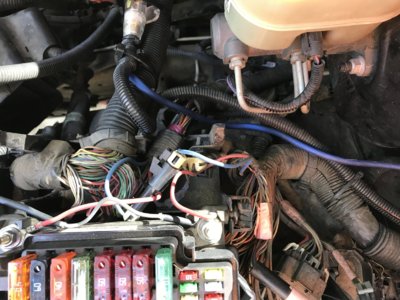
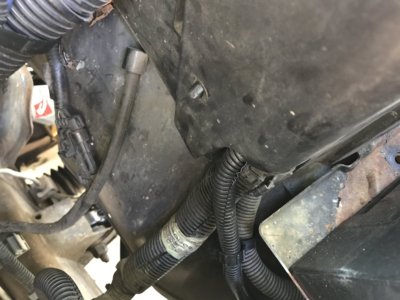
Take the wire loom with the purple and red wires in it and route it down under the pcm and back up to the fuse box. There are other harnesses to follow and provisions on the new harness to secure it to the existing harnesses.

Now unsnap the fuse box from its mount and lift it up so you can get to the underside. It is fastened on the front , back ,and next to the fender.
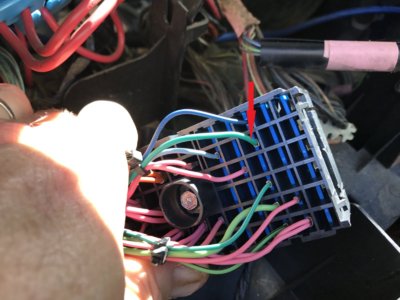
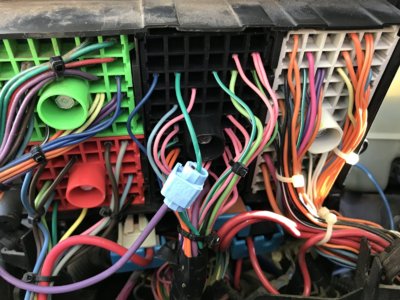
You will be looking for the dark green wire in location C2 B3. I removed the C2 connector in this pic just to show which wire you are tapping into . This is the wire that will send the signal to your fan relay when the compressor is running.
IMG_0754.JPG

Take your quick splice and splice the purple wire here. You can also solder if you like instead of splicing.
IMG_0757.JPG

Continued in the next post due to photo restrictions.....
 
Last edited:

inmypassatlife

Full Access Member
Joined
Feb 21, 2017
Posts
979
Reaction score
672
yep, i already bought my fan and just have yet to add it to my condenser, but this is the right way to go about it. I was just going to add in a relay and a hidden dash switch so i can power when needed.
 
OP
OP
Knightstormz

Knightstormz

TYF Newbie
Joined
Jul 12, 2017
Posts
10
Reaction score
10
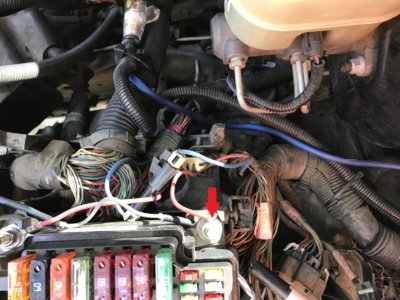
Now put the fuse box back down in its place and make sure the purple wire isnt pinched and runs through the cutout on the front where the other harness comes in. Once back in place take the 13mm nut off the stud with the existing red wire on it . Install the red wire with the fusible link from your new harness on the stud and reinstall the nut. This is your power feed.
IMG_0815.JPG
You can now install the fuse box housing and cover making sure the new harness follows the existing harness through the relief cutouts on the housing.
IMG_0760.JPG
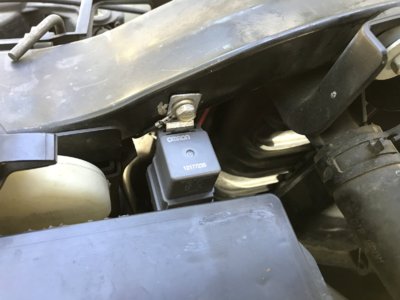
Reinstall your braces . Leave the relay where it is and put the leg of the brace on top with the ground terminal in the middle. Remember, my Tahoe is missing this brace so I am assuming the way I typed it will work on your vehicle.

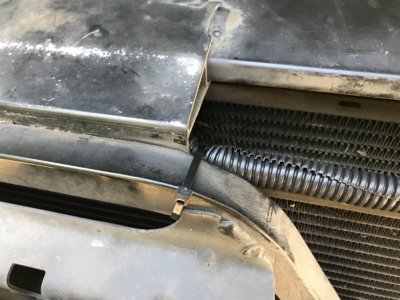
Install your extra piece of wire loom over the red wire you pulled out of the relay harness and route the wire under the top radiator support over toward the condenser.
IMG_0811.JPG
IMG_0810.JPG
Secure the wire loom with zip ties.
 
Last edited:
OP
OP
Knightstormz

Knightstormz

TYF Newbie
Joined
Jul 12, 2017
Posts
10
Reaction score
10
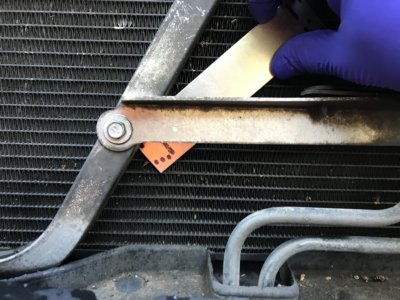
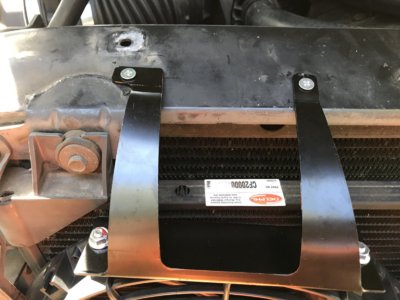
Now its time to mount the fan. You will need to eyeball it and find the best place to mount it as this was not the original design for the truck when it rolled off the line. I mounted mine where I thought the TSB was referring . Hold the fan with the short legs at the bottom and the right leg will mount on the cross support that the trans cooler is on. Hold it in place and mark the hole.
Make sure you use something between the bracket and condenser when you drill to ensure you do not damage the condenser.
IMG_0797.JPG

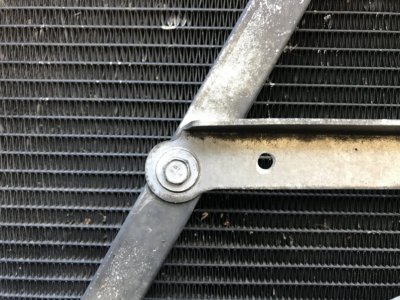
I drilled a 1/4" hole.

IMG_0798.JPG
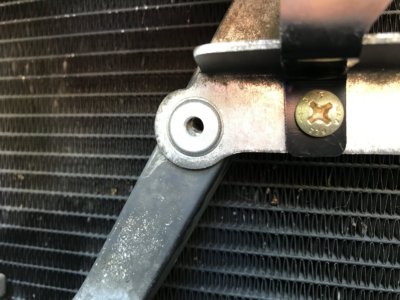
Now mount the fan with a bolt or screw but dont fully tighten it yet. The left lower leg will not mount to anything. Dont worry , when the other three legs are mounted it is plenty secure.
IMG_0799.JPG
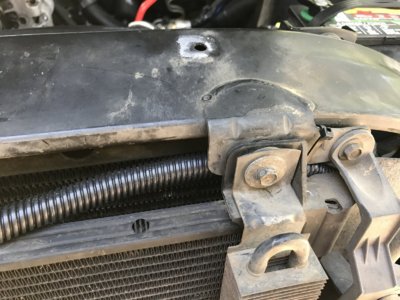
You will have to bend the long top legs to mount on top of the upper radiator support. Make sure when you bend them that the fan blades spin freely without contacting anything. I bent mine and marked the holes , then drilled only through the top layer of the upper radiator support. Do not drill all the way through or you risk drilling the radiator. I used stainless self tapping screws that were 3/8" long.
IMG_0809.JPG
Tighten all your hardware now and make sure the fan blades rotate freely.
 
Last edited:
OP
OP
Knightstormz

Knightstormz

TYF Newbie
Joined
Jul 12, 2017
Posts
10
Reaction score
10
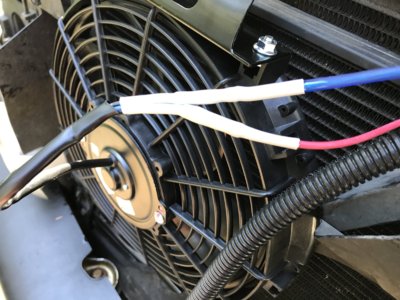
Cut the plug off the fan unless you bought the weatherpack pico connector. Strip the insulation back 1/4" on the two fan wires. Cut the ring terminal off the red wire from the relay harness and strip back the insulation. Strip the insulation off both ends of the extra piece of wire listed in the parts list . Put a 4 inch section of heat shrink over the red wire above where you will splice. Now splice the red wire to the fan power wire. The Dorman had a blue positive wire. Put the heat shrink on your extra wire and then splice that wire to the ground wire from the fan. The Dorman had a black ground side. Once your splices are done slide the heat shrink over them and shrink with a heat gun or hair dryer.
IMG_0803.JPG
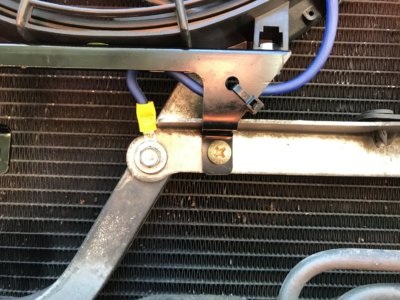
Now take the extra ring terminal and put it on the other end of the wire you had to provide . I used blue but color doesnt matter here. Remove the cross support bolt thats next to your lower fan mount bolt.
IMG_0804.JPG
Install your newly made ground wire ring terminal here and tighten the bolt. Secure your wiring with zip ties.
IMG_0805.JPG
IMG_0812.JPG
 
Last edited:
OP
OP
Knightstormz

Knightstormz

TYF Newbie
Joined
Jul 12, 2017
Posts
10
Reaction score
10
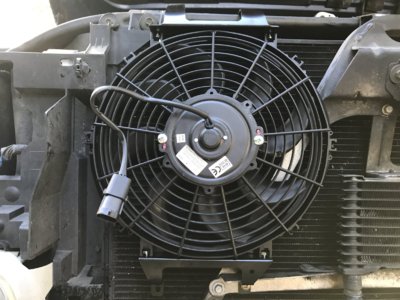
Now reconnect the negative battery cable. Start your truck and test the operation.
The Dorman fan moves a good amount of air for its size and isnt really too loud sitting in the truck. I let mine idle for 30 minutes with the air on . If yours works as planned reinstall your grille, headlights, and upper radiator cover.
IMG_0818.JPG


Grab a cold drink and enjoy your cold air because you are done!
 
Last edited:
OP
OP
Knightstormz

Knightstormz

TYF Newbie
Joined
Jul 12, 2017
Posts
10
Reaction score
10
I wanted to give an update after using the fan for a week.
I sat in the Tahoe for 30 minutes idling after driving 30 minutes to work in 95 degree heat. The air was still ice cold when I turned the truck off .
 

TheAutumnWind

Full Access Member
Joined
Jan 8, 2015
Posts
3,222
Reaction score
1,920
I'm going to have to do this. It has been 100+ so often lately...

The ac doesnt work great when its 110 outside.

Looks like a great mod! Cant believe i hadnt thought of it previously


Edit
Looks like my hvac issues may be related to other things so im gonna try fixing those first.... Is this even necessary for someone with electric fans?
 
Last edited:
OP
OP
Knightstormz

Knightstormz

TYF Newbie
Joined
Jul 12, 2017
Posts
10
Reaction score
10
No, if you have the electric fans oem or have done the mod this won't help any .
Good luck getting yours going.
 

Forum statistics

Threads
132,037
Posts
1,861,365
Members
96,485
Latest member
ldiddy
Top