Just Fishing's 09 Tahoe Build thread

Disclaimer: Links on this page pointing to Amazon, eBay and other sites may include affiliate code. If you click them and make a purchase, we may earn a small commission.

OP
OP
Just Fishing

Just Fishing

Can't fix stupid
Joined
Aug 30, 2020
Posts
3,993
Reaction score
8,699
Location
Utah
So power lumbar...

this was really easy.
First thing is you need to pull the seat back off.

Covered in this video: @ about 22.22

Once you have the back off.
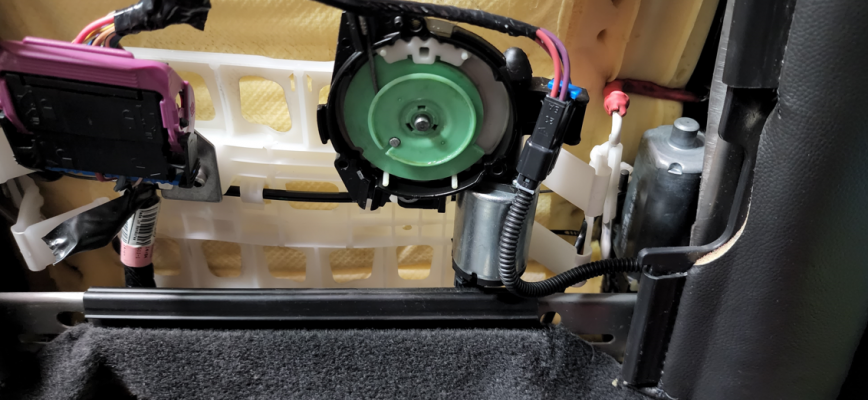
you're going to have something like this.
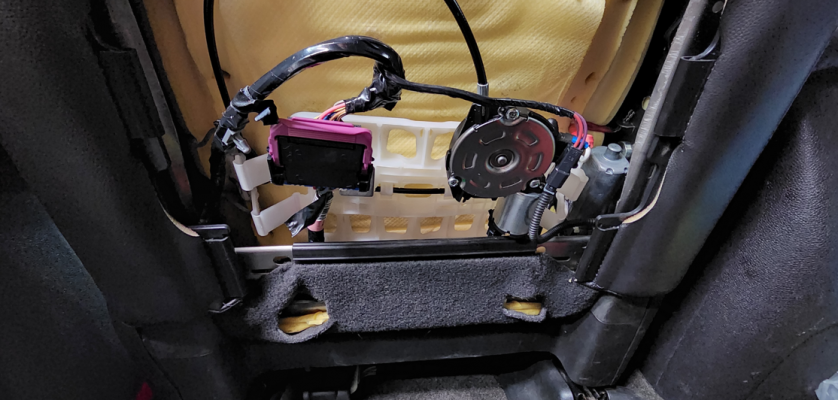
1656025573478.png

Screws to that cover are those weird square bit that every dewalt toolbit set has had a bunch of, but I never find any actual use since most things are torqx now.

https://www.gruvenparts.com/ replacement gears,
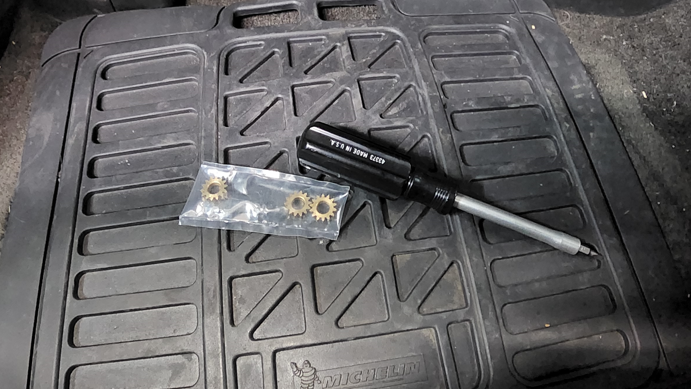
1656025657413.png

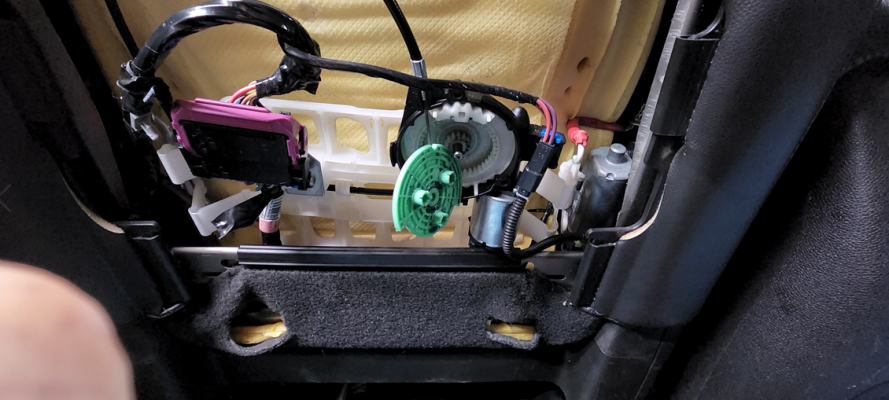
Cover removed,

1656025713077.png


Green thing removed,
1656025742069.png

There were little bits of white gears sitting in here, but I already cleaned it out last time i had this apart.


New brass gears installed; I added some lube, so they functioned smoothly.
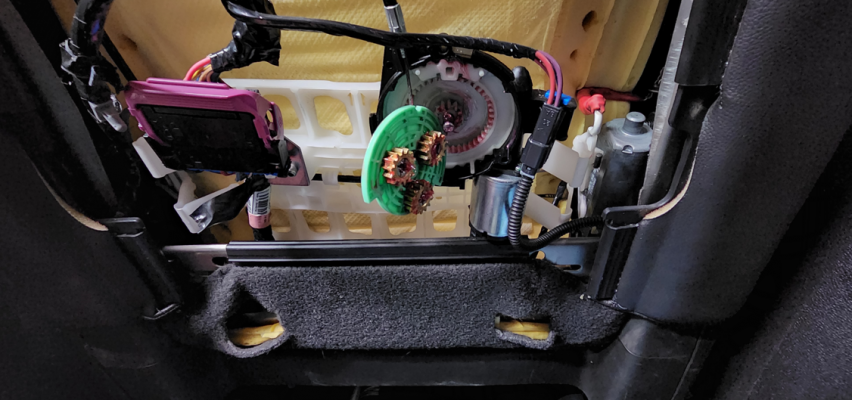
1656025811915.png

It took some work to get the gears to mesh and for everything to go back in, I used a small pick to rotate the gears until it was wanting to line up.
 
OP
OP
Just Fishing

Just Fishing

Can't fix stupid
Joined
Aug 30, 2020
Posts
3,993
Reaction score
8,699
Location
Utah
I'll also add that this the "Ring" or outside white gear in the image has a split in it.
Like it had too much pressure at one time, and it cracked under the strain, then likely turned the little white gears into powder/goo.

I reused that gear.
So far, I don't see any negative effects, and the lumbar seems to be working just fine.
 
OP
OP
Just Fishing

Just Fishing

Can't fix stupid
Joined
Aug 30, 2020
Posts
3,993
Reaction score
8,699
Location
Utah
This weekend I had a great time with the tahoe.
New suspension worked out great while doing some decent speed down the dirt roads on the way to the ol' property/my little piece of desert.

2in lift on the front is working out fantastic.
I love the new stance.
Almost a tiny bit lower on the rear than the front when loaded down with a couple hundred lbs of gear.

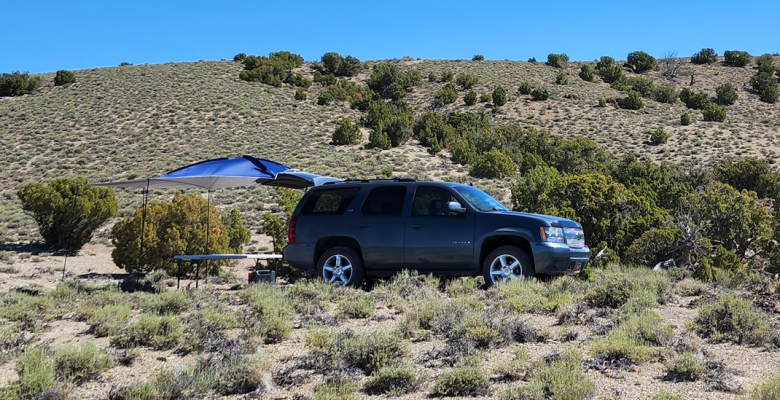
I picked up a somewhat cheap canopy that's meant to partially suppprt off the back or the side of a vehicle

It worked ok for the most part, but it did have some difficulty with wind later in the day.

The setup,
1656274149804.png

Overall, I like it, and I'm thinking I'll keep the canopy.
but i'll probably add one of those easy up canopy things later on.

the last one i had was much easier to deal with, especially when taking it back down. ;)

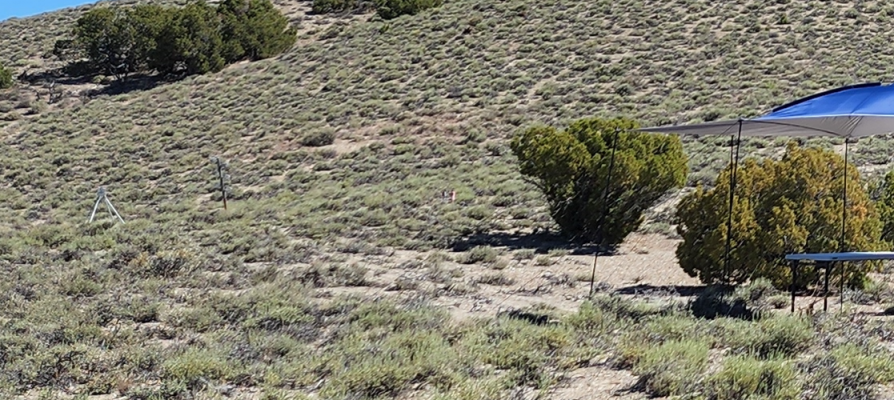
You can't really make it out in the image, but here are two of my targets out in the distance.
1656274312383.png

A good day overall.
I had a nice selection of antiques out with me that have very limited trigger time, and I'm a history nerd when it comes to pews.

I brought white and red spray paint to touch up the targets.
That day, Red seemed to be the color.
White ran too much into the background for my liking.


And speaking of Red, I am a lobster today.

:yaoface2:
 
OP
OP
Just Fishing

Just Fishing

Can't fix stupid
Joined
Aug 30, 2020
Posts
3,993
Reaction score
8,699
Location
Utah
So, one of the things that keeps annoying me, my freaking lifters.
Doing some reading on the subject, it suggests that standard LS7 lifters can have issues with "Race" springs.
Such as my Pac double springs that came with my AFR heads.

one solution would be to change them to something like "Morel #7717" lifters.
Much tighter clearances, and lowers that preload range from .050 - .100 to something like .050 - .080
Summit seems to offer them under their branding.

Anyways,
continuing down the "add more preload"
I'll probably just swap out the springs in the end. :jester:
 
Last edited:
OP
OP
Just Fishing

Just Fishing

Can't fix stupid
Joined
Aug 30, 2020
Posts
3,993
Reaction score
8,699
Location
Utah
Ok so a decision has been made...
I tried adding thicker oil to see if it helped the lifters, and that's a "sort of".
Now I think it's acting like I have too much preload...
:yaoface2:

So, I'm going with the lifter change out option using the ones above.


Fun little thing about these lifters, they are still LS7 lifters in the bottom, but they are identical to the original non dod lifters in every way.
I discovered this while cleaning the new lifters to prepare for install later when I'm motivated to tear into things again.
One of the retaining clips came off and went into the void in my office, so I went hunting for a replacement and found it with the original high mileage lifters!

Example,
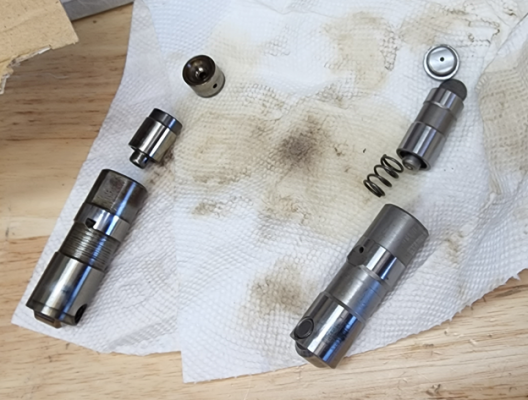
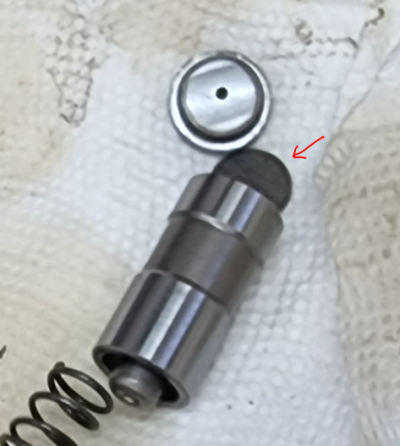
Original lifter on the left, and a lifter identical to to the ones i have currently installed.
1657136114445.png


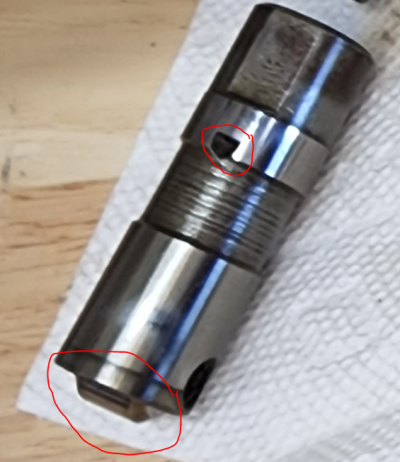
Main differences is the oil feed hole.
On the original lifters, the feed hole is lined up with the roller
1657136194621.png

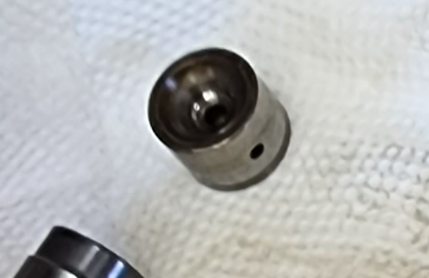
Then the pushrod feed hole is on a solid machined piece, the oil feed hole being on the side
1657136259467.png

From my Original lifters + the new lifters, this should be pointed away from the oil feed hole in the lifter body.
 
OP
OP
Just Fishing

Just Fishing

Can't fix stupid
Joined
Aug 30, 2020
Posts
3,993
Reaction score
8,699
Location
Utah
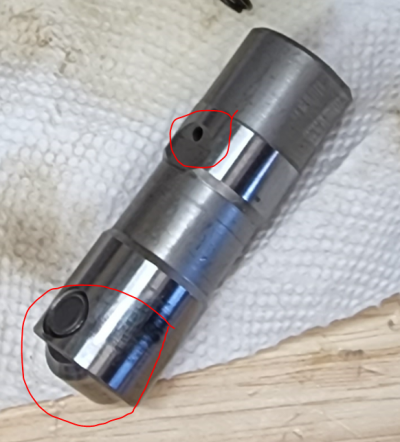
Then the current lifters,
Feed hole is on the side of the roller.
1657136381071.png

Oil feed comes from this little restrictor plate.
1657136442210.png


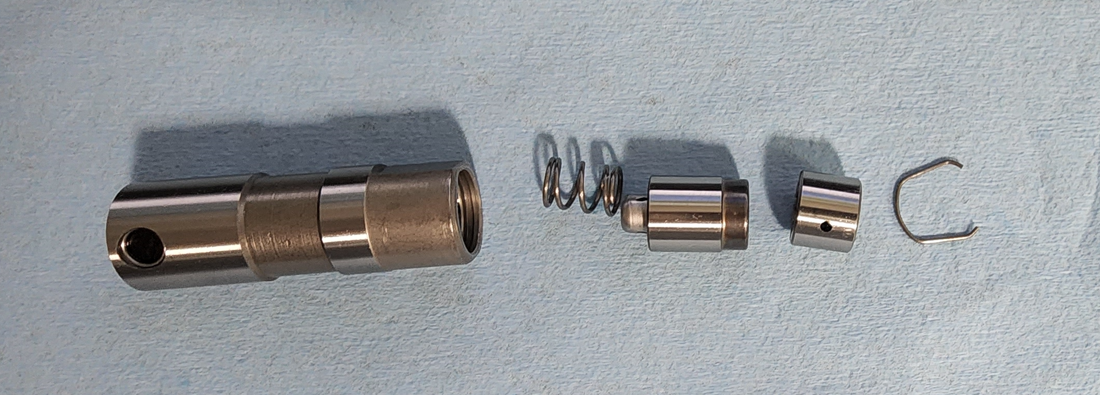
New lifter,
1657136484348.png

Identical to the originals, even down to the retaining clip!
And just like the originals, the fitting is very tight.
it takes a little effort to get everything to come apart and slide back together again.
Clearances seem a bit tighter throughout the whole set.

I also read that your supposed to line that lifter body oil feed hole directly into the oil gally.

Something I got from the corvette forum, and as long as they are installed correctly, they should hopefully quiet my valvetrain down.
 
OP
OP
Just Fishing

Just Fishing

Can't fix stupid
Joined
Aug 30, 2020
Posts
3,993
Reaction score
8,699
Location
Utah
I'm slowly planning out the next task of swapping out my lifters for different ones.
Things have stabled out a bit using 15w40 big rig oil :jester:

I have this camshaft now.
Using 1.8ratio full rollers, I'm happy with it at low rpm.
that in turn grants me some pretty decent gas mileage I can idle everywhere pretty much.

I'm increasing my quench from .040 to .050, that lowers my static compression ratio from like 10.3 down to about 10.1.
Part of that is the lack of a headgasket being available + that should let me get a little looser on the fuel requirements.

My last drive i had to top off in the middle of nowhere.
I paid a premium price for premium fuel.
but the Tahoe let me know that was not premium. :jester:

So, this would be a fantastic time to slap in a different camshaft.
I find reference to this "Truck Norris camshaft"

But it doesn't seem like much of an upgrade, it even has lower lift!
 
OP
OP
Just Fishing

Just Fishing

Can't fix stupid
Joined
Aug 30, 2020
Posts
3,993
Reaction score
8,699
Location
Utah
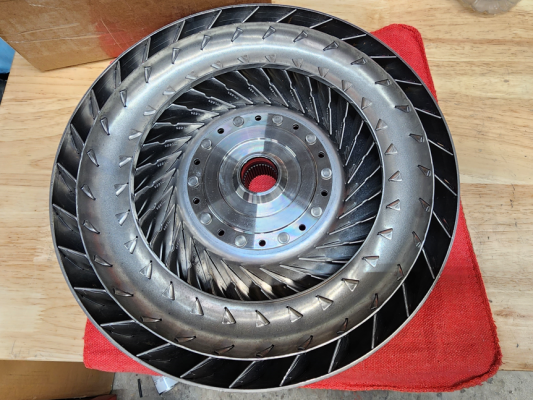
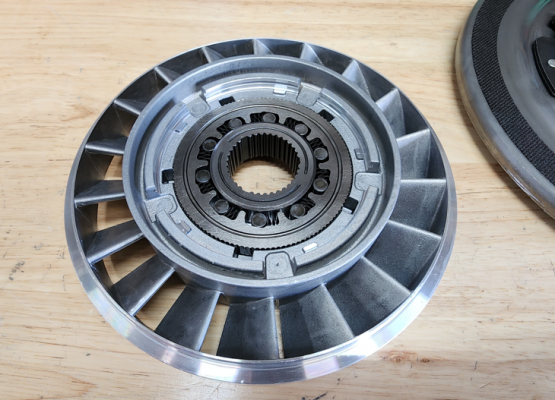
I spent some time opening up my old/orignal tourque converter to see what kind of condition it was in, plus I wanted this fancy little part for a wall hanging or clock.

1665536040469.png

One thing I learned, cut the weld.
I opted to do that after watching some youtube videos.
I went through 3 cutting discs with my die grinder before I broke out the Sawzall.
Once I drained my three Dewalt standard 20v batteries, I migrated to the airsaw. :jester:

Getting that weld out is important as the two outer halves are sandwiched together and fit with some pretty tight precision.

I cut through the weld, and through the inner wall.
Left with just a ring that I had to remove in order to pull the part out above.


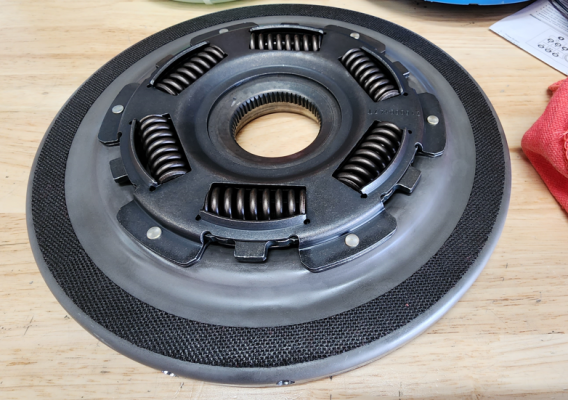
Here is the original clutch.
Has some material left!
1665536238858.png


Overall everything was in pretty good shape.
Meaning I don't believe the trash I found in the cooler lines came from this converter..


Another part that sits between the two turbine halfs rides on a bearing on both sides.

1665536337747.png

I pulled the cover off of it to show the inner one-way clutch/sprag thing it has.

interesting setup, I haven't fully wrapped my head around how the lockup clutch applies, however on the back of the clutch disc, there is a billet looking piston thing that the input shaft appears to seal on.

Without the transmission apart I can't see how it actually functions, but it seems pretty simple.

The converter body half has some pretty cool looking splines, but I tossed that, it's too big and heavy to do anything with.
 

Sparksalot

Supporting Member
Joined
Sep 20, 2020
Posts
6,515
Reaction score
19,799
Location
Bastrop County, Texas
I spent some time opening up my old/orignal tourque converter to see what kind of condition it was in, plus I wanted this fancy little part for a wall hanging or clock.

View attachment 382613

One thing I learned, cut the weld.
I opted to do that after watching some youtube videos.
I went through 3 cutting discs with my die grinder before I broke out the Sawzall.
Once I drained my three Dewalt standard 20v batteries, I migrated to the airsaw. :jester:

Getting that weld out is important as the two outer halves are sandwiched together and fit with some pretty tight precision.

I cut through the weld, and through the inner wall.
Left with just a ring that I had to remove in order to pull the part out above.


Here is the original clutch.
Has some material left!
View attachment 382614


Overall everything was in pretty good shape.
Meaning I don't believe the trash I found in the cooler lines came from this converter..


Another part that sits between the two turbine halfs rides on a bearing on both sides.

View attachment 382615

I pulled the cover off of it to show the inner one-way clutch/sprag thing it has.

interesting setup, I haven't fully wrapped my head around how the lockup clutch applies, however on the back of the clutch disc, there is a billet looking piston thing that the input shaft appears to seal on.

Without the transmission apart I can't see how it actually functions, but it seems pretty simple.

The converter body half has some pretty cool looking splines, but I tossed that, it's too big and heavy to do anything with.
That's going to make a killer clock!

Add a pendulum for fun.
 
OP
OP
Just Fishing

Just Fishing

Can't fix stupid
Joined
Aug 30, 2020
Posts
3,993
Reaction score
8,699
Location
Utah
Not much going on other than I have racked up some miles on the new transmission and engine setup.

also due to air conditioning issues in the garage I had lined the walls with the reflective bubble insulation that they sell at Home Depot & lowes.
It really helped with the AC, especially after I lined the back wall behind my ********* toolbox.
Sun beats down on that wall and really heats it up.
I still have dreams of lining the ceiling and completing the walls.


For my garage heater use, it really made a difference.
Garage heats much faster, and it's easy to keep it comfortable in the cold weather.

More of a difference than I thought, I figured I would need to coat the ceiling before I saw much difference.
I also added a ceiling fan above my work bench, that sits pretty much in front of the heater outlet.


Anyways, I'm hoping to begin work on the Tahoe soon.

I'm planning to lower the compression from something like 10.3:1 to 10.1:1 using head gasket with the thickness of .040 vs the .030 I have now.
I believe that should allow me to get away with regular fuel...

New lifters going in with that, plus I'm changing the PCV setup to that of one for a corvette that pulls gasses from the valley vs the current valve cover.
I'm planning to allow air to suck through both sides of the valve cover vs just the passenger side.
I'm hoping that will help with oil flow back into the pan, plus keeping the rockers nice and clean looking.

My dual catch can setup I currently have has shown it's worth this winter.
Limited driving since I don't commute adds moisture into the engine.

More than I thought it would!

first catch can always catches the oil, and I never see anything in the second can.
this winter I saw milky oil as expected in the first catch can, and then somewhat clean water in the second!
Only a tiny bit of oil made it past the first, but I'm going with this as being a good idea at this point.

:cool:
 

Forum statistics

Threads
132,780
Posts
1,874,203
Members
97,619
Latest member
Jayster0966
Top