Geoffsfas10
Full Access Member
OK...so since I was being a turd in the General thread about tahoes, Im making a in progress build thread of my HID retrofit.
Little backstory...had Sierra with OEM Denali headlights, retrofited those with MH15.0 projectors and loved it. Drove behind that for the better part of 10 years. Got new tahoe, halogen reflectors are the suck. Tried LEDs, didnt like the fitment and still no cutoff.
SO... I started the retrofit research. TONS of info on the yukons, but not as much on tahoes. I was originally planning to go with a D2S projector or even the MLED projectors, but after some measuring and planning, there was LOTS of cutting involved. Not that I have a problem with that, but was wanting to minimize it. Enter the MH1 projector...again. So the newest version is the 7.0, which has a better bi-xenon solenoid, more width and sharper cut off. It also like other Morimoto projectors, has a threaded shaft for installation. However, the MH1 is supposed to be more bolt in ready, so its shaft is much thinner in diameter, as a direct replacement for an H7 bulb opening. I tried finding the details but it came back as the H7 base was just a slightly larger hole then the H11 as our low beams. With this being known, I ordered a bunch of stuff and some ebay headlights.
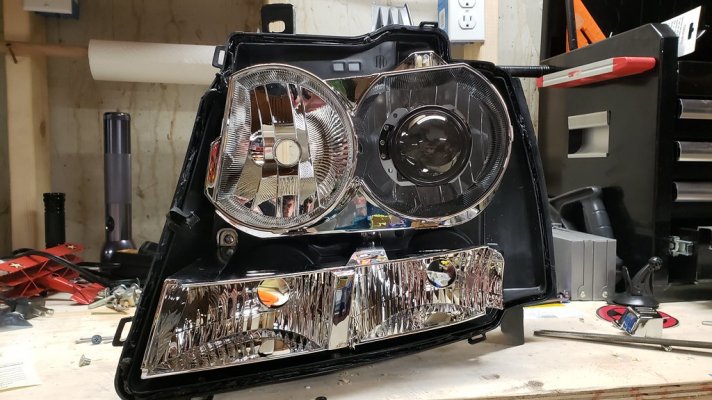
The ebay headlights opened easy enough, 200* for 10 minutes, one cracked right open, using boddy panel tools, and the other one took a second heating for about 5 minutes before it gave up. Now, with the headlights open, i tried to see if the shaft would just walk in, and it was close. So all I had to do was clip off the glare deflector, file it a little more evenly, and then using a round file, I worked the bulb opening til the shaft fit through.
 20200204_185403 by Geoff Anderson, on Flickr
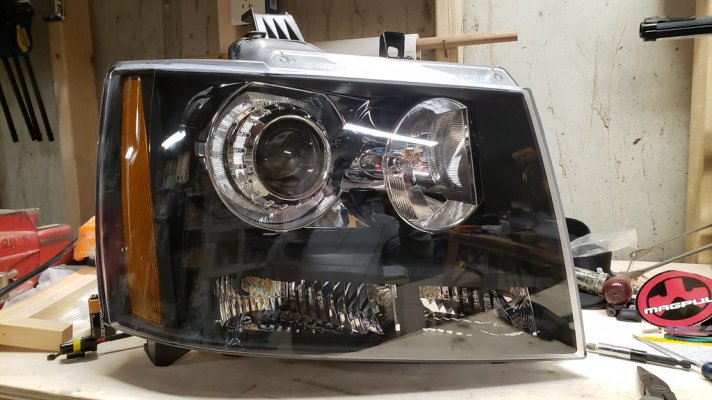
Projector sits right in there. Since the headlight access on these trucks is a royal PITA, i tried doing as much rotational alignement and height adjustment as I could in my basement. Using my computer desk, a bright ass LED flashlight and the same technique for aiming headlights, I rotated them and did a preliminary aim in my basement. Come to find out later, this worked out awesome.
 20200209_092603 by Geoff Anderson, on Flickr
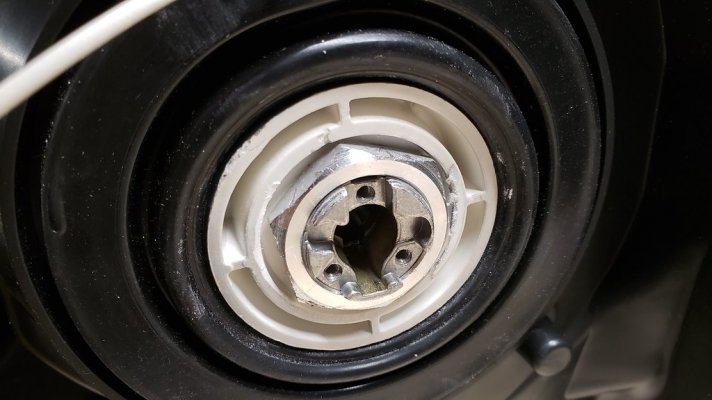
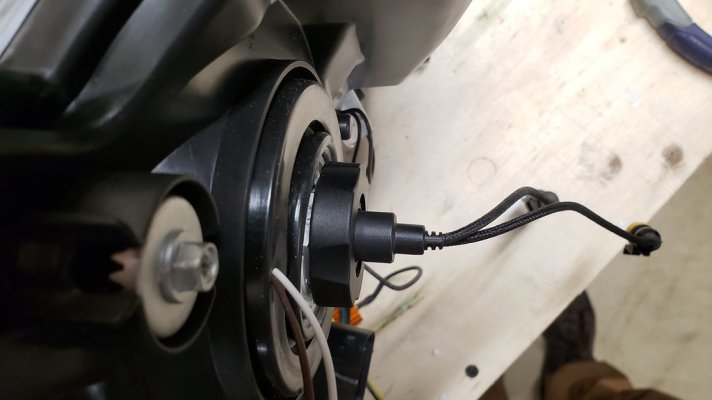
This shows the base of the shaft through the opened bulb opening with the lock nut in its final tighened position. I tighened these as tight as i could go, but still allow for some slight rotational movement so i could double check on the tahoe. Once I was good, i held the projector and tighened it down the rest of the way. Dont so super crazy getting it tight, dont want to break the reflector. These are very sturdy and solid in their final tightness in the housing.
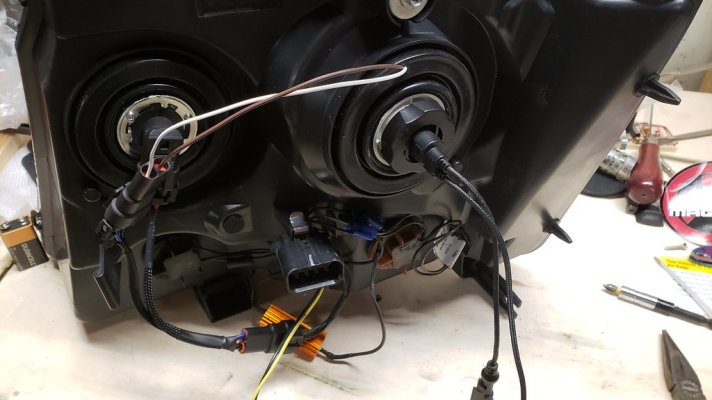
I also used the mounting hole for the glare deflector as my pass through for the high beam wires, then they are just poked through the rubber grommet on the back side here. I will show the complete rear assembly when Im finished with it.
 20200205_192200 by Geoff Anderson, on Flickr
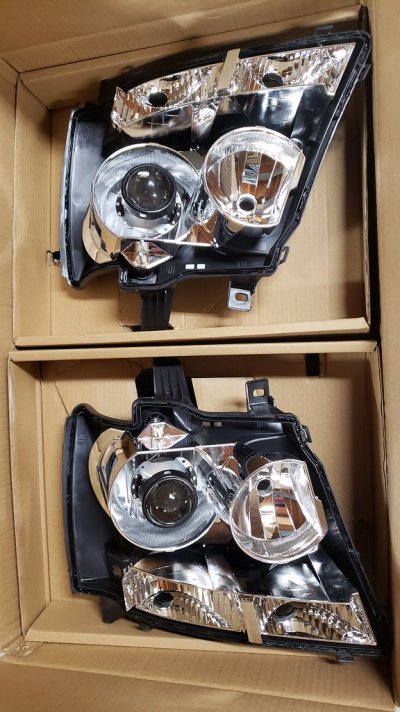
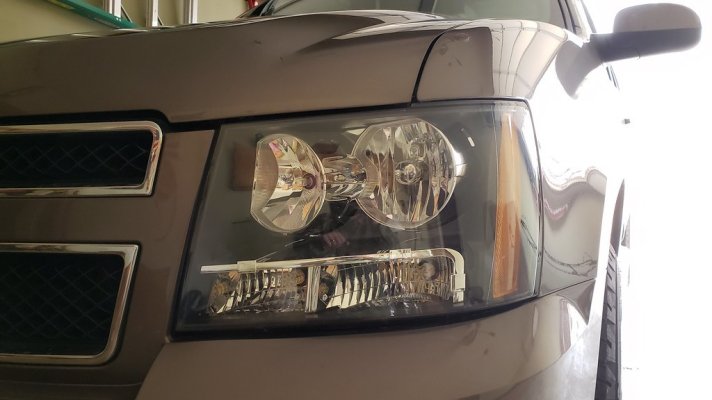
So at this point I was at test fit time. I found a simple trick of removing the 6 bolts across the top of the grill allows the bumper cover to drop down just enough that the entire operation of test fitting, including tool gathering, removal, install, temp wiring and reset to stock and cleanup, took only about 45 minutes.
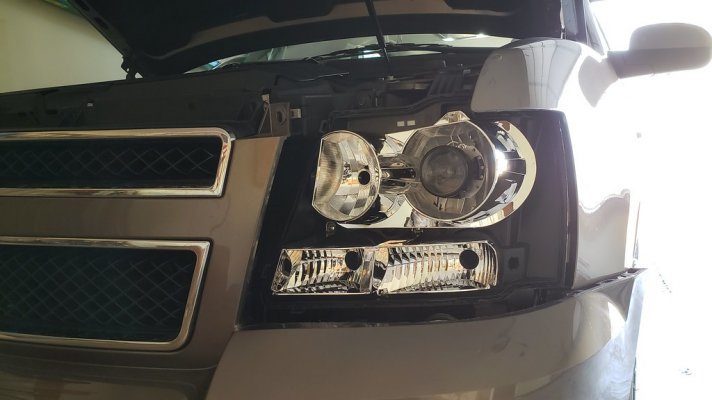
I was expecting the worst when I went to offer these lights up to the truck, since that freaking radiator support is right there by the bulb and the single best thing I could have hoped for happened....THEY FIT!! The MH1 is compact enough that even using the Moto1 bulb holders ( which I will show in another post ) they still clear the supports and allow for the best alignment of the H1 HID.
 20200208_150301 by Geoff Anderson, on Flickr
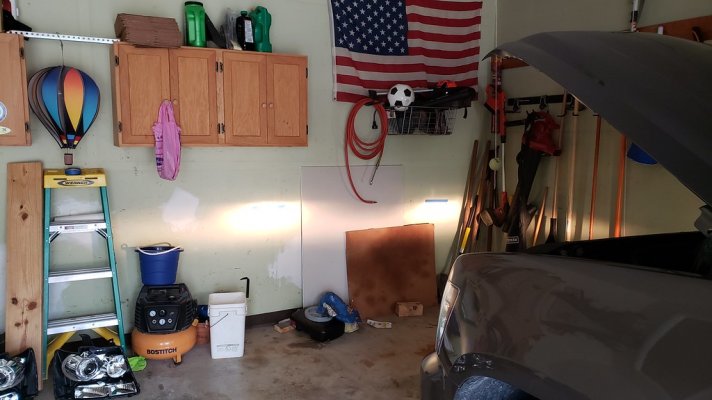
So with them on the truck, I turned the headlights on and....
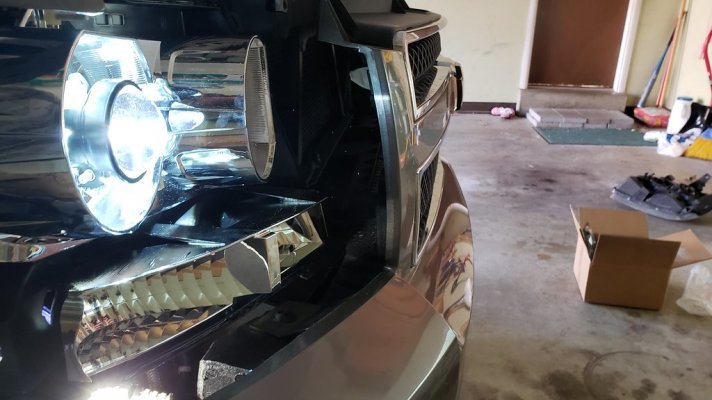 20200208_152713 by Geoff Anderson, on Flickr
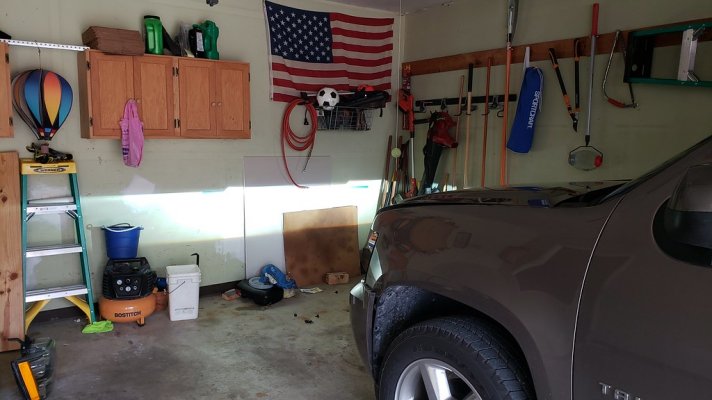
Oh buddy! the cutoff is awesome, they matched perfectly for rotational alignment and the heights were close enough that some readjusting with the alignment screws they will be even. Im not going to post my inital cut off pictures, because they arent aimed yet and thats the best part, gotta wait til its night and its not in my garage but let me tell ya. The factory beams were about 2' wide on the wall at this distance in my garage and they werent touching each other. The projectors were both beams touching, and the far side of the drivers side was almost touching that red snow shovel handle you see bending around in that picture, which is about 10' away from the truck.
These are going to be awesome, im super pumped and this retro has been SUPER easy. I kinda screwed up trimming the E46 extended shields a little bit, but i made a on the flay change that I think will work out ok, especially since they are jb welded in place now. All I am waiting for now is some time to bake the lights again, put the lenses back on and my high beam splitters to arrive, i forgot to order them the first go around.
My plan is to find a good place this week and take some OEM suck pictures, and then go back out in a week or two with the HIDs and take the same shots. We all know its going to be 1000% better but we still want to see it.
Little backstory...had Sierra with OEM Denali headlights, retrofited those with MH15.0 projectors and loved it. Drove behind that for the better part of 10 years. Got new tahoe, halogen reflectors are the suck. Tried LEDs, didnt like the fitment and still no cutoff.
SO... I started the retrofit research. TONS of info on the yukons, but not as much on tahoes. I was originally planning to go with a D2S projector or even the MLED projectors, but after some measuring and planning, there was LOTS of cutting involved. Not that I have a problem with that, but was wanting to minimize it. Enter the MH1 projector...again. So the newest version is the 7.0, which has a better bi-xenon solenoid, more width and sharper cut off. It also like other Morimoto projectors, has a threaded shaft for installation. However, the MH1 is supposed to be more bolt in ready, so its shaft is much thinner in diameter, as a direct replacement for an H7 bulb opening. I tried finding the details but it came back as the H7 base was just a slightly larger hole then the H11 as our low beams. With this being known, I ordered a bunch of stuff and some ebay headlights.
The ebay headlights opened easy enough, 200* for 10 minutes, one cracked right open, using boddy panel tools, and the other one took a second heating for about 5 minutes before it gave up. Now, with the headlights open, i tried to see if the shaft would just walk in, and it was close. So all I had to do was clip off the glare deflector, file it a little more evenly, and then using a round file, I worked the bulb opening til the shaft fit through.
 20200204_185403 by Geoff Anderson, on Flickr
Projector sits right in there. Since the headlight access on these trucks is a royal PITA, i tried doing as much rotational alignement and height adjustment as I could in my basement. Using my computer desk, a bright ass LED flashlight and the same technique for aiming headlights, I rotated them and did a preliminary aim in my basement. Come to find out later, this worked out awesome.
 20200209_092603 by Geoff Anderson, on Flickr
This shows the base of the shaft through the opened bulb opening with the lock nut in its final tighened position. I tighened these as tight as i could go, but still allow for some slight rotational movement so i could double check on the tahoe. Once I was good, i held the projector and tighened it down the rest of the way. Dont so super crazy getting it tight, dont want to break the reflector. These are very sturdy and solid in their final tightness in the housing.
I also used the mounting hole for the glare deflector as my pass through for the high beam wires, then they are just poked through the rubber grommet on the back side here. I will show the complete rear assembly when Im finished with it.
 20200205_192200 by Geoff Anderson, on Flickr
So at this point I was at test fit time. I found a simple trick of removing the 6 bolts across the top of the grill allows the bumper cover to drop down just enough that the entire operation of test fitting, including tool gathering, removal, install, temp wiring and reset to stock and cleanup, took only about 45 minutes.
I was expecting the worst when I went to offer these lights up to the truck, since that freaking radiator support is right there by the bulb and the single best thing I could have hoped for happened....THEY FIT!! The MH1 is compact enough that even using the Moto1 bulb holders ( which I will show in another post ) they still clear the supports and allow for the best alignment of the H1 HID.
 20200208_150301 by Geoff Anderson, on Flickr
So with them on the truck, I turned the headlights on and....
 20200208_152713 by Geoff Anderson, on Flickr
Oh buddy! the cutoff is awesome, they matched perfectly for rotational alignment and the heights were close enough that some readjusting with the alignment screws they will be even. Im not going to post my inital cut off pictures, because they arent aimed yet and thats the best part, gotta wait til its night and its not in my garage but let me tell ya. The factory beams were about 2' wide on the wall at this distance in my garage and they werent touching each other. The projectors were both beams touching, and the far side of the drivers side was almost touching that red snow shovel handle you see bending around in that picture, which is about 10' away from the truck.
These are going to be awesome, im super pumped and this retro has been SUPER easy. I kinda screwed up trimming the E46 extended shields a little bit, but i made a on the flay change that I think will work out ok, especially since they are jb welded in place now. All I am waiting for now is some time to bake the lights again, put the lenses back on and my high beam splitters to arrive, i forgot to order them the first go around.
My plan is to find a good place this week and take some OEM suck pictures, and then go back out in a week or two with the HIDs and take the same shots. We all know its going to be 1000% better but we still want to see it.

 from the sunroof