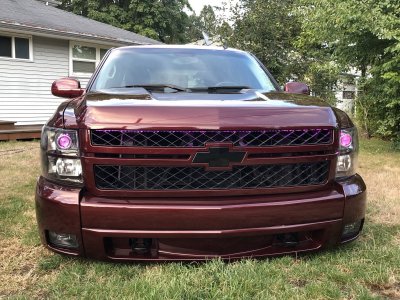
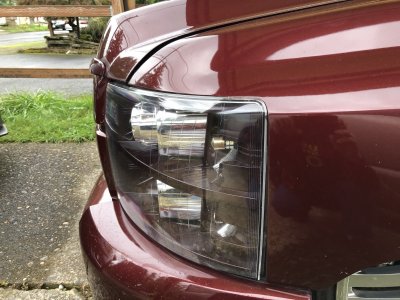
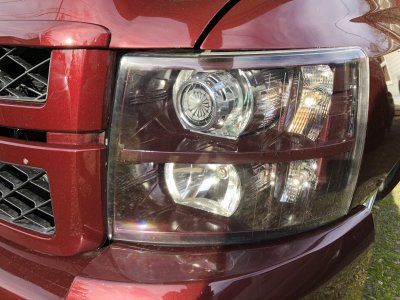
Morimoto MH1 Bi-Xenon Retrofit in Tahoe - Build Thread - FINISHED

Disclaimer: Links on this page pointing to Amazon, eBay and other sites may include affiliate code. If you click them and make a purchase, we may earn a small commission.

992dr

Full Access Member
Joined
Oct 8, 2009
Posts
3,179
Reaction score
1,231
Location
Eastern N.C.
Wow, they look incredible. Nicely done.
Makes me rethink going the retrofit route again. Especially with how easy they were to install.

The assemblies fit with no cutting?
Did you use any type of adhesive to hold them or was the nut enough?
 

Dantheman1540

Full Access Member
Joined
Feb 13, 2020
Posts
4,856
Reaction score
10,503
Location
Sugar Loaf Mountain
Man those look awesome! So many people out there tinting their headlights and tail lights making driving more dangerous. Glad to see people still like to see where they are going and be seen! :headbang:
 
OP
OP
Geoffsfas10

Geoffsfas10

Full Access Member
Joined
Nov 27, 2019
Posts
781
Reaction score
1,695
Location
St. Louis
Wow, they look incredible. Nicely done.
Makes me rethink going the retrofit route again. Especially with how easy they were to install.

The assemblies fit with no cutting?
Did you use any type of adhesive to hold them or was the nut enough?

There no cutting done to the housings themselves. You will have to enlarge the bulb opening hole ever so slightly to get the shaft to come through, but it took all of 5 minutes with a file to get them to fit. I feel pretty confident that the nut on the shaft will hold them in place. the nut is aluminum, so when you crank it down to tightness, it deforms slightly which locks itself in place.

You do need to cut on the radiator support behind the lights just a tiny amount, theres part of the inner fender metal thats folded back onto it, and they dont clear by just the thickness of the metal...BOO!!! It was sooo close haha. I'd take a picture of that but it looks terrible and i dont what to show that until i can clean it up with a grinder or something
 

992dr

Full Access Member
Joined
Oct 8, 2009
Posts
3,179
Reaction score
1,231
Location
Eastern N.C.
There no cutting done to the housings themselves. You will have to enlarge the bulb opening hole ever so slightly to get the shaft to come through, but it took all of 5 minutes with a file to get them to fit. I feel pretty confident that the nut on the shaft will hold them in place. the nut is aluminum, so when you crank it down to tightness, it deforms slightly which locks itself in place.

You do need to cut on the radiator support behind the lights just a tiny amount, theres part of the inner fender metal thats folded back onto it, and they dont clear by just the thickness of the metal...BOO!!! It was sooo close haha. I'd take a picture of that but it looks terrible and i dont what to show that until i can clean it up with a grinder or something

You sir, are the man, I appreciate the info:happy160:
Was the area behind the headlight easily accessible and big enough to fit a power tool of some sort to grind/drill? It's been a few years since I had my headlights out.


edit: This is a stupid question: What harness did you get? The "match stock bulb size" harness? Its the HD Relay H11/H9/H8/880, correct? Or is it the Canbus version?
 
Last edited:
OP
OP
Geoffsfas10

Geoffsfas10

Full Access Member
Joined
Nov 27, 2019
Posts
781
Reaction score
1,695
Location
St. Louis
You sir, are the man, I appreciate the info:happy160:
Was the area behind the headlight easily accessible and big enough to fit a power tool of some sort to grind/drill? It's been a few years since I had my headlights out.


edit: This is a stupid question: What harness did you get? The "match stock bulb size" harness? Its the HD Relay H11/H9/H8/880, correct? Or is it the Canbus version?

Oh yeah, theres plenty of room behind there. I had my dremel with the cable attachment on it and a cutting wheel. later i just barely missed the clearance on the passenger side so I notched it out with a power drill. Lots of room for activities. If i were to do it again, and I still might do this to clean it up, I want to run "half" a hole saw on itand once it breaks through the metal, remove those pieces. And remember, prime and paint the area after you cut, no sense in giving rust free access.

Harness is the Morimoto one, and yes, match the stock bulb size, so H11. You do not need a canbus harness for the 14 and older. The make a single harness ( 9006 socket ) and then send a adapter pigtail with it to convert it to the the OEM bulb. You also will only plug the OEM wiring into one side of the harness, the other plug I tucked up and taped real nice with electrical tape so the connection isnt exposed.
 

992dr

Full Access Member
Joined
Oct 8, 2009
Posts
3,179
Reaction score
1,231
Location
Eastern N.C.
Oh yeah, theres plenty of room behind there. I had my dremel with the cable attachment on it and a cutting wheel. later i just barely missed the clearance on the passenger side so I notched it out with a power drill. Lots of room for activities. If i were to do it again, and I still might do this to clean it up, I want to run "half" a hole saw on itand once it breaks through the metal, remove those pieces. And remember, prime and paint the area after you cut, no sense in giving rust free access.

Harness is the Morimoto one, and yes, match the stock bulb size, so H11. You do not need a canbus harness for the 14 and older. The make a single harness ( 9006 socket ) and then send a adapter pigtail with it to convert it to the the OEM bulb. You also will only plug the OEM wiring into one side of the harness, the other plug I tucked up and taped real nice with electrical tape so the connection isnt exposed.

Nice, that is good to hear. I have an assortment of tools to remove material that should make it quick and easy work. Oh yes, it will be painted almost immediately after. I live on the coast, this will almost instantly rust if I don't prep it.

Thank you my friend, I really appreciate the assistance.
I'm looking forward to this upgrade. Been tossing around LEDs for a little while but always wanted retro's. This has made me 100% choose to go this route. Thank You
 
OP
OP
Geoffsfas10

Geoffsfas10

Full Access Member
Joined
Nov 27, 2019
Posts
781
Reaction score
1,695
Location
St. Louis
Nice, that is good to hear. I have an assortment of tools to remove material that should make it quick and easy work. Oh yes, it will be painted almost immediately after. I live on the coast, this will almost instantly rust if I don't prep it.

Thank you my friend, I really appreciate the assistance.
I'm looking forward to this upgrade. Been tossing around LEDs for a little while but always wanted retro's. This has made me 100% choose to go this route. Thank You

I was in the same boat. I tried LEDs are about 30 minutes one night they just werent the same. Having a retro iin the past made the comparison worse for me, since I was already used to it. With how simple this ended up being, im glad I went this route.

if I were to redo it though, I think I would have gone with the mini gattling gun shrouds, since they screw on to the projector flange from behind, vs having to JB weld the shourds and concentric rings on but such is life. Its all good. Now just to re-aim the passenger side. think im gonna wait til its warmer though.
 

kbuskill

***CAUTION*** I do my own stunts!
Joined
Mar 11, 2017
Posts
5,317
Reaction score
8,354
Location
NE. FL.
I was in the same boat. I tried LEDs are about 30 minutes one night they just werent the same. Having a retro iin the past made the comparison worse for me, since I was already used to it. With how simple this ended up being, im glad I went this route.

if I were to redo it though, I think I would have gone with the mini gattling gun shrouds, since they screw on to the projector flange from behind, vs having to JB weld the shourds and concentric rings on but such is life. Its all good. Now just to re-aim the passenger side. think im gonna wait til its warmer though.

How do you plan on re-aiming the passenger side?

Will you have to open it back up?
 

Rocket Man

Mark
Supporting Member
Joined
Dec 25, 2014
Posts
26,010
Reaction score
50,907
Location
Oregon
I was in the same boat. I tried LEDs are about 30 minutes one night they just werent the same. Having a retro iin the past made the comparison worse for me, since I was already used to it. With how simple this ended up being, im glad I went this route.

if I were to redo it though, I think I would have gone with the mini gattling gun shrouds, since they screw on to the projector flange from behind, vs having to JB weld the shourds and concentric rings on but such is life. Its all good. Now just to re-aim the passenger side. think im gonna wait til its warmer though.
I got the mini Gatling gun shrouds and demon eyes which both screwed on to the projectors. That made that part of it easy. Which ones did you get? Here’s some shots of mine on my Silvy. I also had TRS do their lens etching service as you can see.

1A22983E-2A99-4078-B2A5-1298DC2B9571.jpeg 2FF8D3DC-2AE2-42A8-8BC5-EF6B8951C359.jpeg 2CBCDEFA-B8A1-439A-A902-8FC88A7D4243.jpeg
 

Forum statistics

Threads
133,205
Posts
1,881,549
Members
98,240
Latest member
Blesna

Latest posts

Top