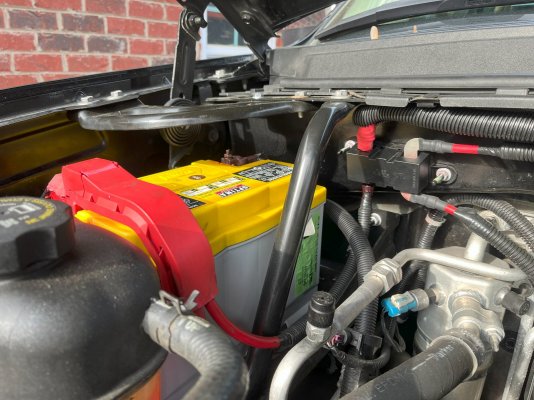
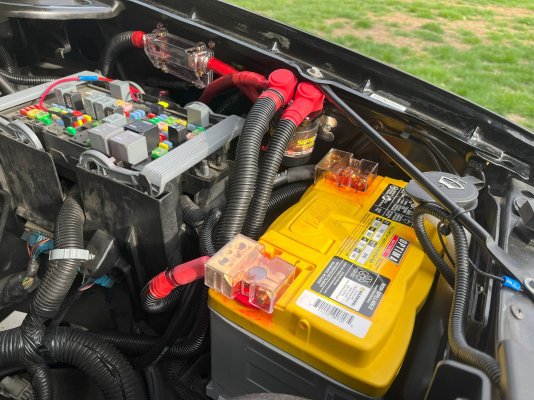
Here's what I did with my 2007 (Cherry) LTZ. I wanted to power a dash cam that would not kill the batt when parked at the airport for weeks. I incorporated a 'Big 3' upgrade along with adding a second, new Aux Batt. 1 - Because I wanted to keep the batts disconnected when parked (so that BOTH batts wouldn't get drained) I installed an AutoIsolator (see that 2 big red insulators on top between Aux Batt and fuse box?). I triggered the AutoIsolator from the Main Fuse box 'Engine' fuse so that when the engine isn't running the AutoIsolator is 'open' and the 2 batteries are disconnected from each other and (duh) when the engine is running the 2 batteries and main alternator ARE tied together. This way, if the Aux Batt is drained I still have the Main Batt in good shape to start the engine and the Aux Batt will then be recharged. (To maintain equal and proper current flow when charging, the 2 batteries must be identical (or very close)). 2 - The conductor (wire) on the top right of the AutoIsolator runs through a 150A fuse to the Aux Batt Positive. The other conductor on top left runs up along firewall and connects to the factory installed fuse on the firewall at Main Batt where the factory cable from the alternator is connected. 3 - I ran an additional positive conductor directly from the alternator (with another fuse) to the same terminal on the AutoIsolator as the conductor that I ran to the Main Batt. 4 - To ensure ALL negative current is monitored on the Negative Current Sensor I ran the conductor from the Aux Batt Negative Terminal to the Main Alternator bracket. I then ran ANOTHER negative conductor from the same Main Alternator bracket across the top-front of the engine to connect to the factory installed Main Grounding lug located on the front of the left-side engine block; I didn't alter the original factory installed negative conductor to the Main Batt. Now, the 2 12V batteries are connected the way that I want. Now, 5 - I ran a (fused) wire to the Main Buss fuse that supplied my OBD port and pulled it's original fuse, now my OBD is powered from the Aux Batt, my dash cam is connected to the OBD port. Lastly, 6 - I powered all 12V interior power supplies (driver side, passenger side, and the one in the cargo area from the Aux Batt. I reckon this post is a bit long and it may be in too much detail.


