2013 Escalade ESV Next BIG adventure: Cooling system refresh, Big 3 Electrical upgrade, Reseal intake, and VLOM mod...

Disclaimer: Links on this page pointing to Amazon, eBay and other sites may include affiliate code. If you click them and make a purchase, we may earn a small commission.

OP
OP
skpyle

skpyle

Full Access Member
Joined
May 15, 2021
Posts
412
Reaction score
1,081
I installed a NOCO Genius 2D onboard battery maintainer. Actually, I used two large zip ties to secure the mount to the side of the battery. I could not find a place to mount the unit near the battery that I was happy with. Side of the battery is not ideal, but it will work. Even though my Escalade is my daily driver, I like having a maintainer installed. Just in case. All 4 of the vehicles at my house have the NOCO Genius 2Ds installed.
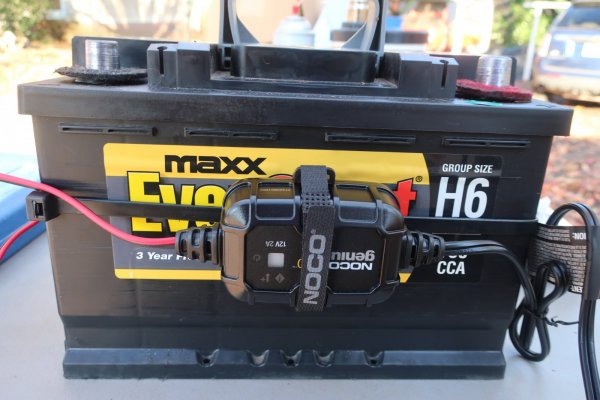

2023-12-12 038.JPG
Not the most elegant install, but it works.
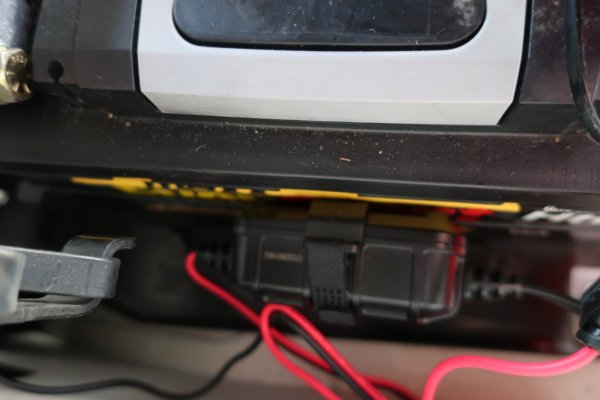

2023-12-12 047.JPG
Location of battery maintainer on the side of the battery means I can't see the indicator to see if it is charging. However, I can look at the battery monitor app on my phone and see the voltage.


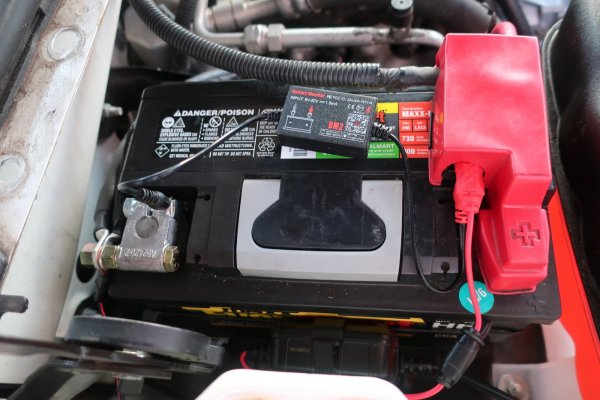
I also installed a QUICKLYNKS BM2 Battery Monitor II bluetooth battery monitor. Same as above, I have one on all my vehicles. Just because. I mounted this one on top of the battery, and will secure it with a zip tie to the (+) power feed cable once all is said and done.

2023-12-12 043.JPG
Battery monitor will live on top of the battery.

2023-12-12 046.JPG
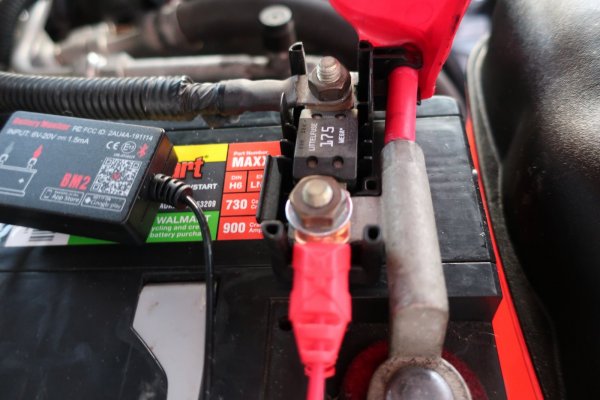
Both the battery maintainer and monitor (+) terminals have been connected to the battery side of the mega fuse at the (+) battery cable terminal.

2023-12-12 044.JPG
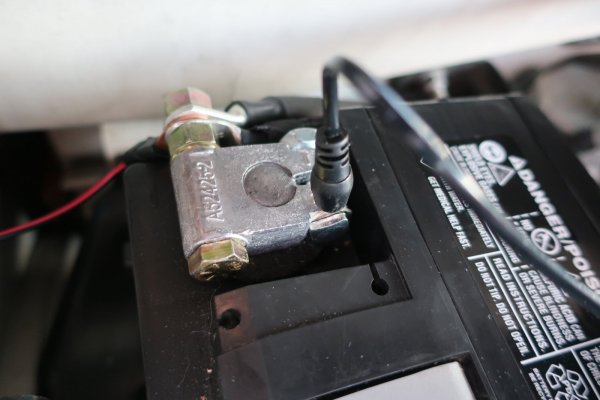
New (-) battery terminal. Not as elegant as I had wanted, but it is solid and functional.
 
Last edited:
OP
OP
skpyle

skpyle

Full Access Member
Joined
May 15, 2021
Posts
412
Reaction score
1,081
You know, I could respond to this in one of two ways…

I choose to be polite and professional. I have been a gearhead for over 30 years. I cut my teeth on rusty deathtraps. Reliability was a mythical concept.

I am a repair technician and lead a crew in a heavy stamping facility for my day(night) job. I regularly see equipment run into the ground. Deferred maintenance is the name of the game. I routinely have to make band-aid/hack repairs that I am not proud of.

I have worked my ass off for years to get where I am and am well paid for it.
My Escalade is the nicest thing I have. I want it to stay running tip-top and balls out.
I have researched the care and feeding of the GMT900 platform. I have identified the known issues, and am addressing them in due time.
I do not have unlimited funds, but I do OK. And I chose to spend my money on preventative maintenance on my vehicles.

I am sorry if my spending seems a frippery to you. I do respect your opinion, though.

Good day to you.
 

j91z28d1

Full Access Member
Joined
Feb 28, 2022
Posts
3,076
Reaction score
3,801
is that terminal discolored from heat?
Screenshot_20231213-185045.png


I wouldn't worry about he o'ring till you see oil pressure issues or at least a different in pressure if you face down a steep driveway or something. I know gm used different rings in different engines and I've not had my yukon apart but my ls3 I had the pan off so I switched it out because I was there. the oem o'ring was perfect, no hardness to it or anything. I was surprised as I've hit over 300deg oil Temps a few different times with that engine before having to cut sessions short and needing cool down laps. I thought forsure it would be baked. even threw a belt once and over heated it to the moon, ful ecm reduced power mode type over heat. I just got a oem from the dealer and replaced it for the heck of it.

I know they do go bad, but I honestly have not idea why some do and some don't. gotta be different oils or types of rubber used in different years. either way, definitely agree to not dropping all that stuff till you have a reason.

for all your battery connections, I've started using no ox on a lot of stuff. at work we are switching the fleet to electric equipment and one of the trainers talked about it for big cabling outside in the elements. I guess it's used a lot in the wind mill world too. it's like a dielectric grease but it's conductive.

the jury seems to be out on using it on the bus bars themselves inside a battery box, pure metal to metal might still have lower impedance but for crimp lugs outside in the elements, they recommended it. I've started using it on a lot of stuff. especially something like a ground cable to a block.

just something you might research. it's cheap, like 6$ on Amazon. Just watch out using it somewhere that it can cross from pos to neg, it's said to cause a small voltage drain.
 
Last edited:

Geotrash

Dave
Supporting Member
Joined
Feb 16, 2018
Posts
6,425
Reaction score
15,917
Location
Richmond, VA
is that terminal discolored from heat?
View attachment 416470


I wouldn't worry about he o'ring till you see oil pressure issues or at least a different in pressure if you face down a steep driveway or something. I know gm used different rings in different engines and I've not had my yukon apart but my ls3 I had the pan off so I switched it out because I was there. the oem o'ring was perfect, no hardness to it or anything. I was surprised as I've hit over 300deg oil Temps a few different times with that engine before having to cut sessions short and needing cool down laps. I thought forsure it would be baked. even threw a belt once and over heated it to the moon, ful ecm reduced power mode type over heat. I just got a oem from the dealer and replaced it for the heck of it.

I know they do go bad, but I honestly have not idea why some do and some don't. gotta be different oils or types of rubber used in different years. either way, definitely agree to not dropping all that stuff till you have a reason.

for all your battery connections, I've started using no ox on a lot of stuff. at work we are switching the fleet to electric equipment and one of the trainers talked about it for big cabling outside in the elements. I guess it's used a lot in the wind mill world too. it's like a dielectric grease but it's consecutive.

the jury seems to be out on using it on the bus bars themselves inside a battery box, pure metal to metal might still have lower impedance but for crimp lugs outside in the elements, they recommended it. I've started using it on a lot of stuff. especially something like a ground cable to a block.

just something you might research. it's cheap, like 6$ on Amazon. Just watch out using it somewhere that it can cross from pos to neg, it's said to cause a small voltage drain.
Nice. Is this the right stuff? https://a.co/d/6RVCykS
 
OP
OP
skpyle

skpyle

Full Access Member
Joined
May 15, 2021
Posts
412
Reaction score
1,081
is that terminal discolored from heat?
View attachment 416470


I wouldn't worry about he o'ring till you see oil pressure issues or at least a different in pressure if you face down a steep driveway or something. I know gm used different rings in different engines and I've not had my yukon apart but my ls3 I had the pan off so I switched it out because I was there. the oem o'ring was perfect, no hardness to it or anything. I was surprised as I've hit over 300deg oil Temps a few different times with that engine before having to cut sessions short and needing cool down laps. I thought forsure it would be baked. even threw a belt once and over heated it to the moon, ful ecm reduced power mode type over heat. I just got a oem from the dealer and replaced it for the heck of it.

I know they do go bad, but I honestly have not idea why some do and some don't. gotta be different oils or types of rubber used in different years. either way, definitely agree to not dropping all that stuff till you have a reason.

for all your battery connections, I've started using no ox on a lot of stuff. at work we are switching the fleet to electric equipment and one of the trainers talked about it for big cabling outside in the elements. I guess it's used a lot in the wind mill world too. it's like a dielectric grease but it's conductive.

the jury seems to be out on using it on the bus bars themselves inside a battery box, pure metal to metal might still have lower impedance but for crimp lugs outside in the elements, they recommended it. I've started using it on a lot of stuff. especially something like a ground cable to a block.

just something you might research. it's cheap, like 6$ on Amazon. Just watch out using it somewhere that it can cross from pos to neg, it's said to cause a small voltage drain.
The large female spade terminal for power into the distribution box is not heat discolored. I looked at it closer with a good light.

That's was what I was thinking about the oil pump pickup O-ring. I have great oil pressure right now. I keep track of it at oil changes and such, and for giggles at most engine starts. If I suddenly develop low oil pressure, I will do the 'overfill the oil and point the nose of the vehicle downhill' and see what happens. If I have to replace the O-ring then, I will.
Until then, I will leave it be.

You bring up a good point. The failed O-ring is common, but does not seem to be inevitable. Some do, most don't...

Very good advice about the No-Ox, thanks! I have ordered some from the link posted. Since I am not done with the work, I have no problem pulling the freshly fabricated (-) cables back out. I will strip the heat shrink, and work a little No-Ox into the open ends of the crimp terminals. I have plenty of heat shrink. I will use it building future cables.
As well as at the connection on the cylinder head.

Thanks!
 
OP
OP
skpyle

skpyle

Full Access Member
Joined
May 15, 2021
Posts
412
Reaction score
1,081
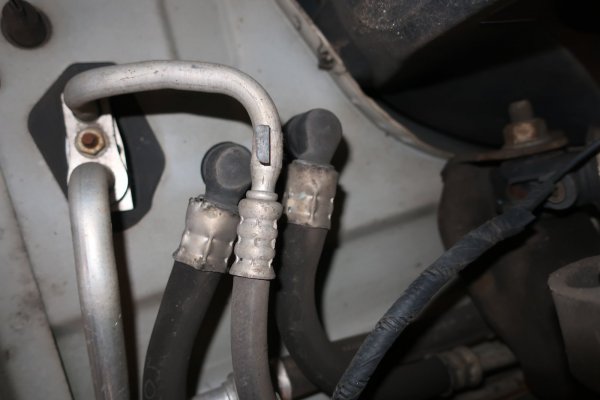
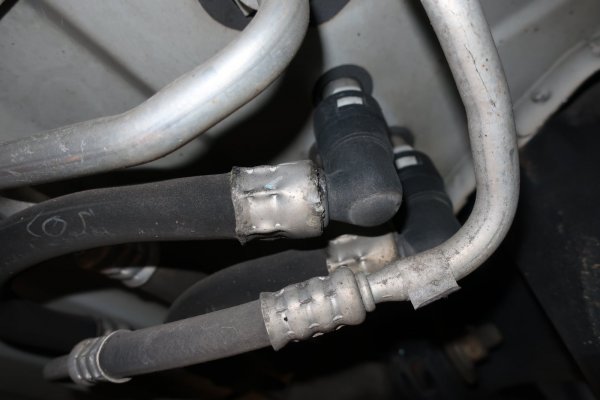
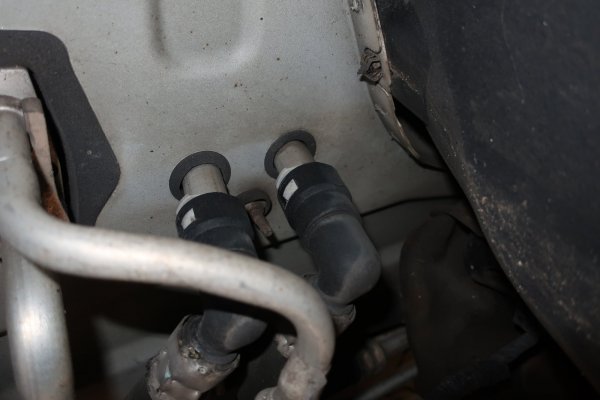
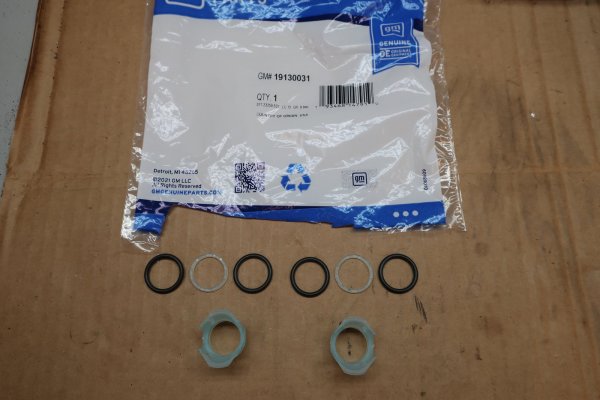
Friday, before I laid down for a nap, I tried replacing the locks, O-rings, and spacers for the rear heater core hose quick disconnects.
And failed miserably.


2023-12-17 001.JPG
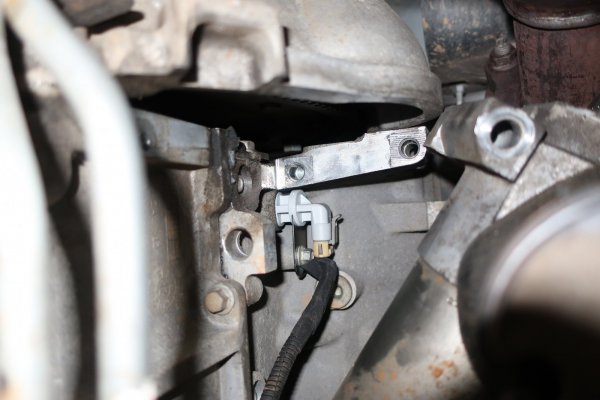
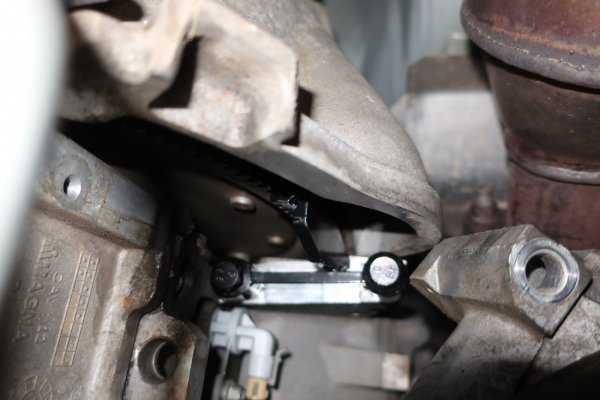
Rear heater core hose quick disconnects under the passenger's side rear of the vehicle.


2023-12-17 003.JPG


2023-12-17 005.JPG
Could not depress the locking tabs enough for the quick disconnects to release. Did not want to get medieval and break anything.


As far as I can tell, the quick disconnects are the same as the heater hoses that connect to the heater Tees under the hood. However, I could not get the locking tabs to release for love nor money. I tried my fingers, hose pliers, and Knipex pliers. No love. I gave up before I broke something.
I will revisit this in the near future.
In my mind, the O-ring seals and locks are 10 years old. Couldn't hurt to replace them.


2023-12-17 041.JPG
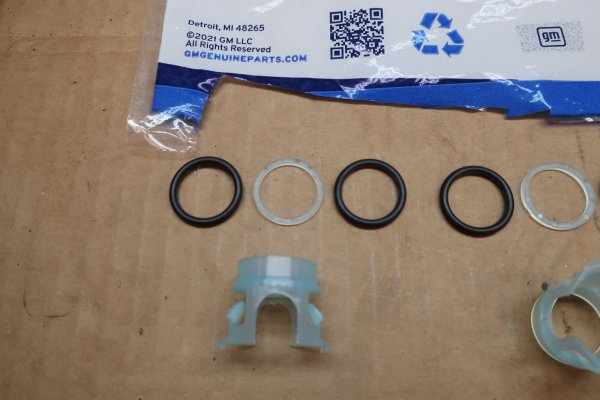
GM seal and lock kit for rear heater core hose quick disconnects.


2023-12-17 042.JPG
Spacer goes between the two O-rings. The lock inserts snap into the heater hose quick disconnect housings.
 
OP
OP
skpyle

skpyle

Full Access Member
Joined
May 15, 2021
Posts
412
Reaction score
1,081
Saturday, I successfully replaced the crankshaft pulley and bolt, front crankshaft seal, and the crankshaft position sensor (CKP).

NOTE: all of this work was done under my Escalade up on jack stands.


My first mistake was reading the service manual. To replace the crankshaft pulley, I was to:
-drain cooling system
-disconnect upper radiator hose from radiator
-disconnect both oil cooler lines from radiator
-disconnect both transmission oil cooler lines from radiator
-disconnect and remove fan/shroud assembly

I am assuming all this is for clearance to use the factory removal/installation tools.
Heck no!
I gambled that the aftermarket tools I was using would be shorter and not need all the extra clearance. However, I was pretty sure I would not have clearance for my pneumatic impact gun. Hand tools only...

Even the service manual instructions for starter removal were ungood. It talked about removing the right front wheel and wheel well liner, and working from there.
Luckily, I read a post here on TYF that said just to unbolt the starter and move it out of the way.
That made sense.

Reason for removing the starter: installation of the flywheel lock. I deemed it necessary, and subsequently proved this out. I had read posts about bracing a pry bar in the crankshaft pulley against the AC compressor to hold the pulley while removing/installing the bolt.
The amount of force both those events took for me meant I wasn't comfortable trying to manipulate the prybar.


2023-12-17 012.JPG
Starter removed, also showing access to the newly replaced CKP sensor.


2023-12-17 013.JPG
Flywheel lock bolted in place of the starter.


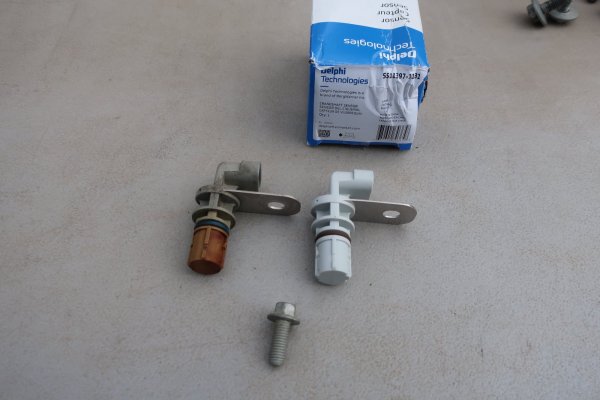
While I had the starter moved out of the way, I replaced the CKP sensor. Since it is right above and completely blocked by the starter. It wasn't a bad job. I was able to get my left hand up to the sensor to remove the retaining bolt and then the sensor. Same for getting it all back together. There was JUST enough room to swing my torque wrench to tighten the CKP sensor retaining bolt to 18 ft/lbs (216 in/lbs.) Only just. Pretty much one tooth at a time on the ratchet.


2023-12-17 009.JPG
Old CKP sensor at left, new Delphi SS11397-11B1 sensor at right. OEM GM 12703627 CKP sensor was unavailable. I took my chances with the Delphi.
 
Last edited:
OP
OP
skpyle

skpyle

Full Access Member
Joined
May 15, 2021
Posts
412
Reaction score
1,081
OK...main event: the pulley itself.

I had read posts of people having a heckuva time getting the old pulley off. Requiring heat and violence. Or at least a strong pneumatic impact. Which I had, but I wasn't sure I had the clearance to use it.

Getting the old bolt out was actually the worst part. Using my arms to pull on the breaker bar just moved my body. I had to pull with the breaker bar at around 7:00 o'clock because of interference with stuff in the engine bay and the fact I was using a 6pt 24mm deep impact socket. I ended up laying on my back, grabbing the passenger's side front tire, and pushing with my left leg. Finally got the bolt to break loose. I was a hair's breadth from going to get my pneumatic impact and running air out to where I was working.


2023-12-17 018.JPG
Finally got the old bolt out.


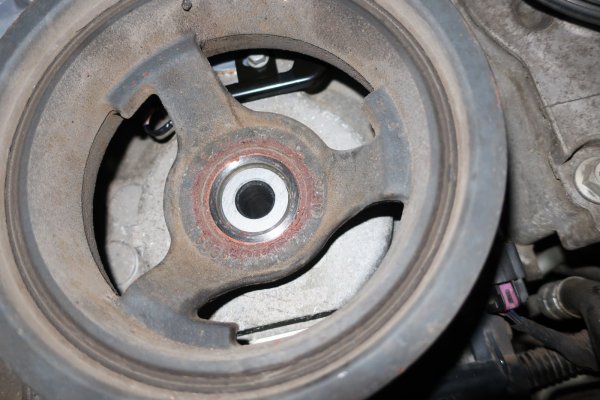
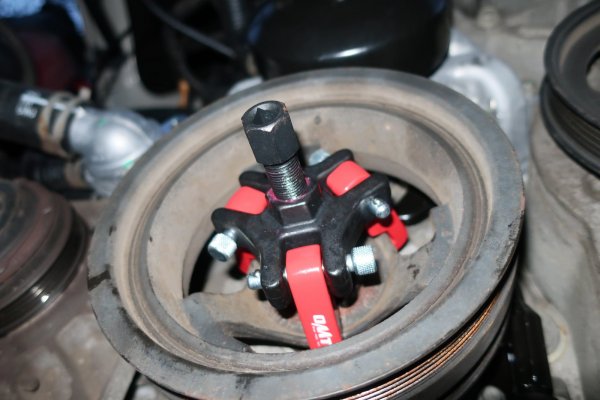
Next trick was the removal tool. I have watched this type of removal tool used repeatedly by 'I Do Cars' on youtube, but hadn't really paid attention to how the tool was set on the pulley. That took a little finagling to get it set right. The notches in the tool arms fit into flats on the backside of the pulley hub. Took me a few tries to get everything lined up correctly.

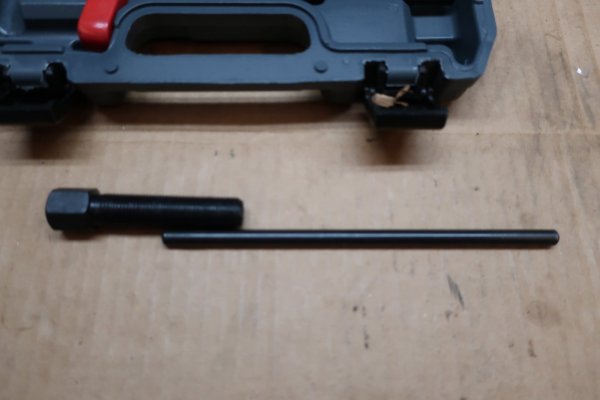
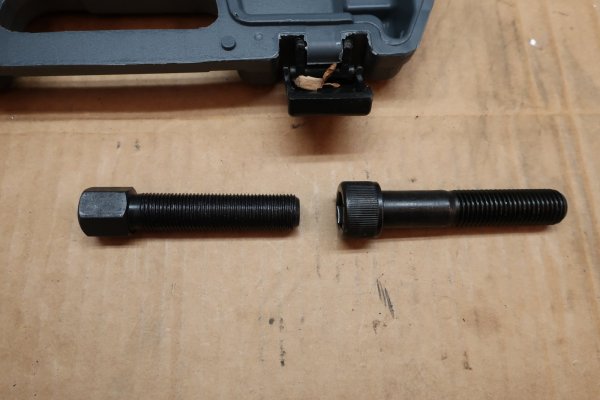
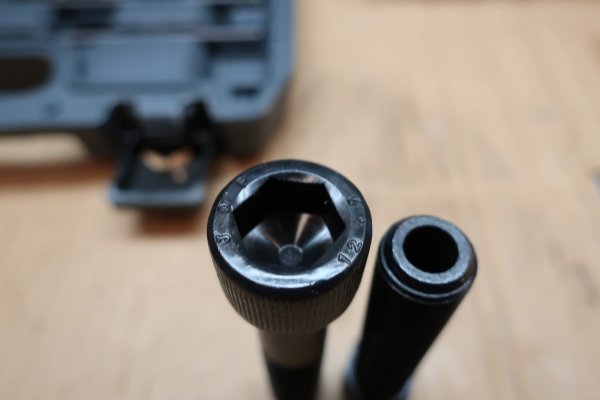
I ended up trying the long removal rod. I had watched videos of the long rod getting bent in use, and had gotten three different lengths of M16 x 2.0 socket head bolts to use instead. However, I was concerned the tapered tip of the tool forcing screw would be deformed in the socket head of the bolt.


2023-12-17 043.JPG
Removal tool forcing screw and the long removal rod.


2023-12-17 044.JPG
Forcing screw and an M16 x 2.0 socket head bolt.


2023-12-17 047.JPG
Concerned that the tapered end of the forcing screw would deform in the socket of the bolt.


2023-12-17 019.JPG
Pulley removal tool installed on the pulley. Note the grease on the forcing screw threads. Never go in dry.
 

Forum statistics

Threads
132,301
Posts
1,865,661
Members
96,890
Latest member
Rednim
Top