2013 Escalade ESV Next BIG adventure: Cooling system refresh, Big 3 Electrical upgrade, Reseal intake, and VLOM mod...

Disclaimer: Links on this page pointing to Amazon, eBay and other sites may include affiliate code. If you click them and make a purchase, we may earn a small commission.

OP
OP
skpyle

skpyle

Full Access Member
Joined
May 15, 2021
Posts
410
Reaction score
1,066
2023-12-04 069.JPG
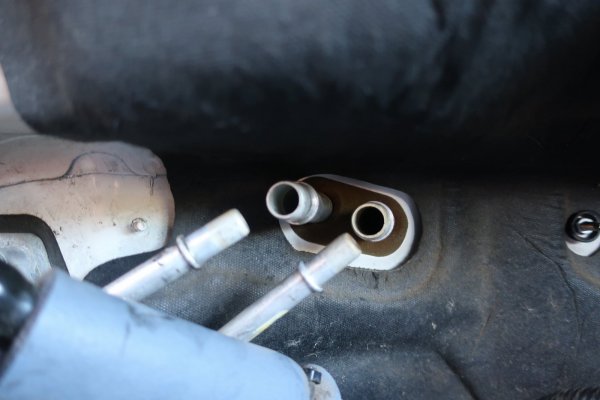
Heater Tees off and both sets of heater core lines are bare.


2023-12-04 073.JPG
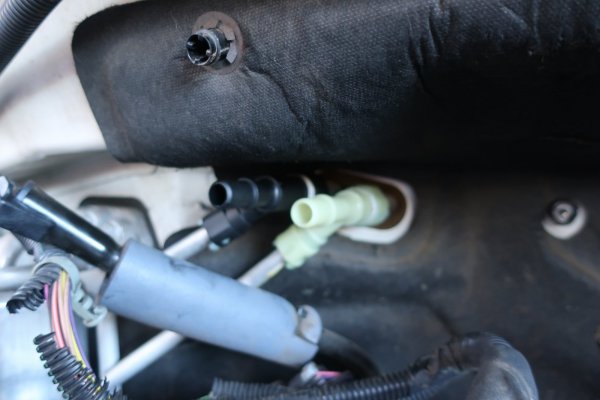
New Tees installed.
(Yes, the wiring loom is trashed. I will be removing it and installing braided mesh loom.)


2023-12-04 053.JPG
New water pump and thermostat assembly.


2023-12-04 061.JPG
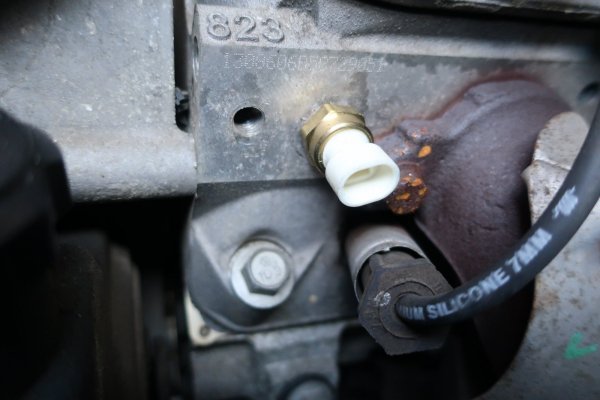
I also installed a new coolant temp sensor in the left cylinder head.


2023-12-04 095.JPG
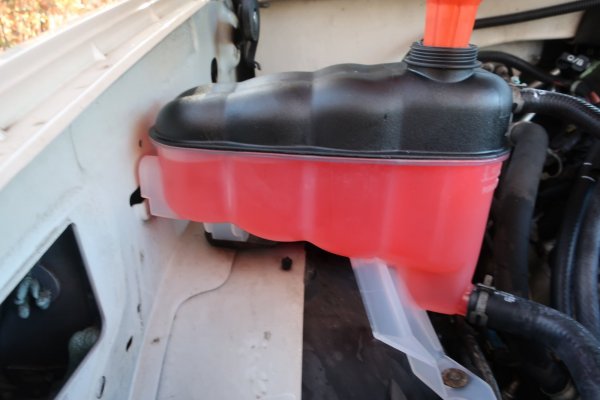
New coolant reservoir installed.
System has been filled with a 50/50 mix of GM Dexcool and distilled water. I will need to properly bleed the system and top it off once the engine is running.
 
OP
OP
skpyle

skpyle

Full Access Member
Joined
May 15, 2021
Posts
410
Reaction score
1,066
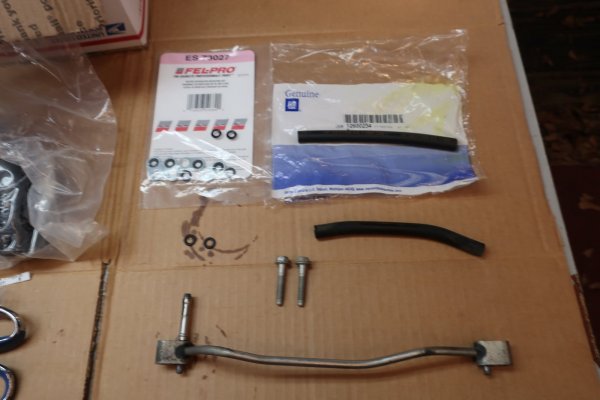
I replaced the little O-rings for the front steam bleed crossover tube. And the slit rubber hose that covers the metal line. I do not understand what that is for. I ordered that hose, as it was listed as 'bleed crossover hose' so I thought I needed it. The new one came in the GM bag slit down the middle. I thought it was defective. And ordered another. And realized I am defective.


2023-12-04 043.JPG


Something I did note. The Fel-Pro gasket set came with two sets of seals, and the service manual talks about the rear bleed port block off plates. Since I had the intake manifold off, I believed this was the perfect time to replace the seals under the block off plates. Except my 2013 L94 does not have the rear bleed ports. The head castings have dimples for the bleed ports and bolt holes, but no drilled passages. So I did nothing. :D


2023-11-28 043.JPG
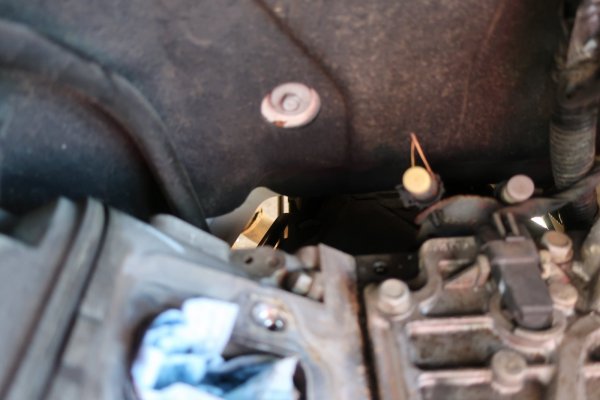
Right cylinder head rear bleed port not drilled. (Sorry for the lousy photo.)


2023-11-28 045.JPG
Left cylinder head rear bleed port not drilled. (Sorry for the lousy photo.)


Two things I forgot to mention:

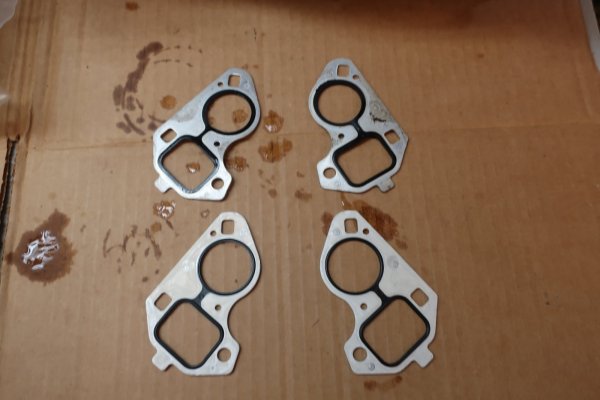
I used the OEM rubber lined metal gaskets for the water pump mounting. I had read that aftermarket gaskets tended to not seal as well. Didn't want to find out the hard way.

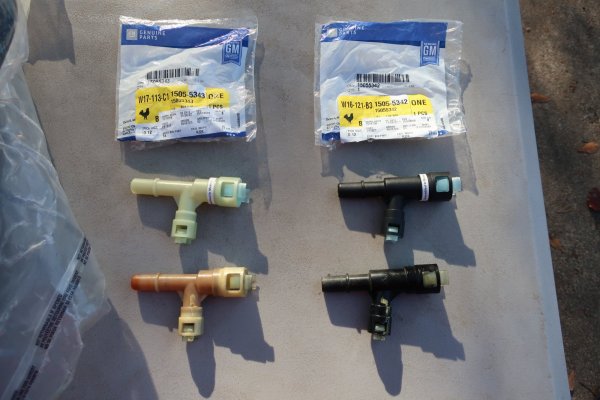
I went with the OEM plastic heater Tees because they lasted 150,000+ miles. Yes, it is a flawed design that can fail. However, if kept up with, they are OK. So I am good with that.


2023-12-04 050.JPG
Original OEM water pump gaskets at top, new OEM water pump gaskets at bottom.


2023-12-04 068.JPG
New OEM heater Tees at top, old OEM heater Tees at bottom.
 
OP
OP
skpyle

skpyle

Full Access Member
Joined
May 15, 2021
Posts
410
Reaction score
1,066
During the cooling system refresh, I did do some WYAIT (While You Are In There) work.
I like to replace sensors and such on a preemptive basis for the most part. How difficult access is plays a part as well. For example, I will likely replace the MAF and MAP whenever they start to fail. Easy to get to.

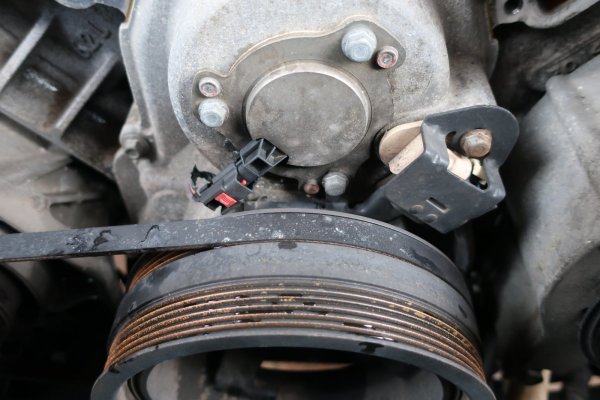
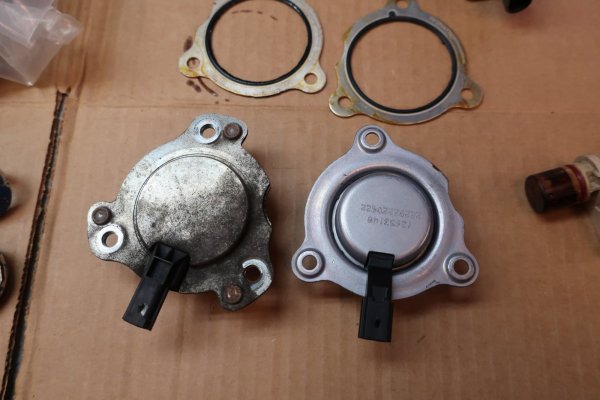
The CMP (cam position sensor) is another thing entirely. With the water pump off, access was right there. As well, I replaced the Cam Magnet Actuator. This is what moves the plunger in and out in the front of the camshaft to drive VVT. I had no reason to suspect any issues with the actuator, as my Escalade runs balls out and has no DTC's set. But, WYAIT...


2023-12-04 022.JPG
Cam magnet actuator on the front of the upper part of the timing cover, with the CMP sensor under the metal harness cover to the right.


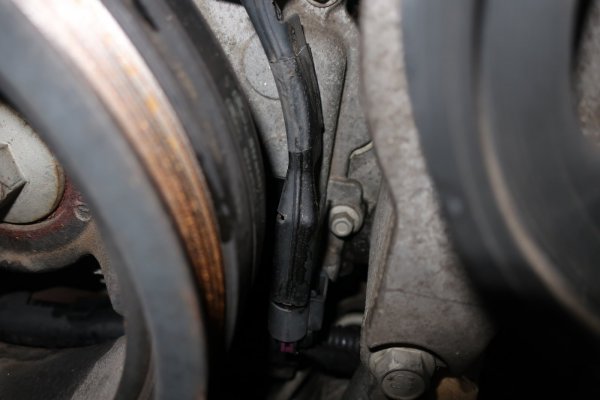
2023-12-04 026.JPG
Actuator/CMP harness travels down the left side of the harmonic balancer. NOTE: the bolt to the right of the harness does NOT secure it.


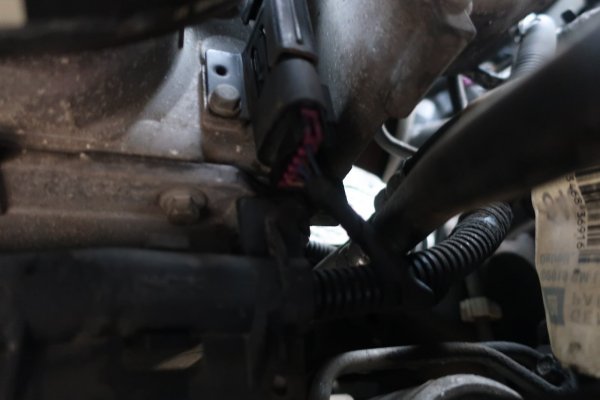
2023-12-04 028.JPG
Bottom of the Actuator/CMP harness, plug that connects it at bottom, and bolt to the left that secures the metal harness bracket.


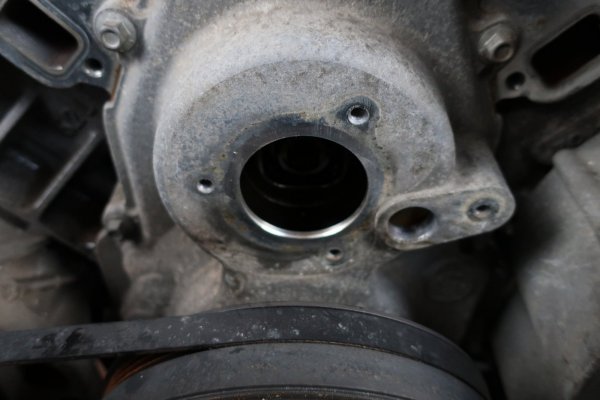
2023-12-04 030.JPG
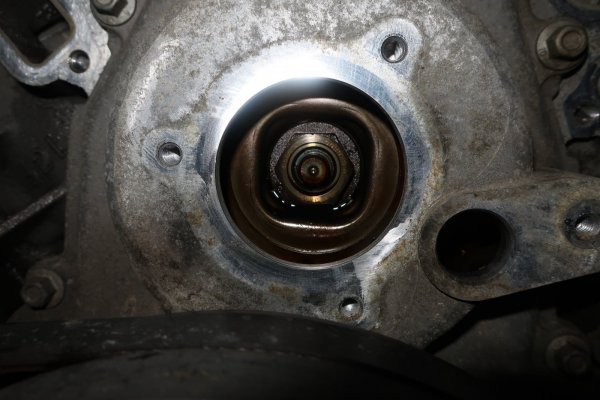
Upper timing cover with the actuator and CMP removed.


2023-12-04 032.JPG
Inside the timing cover, showing the face of the VVT cam gear, and the plunger in the center that is controlled by the cam magnet actuator.
 
OP
OP
skpyle

skpyle

Full Access Member
Joined
May 15, 2021
Posts
410
Reaction score
1,066
I installed a new CMP, new actuator, and new harness assembly for both. Swapping the parts was not awful, but a bit of a pain because I didn't remove the harmonic balancer. So the plug for the CMP, and the plug at the bottom of the harness was a chore to get disconnected. As well, the lower bolt on the actuator and the lower bolt on the harness were inaccessible by ratchet. I had to use a wrench and my fingers. Time consuming, but it worked.
I used my little 1/4" drive torque wrench for the bolts I could reach with a ratchet. For the other two, I just pulled the wrench until it felt similar to the torque wrench. Value was 106 in/lbs, so we are not talking very tight.

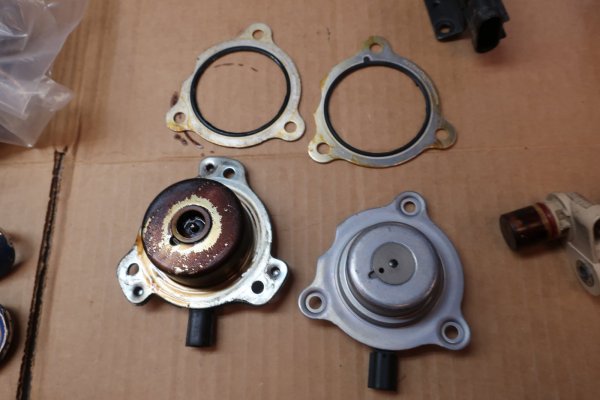
I did note the new actuator looked a little different than the OEM unit, but I will just chalk that up to a running revision of the part. And hope for the best.
(NOTE: I got my part numbers from gmpartsgiant.com and either bought from there or from RockAuto.)


2023-12-04 033.JPG
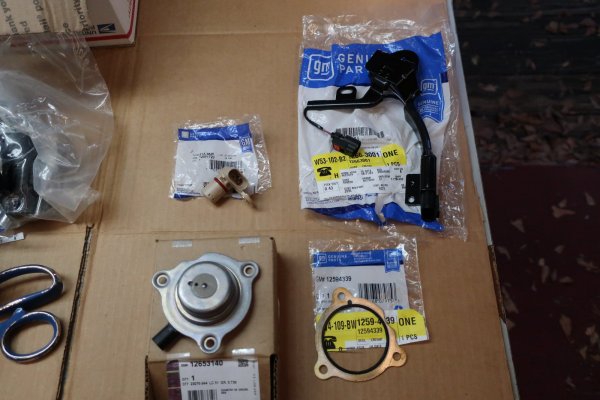
New cam magnet actuator, gasket, harness and metal bracket, and CMP sensor.


2023-12-04 034.JPG
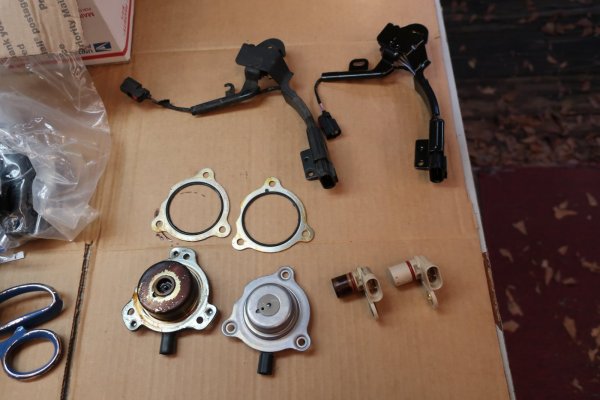
Old parts at left, new parts at right.


2023-12-04 035.JPG
Cam side of old actuator and new actuator are a little different, but seem functionally the same.


2023-12-04 036.JPG
Outward facing side of actuators are a little different as well.


2023-12-04 042.JPG
New parts installed in the timing cover.
 
OP
OP
skpyle

skpyle

Full Access Member
Joined
May 15, 2021
Posts
410
Reaction score
1,066
Hello donthejetman!

OK, I am listening…
Can this balancer be replaced by a home mechanic?
What kind of special tools are needed?
From what I understand, this balancer is not keyed.
Also, the bolt is to be replaced as well?
I am assuming I would replace the front main seal as well?

Am not near a computer, so I can’t access the service manual.

Thanks!
 
OP
OP
skpyle

skpyle

Full Access Member
Joined
May 15, 2021
Posts
410
Reaction score
1,066
Alright, I'm home now, and have had access to the service manual, and the internet. Which is bad. Because I am stupid.

I just put a Rock Auto order in for:
balancer
balancer bolt
front seal
serpentine belt and tensioner kit
crankshaft position sensor

I just put an Amazon order in for:
LS balancer removal tool
LS balancer installer tool
LS flywheel lock tool


Yes, some of this is not needed. However, like I said, I am stupid. Sometimes I like to do things the hard way.
All of the parts should be here by Thursday. And I have the weekend off. Hopefully my fuel injectors will be back by Friday.

Meaning, if I get my act together, I can have my Escalade running on Sunday.

We shall see...
 

iamdub

Full Access Member
Joined
Apr 23, 2016
Posts
20,821
Reaction score
44,932
Location
Li'l Weezyana
From what I understand, this balancer is not keyed.
Also, the bolt is to be replaced as well?
I am assuming I would replace the front main seal as well?

Am not near a computer, so I can’t access the service manual.

Thanks!

It's not keyed cuz it's really not a [harmonic] balancer. It's just a crank pulley. It does have rubber isolation between the outer ring that the belt rides on and the inner hub to dampen asynchronous vibrations.

The crank pulley bolt is torque-to-yield (TTY) so it must be replaced. Yes- it's a perfect time to replace the front crank seal and front cover gasket. Be aware that the cover must be in proper alignment so that the seal is perfectly centered around the crankshaft, otherwise it'll wear more on one side and leak prematurely. There are alignment tools for this.

Also, while the VVT system is generally reliable, the cam phaser is known to act up with age. If I were that close to it, I'd replace it as well.

Oh, back the the crank bolt- if you don't wanna deal with the TTY stuff, you can get an ARP bolt and just torque it as they specify. I've always used the stock TTY bolt. I use a protractor to put "0" and "140°" marks on the pulley, install it and torque the bolt, mark the bolt at my "0" point, then rotate the bolt until the mark on it aligns with the "140°" mark. Pics and description >HERE<
 
Last edited:

j91z28d1

Full Access Member
Joined
Feb 28, 2022
Posts
3,014
Reaction score
3,721
this is an impressive amount of parts changed all at once

before you fill the cooling system did you look at the rear heat elbows?

I bought them, but didn't have the still do change them at home, said eh I'll do it at work later and still never have haha. I don't see posts about them breaking the the T's but still plastic junk
 
OP
OP
skpyle

skpyle

Full Access Member
Joined
May 15, 2021
Posts
410
Reaction score
1,066
It's not keyed cuz it's really not a [harmonic] balancer. It's just a crank pulley. It does have rubber isolation between the outer ring that the belt rides on and the inner hub to dampen asynchronous vibrations.

The crank pulley bolt is torque-to-yield (TTY) so it must be replaced. Yes- it's a perfect time to replace the front crank seal and front cover gasket. Be aware that the cover must be in proper alignment so that the seal is perfectly centered around the crankshaft, otherwise it'll wear more on one side and leak prematurely. There are alignment tools for this.

Also, while the VVT system is generally reliable, the cam phaser is known to act up with age. If I were that close to it, I'd replace it as well.

Oh, back the the crank bolt- if you don't wanna deal with the TTY stuff, you can get an ARP bolt and just torque it as they specify. I've always used the stock TTY bolt. I use a protractor to put "0" and "140° marks on the pulley, install it and torque the bolt, mark the bolt at my "0" point, then rotate the bolt until the mark on it aligns with the "140°" mark. Pics and description >HERE<

iamdub, thanks for the info! I did not realize the VVT cam phaser was also a ‘wear’ item.
Since we are looking that far in, what about:
-timing set?
-timing chain tensioner? (I thought I read something about there being a better option for this)

Thanks!


this is an impressive amount of parts changed all at once

before you fill the cooling system did you look at the rear heat elbows?

I bought them, but didn't have the still do change them at home, said eh I'll do it at work later and still never have haha. I don't see posts about them breaking the the T's but still plastic junk

Hello j91z28d1: yeah…I tend to go overboard.
I have replaced the coolant Tees at the firewall and the heater hoses that connect to them.
I am not familiar with the ‘rear heat elbows’.

I will have to research that.


Thanks!
 
Top