Dave Jr
Member
Was the ops vehicle a swb or lab to begin with? The behind the 3rd row space has me guessing swb
Tahoe; SWB
Disclaimer: Links on this page pointing to Amazon, eBay and other sites may include affiliate code. If you click them and make a purchase, we may earn a small commission.
Was the ops vehicle a swb or lab to begin with? The behind the 3rd row space has me guessing swb


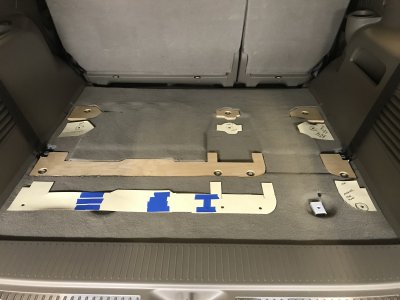
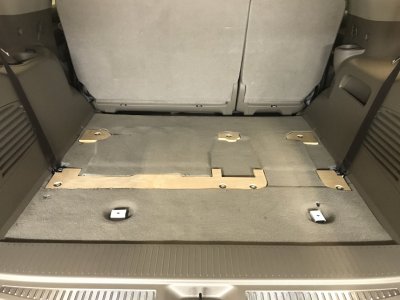
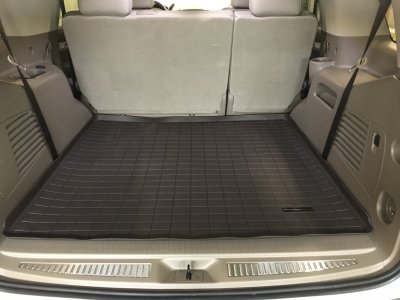
I am so glad I found this. I want to do this to my 2017 Suburban. I hope the disassembly is similar!I really liked what you did and instructions were great. I made templates and cut 3/4 plywood with counter sunk holes to fill the no carpet voids. You have to put bolts in holes since they are open to bottom of truck and would let water in. I cut off the studs used to locate the seat belt bracket at 3/4". Then I put in the Weather Tech rear cargo mat. I can put the third row back in if I have a need in 30 minutes.View attachment 222381 View attachment 222382 View attachment 222383
I really liked what you did and instructions were great. I made templates and cut 3/4 plywood with counter sunk holes to fill the no carpet voids. You have to put bolts in holes since they are open to bottom of truck and would let water in. I cut off the studs used to locate the seat belt bracket at 3/4". Then I put in the Weather Tech rear cargo mat. I can put the third row back in if I have a need in 30 minutes.View attachment 222381 View attachment 222382 View attachment 222383
Tools needed:
15mm socket and ratchet
Small screwdriver
Start with removing the accessory tray:
Remove Matt
Remove “thumb” screws
https://www.flickr.com/gp/163893409@N03/13jcz8
https://www.flickr.com/gp/163893409@N03/3fw880
After removing screws simply lift out container
Remove the aft 4 10x1.5mm hex bolts (silver) using 15mm ratchet.
View attachment 196960
***Raise the seats
Remove 3 access covers and 3 forward retaining bolts
https://www.flickr.com/gp/163893409@N03/Qr2Y70
After bolt remove I replaced the covers
***Lower the seats
Have your screwdriver handy and roll the seat section up
https://www.flickr.com/gp/163893409@N03/WT98d8
Unplug the electrical connection lifting the tab with screwdriver
https://www.flickr.com/gp/163893409@N03/0dhW4N
Your all set! Remove the seat assembly
https://www.flickr.com/gp/163893409@N03/AiJ23r
I will be adding a proper deck with spacers I’ll add to this post
Just remember to bag your bolts and wrap the seats for storage...
For now a weathertech insert works fine
