- Joined
- Jul 31, 2011
- Posts
- 5,125
- Reaction score
- 161
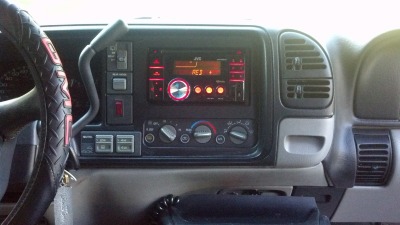
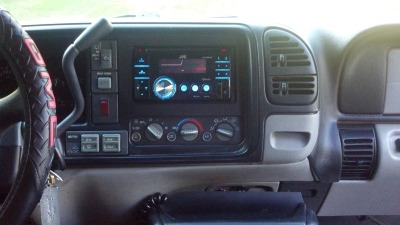
ok so ive noticed there is not a Sticky here that explains a DD install and would like to make this one if any of you agree .
First off lets get some things straight this write up is ONLY for TheDetailSS kit sold here http://www.thedetailss.com and IMO the ONLY way to do a proper DD install . not to bash anyone who did it differently because some of you did a great job but for the headache and money i would defiantly recommend this product . next thing is this is how i did mine i chose to do it this way . your results may vary upon how much time and effort you put into yours . another thing im not responsible for your mistakes . if you have questions ask me here on this thread or PM me if i cant help you ill direct you too someone who can .
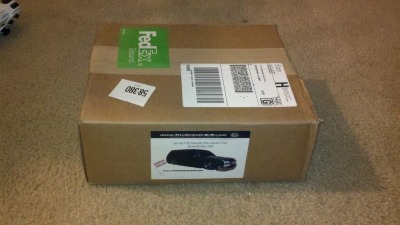
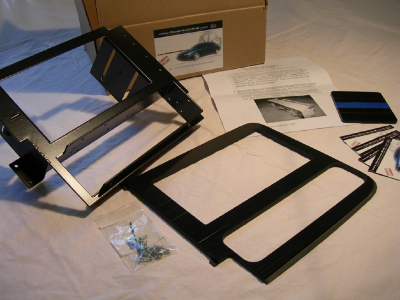
I bought the 95-99 ck double din install kit (without the pre molded dash section)
My quick Review
1.Parts - as advertised and sturdy well built with no imperfections did not feel cheap great instructions
2.price- at time of purchase i thought a little excessive but once in hand and installed WORTH THE MONEY
3. customer service - SPOT ON owner was very happy and quick to answer any questions before purchase, even after purchase was very helpful in providing extra pictures advice and confidence booster to help me finish my install
NOTE: some steps were taken directly out of the install instructions as they are very clear and i could not have put them better i also added my own words to some of these steps and procedures
you will need :
--Flat head screw driver - big and small
--DD install Kit
--Time : to do it right
--patience
--percocets -prescribed for root canal but advil will work lol (for hacking up inside of your dash)
--drill ( drill bit for install is included but you can use your own if you wish)
-- small reciprocating air saw is ideal (did not have one for mine)
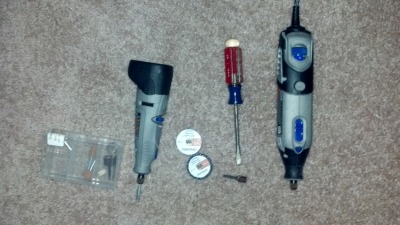
--dremel : multi speed i would say 2 one powered for the long process of molding the dash piece to the new dash and a smaller battery operated on to fit inside your dash for easier install
-- PLASTIC cut off wheel for dremel
-- sanding thing pictured below dont know the name of it but comes with dremel makes those fine touches for getting the size just right
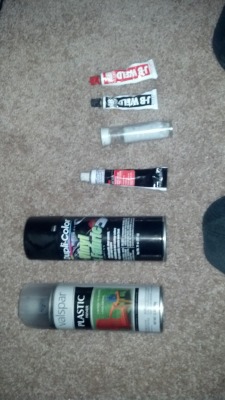
-- quik steel plastic adhesive
-- JB weld plastic adhesive
-- valspar plastic primer and duplicator vynl and fabric paint
-- extra Dash assembly . GET THIS if you do screw up you didnt screw up the one you only have i got mine from a junk yard for 25 bucks a well played investment
--rubbing alcohol
Pics
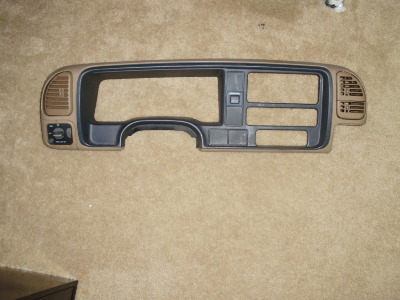
First start by molding your dash pieces together to me this was the longest process AGAIN remember you will pay more but you can get a kit from them that already has this done for you
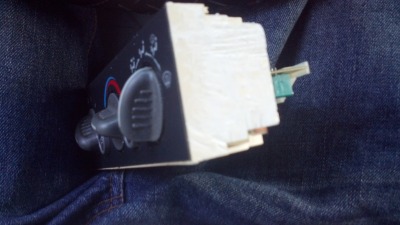
but take the EXTRA dash you aquirred and go hold the pieces together and see how much your going to have to cut DONT CUT TOO MUCH remember the old saying you can always cut more you cant put back or somthing of that nature
after you make a cut hold the pieces together and continue observing your cuts as you make them i found the best way was to Cut the big section out first purposely short of the lay in and switch to the sanding wheel to make fine adjustments so not to have to start over again
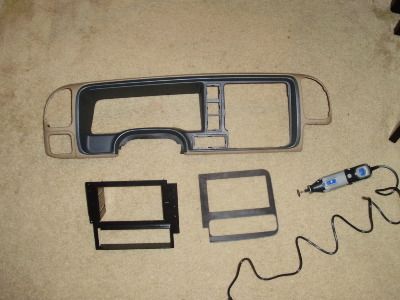
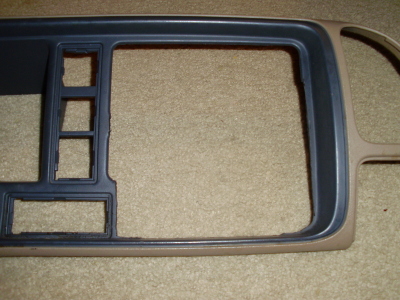
again this process is TEDIOUS remember take your time you will get there also notice there is a LIP on the side that is meant to touch the backside of the panel so AGAIN dont cut too much if you do this right you will minimize you having to fill in gaps and so your not confused TEXTURED side goes on the inside smooth faces outwards once this is completed test fit it into your truck it may be nessacary to trim inner corners of the around the hvac to insure a good fitment
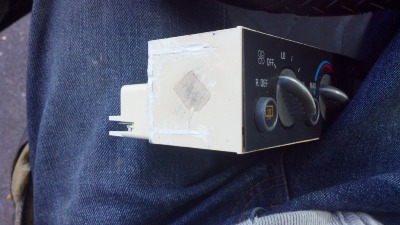
Once you have this completed and the insert fits flush and correctly inside the bezel your ready for your next step now here is where i deviated from the instructions your now ready to glue it into place (once again MAKE SURE IT FITS SQUARE and correctly once the next step is completed its hard going back)
i used Quick steel for plastics and JB weld i couldn't find the recommended Norton Speed grip but many others will work . after cure ensure that the piece is firmly epoxied into place .
Next step is focus on plastic filling all gaps on front side and sand as desired i used again quick steel for plastics as its sandable and paintable and easy to mold into places
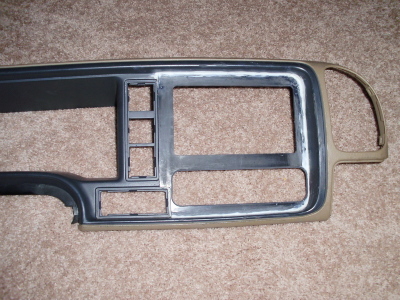
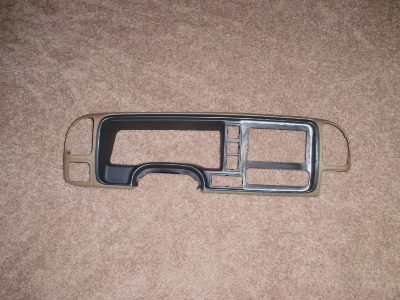
after sanding your almost ready for paint make sure your happy with your final product this is how its going to look once painted so now is the time to clean up and fix any imperfections in your work
Prep to Paint -- prep the surface well if you fail to do this you will have paint chipping and bubbling ect.... due to grease and dirt
i washed it with regular dish soap and warm water allow time to dry before next step
lastly i took rubbing alchohol and a LINT FREE cloth and rubbed down the entire surface that was to be painted . again allow to dry
Primer--- i used as said valspar plastic primer (yes its a CLEAR primer) but you will see the coat as it looks like a clear coat was painted to your dash i only applied 2 thin layers of primer allowing each layer to properly dry before the next i waited 2 hours before applying my paint
Paint --- after allowing last coat or primer to dry for atleast 2 hours i painted with duplicolor vinyl and fabric black paint ( you may choose any color you like) found at AUTOZONE or any other automotive outlets REMEMBER take your time this will decide the look of your final Product i simply aplied 3 THIN coats of paint allowing ample time between drieng so as not to allow running or patch up look
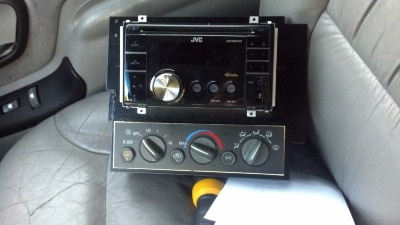
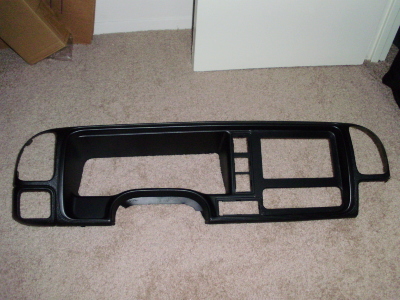
YOUR final product should look like this ( NOTE i emphisized on the fact of taking your time you see that imperfection next to the 4x4 controls YEA i had to go back and fix that AGAIN dont get excited and rush TAKE YOUR TIME ITS WORTH IT
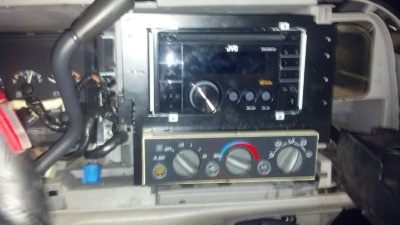
now IMO the hard part is over but you still have to Hack the inside of your dash to make your new head unit and the new location of your HVAC controls fit
FIRST disconnect battery
-set parking brake
put vehicle in gear selection one
begin disasymbly of your dash with scredriver make sure to unplug all required wires to take off dash
once old dash is off start taking out hvac controls and old head unit
next step ,this is the simple process and really you dont have to make look pretty as you wont see it but i did anyways take your Bracket that was included into the kit and test fit it into your location of the dash it will be obvious how it supposed to fit but you will also see what it hits against and will know what to cut . The detail SS instructions here are very detailed and has a detailed image on what to cut but somthings will be obvious
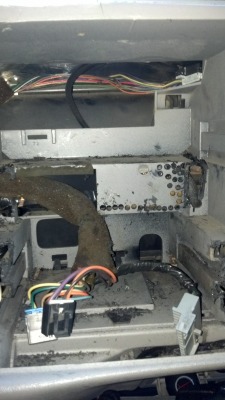
OK one thing i will mention is take SPECIAL care when cutting the back side of the dash there is a metal bracket just behind the plastic and a wiring harness TAKE SPECIAL CARE IN NOT CUTTING THIS or you have a HUGE job ahead of you lmao heres a pic of the said wiring harness DONT MIND THOSE DRILL HOLES I GOT FUSTRATED AND PERCOCET IS A HELL OF A DRUG
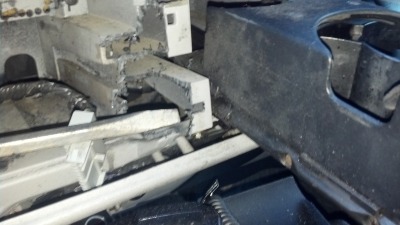
another thing to mention DO NOT CUT THIS PLASTIC TAB if you do your screwed you have to fix this as it holds that corner of your bezel to the dash i was "impaired and had to fix this . The instruction tell you not to cut this but i missed this step it is located next to your cup holder see pic
now keep test fitting your bracket inplace once fitted wire up your plug for your head unit. PLZ solder it i got excited and butt connected it and had to redo it . your not done lol take out bracket and install your DD head unit
this part is pretty straight forward
First off lets get some things straight this write up is ONLY for TheDetailSS kit sold here http://www.thedetailss.com and IMO the ONLY way to do a proper DD install . not to bash anyone who did it differently because some of you did a great job but for the headache and money i would defiantly recommend this product . next thing is this is how i did mine i chose to do it this way . your results may vary upon how much time and effort you put into yours . another thing im not responsible for your mistakes . if you have questions ask me here on this thread or PM me if i cant help you ill direct you too someone who can .
I bought the 95-99 ck double din install kit (without the pre molded dash section)


My quick Review
1.Parts - as advertised and sturdy well built with no imperfections did not feel cheap great instructions
2.price- at time of purchase i thought a little excessive but once in hand and installed WORTH THE MONEY
3. customer service - SPOT ON owner was very happy and quick to answer any questions before purchase, even after purchase was very helpful in providing extra pictures advice and confidence booster to help me finish my install
NOTE: some steps were taken directly out of the install instructions as they are very clear and i could not have put them better i also added my own words to some of these steps and procedures
you will need :
--Flat head screw driver - big and small
--DD install Kit
--Time : to do it right
--patience
--percocets -prescribed for root canal but advil will work lol (for hacking up inside of your dash)
--drill ( drill bit for install is included but you can use your own if you wish)
-- small reciprocating air saw is ideal (did not have one for mine)
--dremel : multi speed i would say 2 one powered for the long process of molding the dash piece to the new dash and a smaller battery operated on to fit inside your dash for easier install
-- PLASTIC cut off wheel for dremel
-- sanding thing pictured below dont know the name of it but comes with dremel makes those fine touches for getting the size just right
-- quik steel plastic adhesive
-- JB weld plastic adhesive
-- valspar plastic primer and duplicator vynl and fabric paint
-- extra Dash assembly . GET THIS if you do screw up you didnt screw up the one you only have i got mine from a junk yard for 25 bucks a well played investment
--rubbing alcohol
Pics


First start by molding your dash pieces together to me this was the longest process AGAIN remember you will pay more but you can get a kit from them that already has this done for you
but take the EXTRA dash you aquirred and go hold the pieces together and see how much your going to have to cut DONT CUT TOO MUCH remember the old saying you can always cut more you cant put back or somthing of that nature
after you make a cut hold the pieces together and continue observing your cuts as you make them i found the best way was to Cut the big section out first purposely short of the lay in and switch to the sanding wheel to make fine adjustments so not to have to start over again


again this process is TEDIOUS remember take your time you will get there also notice there is a LIP on the side that is meant to touch the backside of the panel so AGAIN dont cut too much if you do this right you will minimize you having to fill in gaps and so your not confused TEXTURED side goes on the inside smooth faces outwards once this is completed test fit it into your truck it may be nessacary to trim inner corners of the around the hvac to insure a good fitment
Once you have this completed and the insert fits flush and correctly inside the bezel your ready for your next step now here is where i deviated from the instructions your now ready to glue it into place (once again MAKE SURE IT FITS SQUARE and correctly once the next step is completed its hard going back)
i used Quick steel for plastics and JB weld i couldn't find the recommended Norton Speed grip but many others will work . after cure ensure that the piece is firmly epoxied into place .
Next step is focus on plastic filling all gaps on front side and sand as desired i used again quick steel for plastics as its sandable and paintable and easy to mold into places


after sanding your almost ready for paint make sure your happy with your final product this is how its going to look once painted so now is the time to clean up and fix any imperfections in your work
Prep to Paint -- prep the surface well if you fail to do this you will have paint chipping and bubbling ect.... due to grease and dirt
i washed it with regular dish soap and warm water allow time to dry before next step
lastly i took rubbing alchohol and a LINT FREE cloth and rubbed down the entire surface that was to be painted . again allow to dry
Primer--- i used as said valspar plastic primer (yes its a CLEAR primer) but you will see the coat as it looks like a clear coat was painted to your dash i only applied 2 thin layers of primer allowing each layer to properly dry before the next i waited 2 hours before applying my paint
Paint --- after allowing last coat or primer to dry for atleast 2 hours i painted with duplicolor vinyl and fabric black paint ( you may choose any color you like) found at AUTOZONE or any other automotive outlets REMEMBER take your time this will decide the look of your final Product i simply aplied 3 THIN coats of paint allowing ample time between drieng so as not to allow running or patch up look
YOUR final product should look like this ( NOTE i emphisized on the fact of taking your time you see that imperfection next to the 4x4 controls YEA i had to go back and fix that AGAIN dont get excited and rush TAKE YOUR TIME ITS WORTH IT

now IMO the hard part is over but you still have to Hack the inside of your dash to make your new head unit and the new location of your HVAC controls fit
FIRST disconnect battery
-set parking brake
put vehicle in gear selection one
begin disasymbly of your dash with scredriver make sure to unplug all required wires to take off dash
once old dash is off start taking out hvac controls and old head unit
next step ,this is the simple process and really you dont have to make look pretty as you wont see it but i did anyways take your Bracket that was included into the kit and test fit it into your location of the dash it will be obvious how it supposed to fit but you will also see what it hits against and will know what to cut . The detail SS instructions here are very detailed and has a detailed image on what to cut but somthings will be obvious
OK one thing i will mention is take SPECIAL care when cutting the back side of the dash there is a metal bracket just behind the plastic and a wiring harness TAKE SPECIAL CARE IN NOT CUTTING THIS or you have a HUGE job ahead of you lmao heres a pic of the said wiring harness DONT MIND THOSE DRILL HOLES I GOT FUSTRATED AND PERCOCET IS A HELL OF A DRUG


another thing to mention DO NOT CUT THIS PLASTIC TAB if you do your screwed you have to fix this as it holds that corner of your bezel to the dash i was "impaired and had to fix this . The instruction tell you not to cut this but i missed this step it is located next to your cup holder see pic

now keep test fitting your bracket inplace once fitted wire up your plug for your head unit. PLZ solder it i got excited and butt connected it and had to redo it . your not done lol take out bracket and install your DD head unit
this part is pretty straight forward
Last edited:

