He's just replacing the rubber flex lines with braided ss lines at all 4 wheels plus the 2 over the top of the diff where they connect to the solid lines.You are right the GMT800 got Stabiltrak in the 05 model year as stock, the BPMV under the Drivers side seat will have 6 lines instead of the usual 5. I had a great laugh when I did all the brake lines, I got the SS kit from Dorman and when the box came, it was over 7 feet tall and you could pick it up with your baby finger. That Front line to the passenger side front was over 13 feet long, and in the box it was folded up special. The nice thing about that kit was it came with all the fittings and it was only 40 dollars. In fact GM came out with a special written article about how to change all the lines. I am trying to remember it as it was a great help in routing all the lines and hoses.
You are using an out of date browser. It may not display this or other websites correctly.
You should upgrade or use an alternative browser.
You should upgrade or use an alternative browser.
Brake Flex Line Replacement - Tips / Tricks / Photos
- Thread starter mals
- Start date
Disclaimer: Links on this page pointing to Amazon, eBay and other sites may include affiliate code. If you click them and make a purchase, we may earn a small commission.
corvette744
2004 Z-71
You better spray those a couple days before to help you out.I did the 5 line kit last week-the rear line took me over an hour.If you can you can break free those lines then pop out the clips and the lines drop down enough to work on them.Dont be suprised if you find out the fittings on the new stainless lines are diff then what you have and you have to cut and reflare the ends and install longer fittings to make it all work.Spare tire for sure has to be dropped.If i had to do it again i would do all the lines except those 2 and let a shop do it just in-case your fittings dont work.And make sure you mount the front lines under the control arm and far enough back so they dont rub on your tires at full turn-have someone turn the wheel back and forth and make sure its not close.I mounted the clip under the control arm they supplied.The stock clip didnt work.I'm planning to replace all six of my rubber flex brake lines with stainless flex lines. Today I pulled the rear wheels off to do a little prep work, and plan out my order of operations for next weekend. In tracing the lines, the two flex lines that drop down from the frame cross member to the rear axle look like they are going to be the difficult ones.
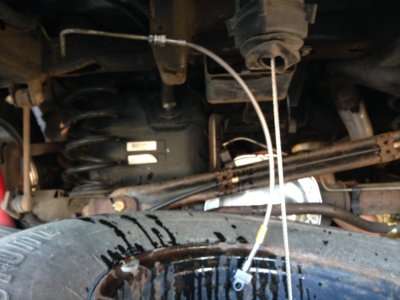
Does anyone have any tips for how to brake free the fittings from the solid brake line to the top of the flex tube that is up between the cross member and the body?
I can get a clear line of site to it after I pulled the spare tire, and I can get a wrench on the fitting by coming up the front side of the cross member, but I don't think there is enough room to swing the wrench. Even if I get the first one off it would then be in the way of getting the wrench on the second one.
View attachment 186934
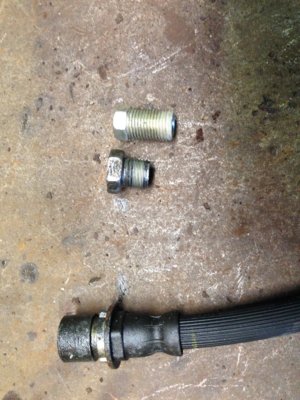
View attachment 186935
Is this the project that finally makes me buy a set of crowsfeet socket tips?
Dannydean
Member
- Joined
- Jul 2, 2017
- Posts
- 63
- Reaction score
- 30
Soak them good with penetrating oil and it also helps to add a little heat with a small propane bottle to the stubborn or rusty fittings
mals
Full Access Member
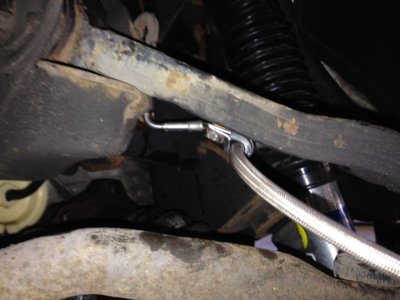
You better spray those a couple days before to help you out.I did the 5 line kit last week-the rear line took me over an hour.If you can you can break free those lines then pop out the clips and the lines drop down enough to work on them.Dont be suprised if you find out the fittings on the new stainless lines are diff then what you have and you have to cut and reflare the ends and install longer fittings to make it all work.Spare tire for sure has to be dropped.If i had to do it again i would do all the lines except those 2 and let a shop do it just in-case your fittings dont work.And make sure you mount the front lines under the control arm and far enough back so they dont rub on your tires at full turn-have someone turn the wheel back and forth and make sure its not close.I mounted the clip under the control arm they supplied.The stock clip didnt work.
View attachment 186990
Thanks for the information and the photos.
Did you heavily modify the steel tube over the rear axle when you reflared it, or did it always terminate to the flex line pointing towards the passenger side parallel to the the axle? As you can see in this picture I just took, my two lines make a turn towards the rear, then two quick 90s to head back towards the front of the vehicle, then transition to the flex lines over the cross member, and then drop down on the back side of the differential.
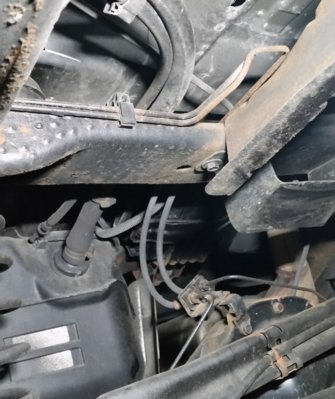
I'm going to head back out in a bit and soak ever part I plan on touching (front & back) with penetrating oil. I have another vehicle, so this will stay up on stands until the project is done, so I will probably hit them again a few times before I start pulling it apart on Friday.
Hopefully my upper steel line fittings are long enough to seat in the Goodridge fittings. Cutting them and reflaring them in there current position doe not seem like an option.
Last edited:
corvette744
2004 Z-71
If you have to cut and reflare i would take it somewhere and let them do it-its in a terrible spot but do able.Who knows yours might fit mine didnt,you can always just leave them on and install all the rest and let someone else do it-that does it for a living.Whats hard to us is prob easy to them.Im glad i had mine at the shop when i did it they let me use the rack i have know them for years.When the fitting didnt work i tapped out and let them fix the line and flare it.Thanks for the information and the photos.
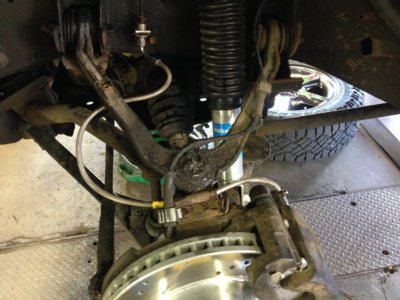
Did you heavily modify the steel tube over the rear axle when you reflared it, or did it always terminate to the flex line pointing towards the passenger side parallel to the the axle? As you can see in this picture I just took, my two lines make a turn towards the rear, then two quick 90s to head back towards the front of the vehicle, then transition to the flex lines over the cross member, and then drop down on the back side of the differential.
View attachment 186997
I'm going to head back out in a bit and soak ever part I plan on touching (front & back) with penetrating oil. I have another vehicle, so this will stay up on stands until the project is done, so I will probably hit them again a few times before I start pulling it apart on Friday.
Hopefully my upper steel line fittings are long enough to seat in the Goodridge fittings. Cutting them and reflaring them in there current position doe not seem like an option.
PG01
Supporting Member
Not hard to reflare, but def double flare them and a small tubing cutter gets into tight spots. Double flaring tools are cheap and small enough to fit in there. Just  yet again
 yet again
corvette744
2004 Z-71
I hear ya i assume i could of done it,but they only charged me 20 bucks for the fitting and cut and flare.I was on the phone with goodridge wanting answers as to why this was happening.Their tech told me they are aware of some different size fitting on some years.Why isnt that anywhere in the instructions or box or anywhere.He then said i quote i can send you some copper washers to take up the slack.That has to be the stupidest thing i have heard in a long time.I couldnt stand it and hung up LOLNot hard to reflare, but def double flare them and a small tubing cutter gets into tight spots. Double flaring tools are cheap and small enough to fit in there. Justyet again
Chubbs
Full Access Member
- Joined
- Jun 24, 2017
- Posts
- 634
- Reaction score
- 391
@corvette744
I was really wanting to go with Goodridge for the flex hose replace on my Yukon as I've had good results with them on a diff't make, but if I'm going to have problems with their setup I may as well look for another manufacturer. I do most of my maint @ my apartment & I don't have the luxury of fiddle-fu[king around with half a$$ developed replacement parts. Does anybody have first hand knowledge of a plug&play kit?
I was really wanting to go with Goodridge for the flex hose replace on my Yukon as I've had good results with them on a diff't make, but if I'm going to have problems with their setup I may as well look for another manufacturer. I do most of my maint @ my apartment & I don't have the luxury of fiddle-fu[king around with half a$$ developed replacement parts. Does anybody have first hand knowledge of a plug&play kit?
I
I used Goodridge and they were great. I had the 5- line kit and never got to the one above the rear diff. That one's a ***** to get to. I'll take it to a shop for that one probably. Just doing the 4 corners made a huge difference.@corvette744
I was really wanting to go with Goodridge for the flex hose replace on my Yukon as I've had good results with them on a diff't make, but if I'm going to have problems with their setup I may as well look for another manufacturer. I do most of my maint @ my apartment & I don't have the luxury of fiddle-fu[king around with half a$$ developed replacement parts. Does anybody have first hand knowledge of a plug&play kit?
Chubbs
Full Access Member
- Joined
- Jun 24, 2017
- Posts
- 634
- Reaction score
- 391
I'm not worried about the line being in a tight spot. I can't exactly spend a whole day cutting lines, reflaring to modify the fittings to accept a kit that should plug & play anyways.
