You are using an out of date browser. It may not display this or other websites correctly.
You should upgrade or use an alternative browser.
You should upgrade or use an alternative browser.
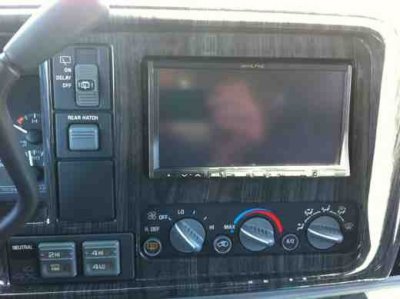
Double Din Install
- Thread starter Donnie Yukonie
- Start date
Disclaimer: Links on this page pointing to Amazon, eBay and other sites may include affiliate code. If you click them and make a purchase, we may earn a small commission.
- Joined
- Jul 31, 2011
- Posts
- 5,125
- Reaction score
- 161
You are gonna need more than a dremel. Lots of hand sanding to make sure you get that plastic insert to fit right and square. I just finished mine and it was very tedious. After with primer....
View attachment 16817
It's now off getting hydro dipped.
wow that looks good ! any tips?
Use the dremel to cut the majority of the insert out. Then hand sand to get it perfect. Keep trying and test fitting as you go. Sand just enough to keep going so you don't have to fill any gaps with filler. I ended up just glueing the insert piece in with some gorilla glue from the backside. It is very solid.
Cutting the inside of the dash out is pretty easy. Just really messy! Black plastic everywhere. And just becareful when you cut out at the bottom corner where it says in the instructions. I was very careful not to cut the tab hole out but it still broke free.
Cutting the inside of the dash out is pretty easy. Just really messy! Black plastic everywhere. And just becareful when you cut out at the bottom corner where it says in the instructions. I was very careful not to cut the tab hole out but it still broke free.
- Joined
- Jul 31, 2011
- Posts
- 5,125
- Reaction score
- 161
great ima start working on mine tom post pics when your done
- Joined
- Jul 31, 2011
- Posts
- 5,125
- Reaction score
- 161
So which of those pieces was the one for $400?
He didn't buy the complete dash kit. He got the same kit I did where you do all the work and he gives you the two black insert pieces you see in the photo above which is only $165. Link here;
http://thedetailss.com/95-99_CK_Double_Din.html
He didn't buy the complete dash kit. He got the same kit I did where you do all the work and he gives you the two black insert pieces you see in the photo above which is only $165. Link here;
http://thedetailss.com/95-99_CK_Double_Din.html
Oh have not seen that before, thank ya. I think I'll go for that one then, lot easier to swallow than $400.


