Excon11
Banned
Sorry for how late this has been i've had family come down to the house and havent really had to much time. Total install time for me was around an hour and 15 or so minutes. Gonna help my best to make it as clear as possible.
Tools Needed:
1. Phillips head screwdriver
2. Escalade Tail Lights L+R
3. 2 5 to 4 trailer harness converter (Hopkins # 48845 is the ones I used).
4. 6 Ohm 50w Power resistor (Superbright LED’s #RL-650 is again the ones I used).
5. Crimps or a soldering Iron
6. Crimp tool(If using Crimps) * I used crimps was easier IMO*
7. Heat Shrink to insulate the wires from water just incase.
8. Heat Gun.
9. Extra Harnesses incase you mess up ( I just used my stocks)
10. Wire Cutters
11. Zip Ties.
Instructions:
1. Dis-install the stock tail lights using the screwdriver
2. Remove the bulbs and put the stock lamp to the side.
3. I left my harnesses plugged in the whole time so you can either decide to unclip them from the bottom just what ever is easier.
4. Cut the wires a little below the side marker bulb to get full access to the wires.
5. Cut the Escalade harness little above the 6 pin connector( It takes alot of guts to cut these trust me)
6.*This is the wiring Diagram I used works perfectly* The Sideways slants are where the crimps are used.

7. I did the direct connections first after than I started with the converter. I cut the wires short and cut the unneeded wires (Brown and Yellow) almost completely off and than insulated them with electrical tape
8. Escalade to harness is pretty straight forward just fallow the colors and crimp where it says to crimp.
9. Disregard the Pink+Black and Yellow+Black Wires on the Escalade too I cut them short and covered them in electrical tape as well.
10. Wire the direct connections on the tahoe side just like you did with the escalades side.
11. Where it gets tricky is the Tahoe to the converter with the resistors.
12. The red and green wire only get one resistor on them while the white has two .
.
13. Superbright Led resistors come with these blue crimp locks that work amazing. you put the wires threw the slot and connect to its designated wire using the diagram but than the resistor goes in the slow that doesn't go all the way threw.
14. After that test using the unlock function and watch your escalade lights come to life.
15. After seeing that they work move the heat shrink tubing over and go over it with a heat gun sealing them and after that put them back in the black plastic tubing as well as you can.
16. Put the wiring down the slot so it hangs all under your bumper and go to work installing the zip ties (See above pics of mine) ** Make sure you keep the resistors away from the wires they do get hot and might burn threw**
17. Than install and repeat on the opposite side (2nd half gets very easy since you know exactly what your doing.
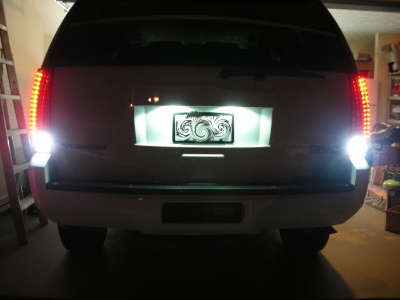
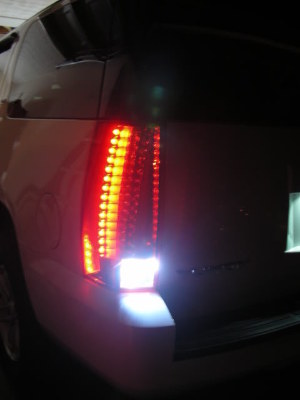
18. Install using the screws and the phillips head and than enjoy your tail lights . If you have any questions at all don't hesitate to ask me i'm more than happy to help, and sorry I didn't have more detailed pics I realized I should've taken pics during the install but spaced.
19. Just test all hazards, turns, etc It should all work.


Im not electrical genius its more of a mental challenge than physical just take deep breaths and you'll be just fine.
Hope you all enjoyed my write up .
.
Tools Needed:
1. Phillips head screwdriver
2. Escalade Tail Lights L+R

3. 2 5 to 4 trailer harness converter (Hopkins # 48845 is the ones I used).
4. 6 Ohm 50w Power resistor (Superbright LED’s #RL-650 is again the ones I used).
5. Crimps or a soldering Iron
6. Crimp tool(If using Crimps) * I used crimps was easier IMO*
7. Heat Shrink to insulate the wires from water just incase.
8. Heat Gun.
9. Extra Harnesses incase you mess up ( I just used my stocks)
10. Wire Cutters
11. Zip Ties.
Instructions:
1. Dis-install the stock tail lights using the screwdriver
2. Remove the bulbs and put the stock lamp to the side.
3. I left my harnesses plugged in the whole time so you can either decide to unclip them from the bottom just what ever is easier.
4. Cut the wires a little below the side marker bulb to get full access to the wires.
5. Cut the Escalade harness little above the 6 pin connector( It takes alot of guts to cut these trust me)

6.*This is the wiring Diagram I used works perfectly* The Sideways slants are where the crimps are used.

7. I did the direct connections first after than I started with the converter. I cut the wires short and cut the unneeded wires (Brown and Yellow) almost completely off and than insulated them with electrical tape

8. Escalade to harness is pretty straight forward just fallow the colors and crimp where it says to crimp.
9. Disregard the Pink+Black and Yellow+Black Wires on the Escalade too I cut them short and covered them in electrical tape as well.
10. Wire the direct connections on the tahoe side just like you did with the escalades side.
11. Where it gets tricky is the Tahoe to the converter with the resistors.
12. The red and green wire only get one resistor on them while the white has two
 .
. 13. Superbright Led resistors come with these blue crimp locks that work amazing. you put the wires threw the slot and connect to its designated wire using the diagram but than the resistor goes in the slow that doesn't go all the way threw.
14. After that test using the unlock function and watch your escalade lights come to life.
15. After seeing that they work move the heat shrink tubing over and go over it with a heat gun sealing them and after that put them back in the black plastic tubing as well as you can.

16. Put the wiring down the slot so it hangs all under your bumper and go to work installing the zip ties (See above pics of mine) ** Make sure you keep the resistors away from the wires they do get hot and might burn threw**
17. Than install and repeat on the opposite side (2nd half gets very easy since you know exactly what your doing.
18. Install using the screws and the phillips head and than enjoy your tail lights
 . If you have any questions at all don't hesitate to ask me i'm more than happy to help, and sorry I didn't have more detailed pics I realized I should've taken pics during the install but spaced.
 19. Just test all hazards, turns, etc It should all work.


Im not electrical genius its more of a mental challenge than physical just take deep breaths and you'll be just fine.
Hope you all enjoyed my write up
 .
.


