Fosscore's 2006 Tahoe Build Thread

Disclaimer: Links on this page pointing to Amazon, eBay and other sites may include affiliate code. If you click them and make a purchase, we may earn a small commission.

Pachanga02

Full Access Member
Joined
Jan 22, 2012
Posts
1,236
Reaction score
75
Location
Ny
I'm kind of sick of seeing this beautiful sexy truck. It's everything I want on a truck. Color is wet, stance/wheels is where it's supposed to be, enough already and make a calendar.
 

05Single

afraid of the dark
Joined
Feb 26, 2015
Posts
8,186
Reaction score
11,456
I'm kind of sick of seeing this beautiful sexy truck. It's everything I want on a truck. Color is wet, stance/wheels is where it's supposed to be, enough already and make a calendar.
Not me, this one and only truck is my motivation. I need a daily reminder.
:fuckyea:
 

DDenali

Full Access Member
Joined
Mar 4, 2014
Posts
559
Reaction score
501
Location
Orangeburg, SC
Gave the truck a good wash this morning so that I could get the HD hood detailed after the repaint. Looking badass and it is finally smooth and free of corrosion. What a mission, but the painters hooked me up this time going the extra mile to make sure they got it dialed in. I hit it with the clay bar, polished it with the DA and 3M Perfect-It Ultrafine Machine Polish, then Surf City Garage Nano Seal and Glaze. The shine and reflection is amazing!!

I hit the tires with a stiff brush and cleaner and gave the wheel faces a good polish. They weren't really that dirty, but worth the effort to make sure there wasn't any additional brake dust on them even though they get their own wash mitt on the face and a separate one for the inner lip. Shined the tires up and hit the road for a short road trip with the family while the truck was looking sweet and the weather was perfect.


View attachment 73502

View attachment 73504

View attachment 73505

View attachment 73506

View attachment 73507
[emoji122][emoji122][emoji122][emoji122][emoji122][emoji122][emoji122][emoji122][emoji122][emoji122][emoji122]


Sent from my iPhone using Tapatalk
 
OP
OP
Fosscore

Fosscore

Full Access Member
Joined
Apr 16, 2014
Posts
10,549
Reaction score
18,384
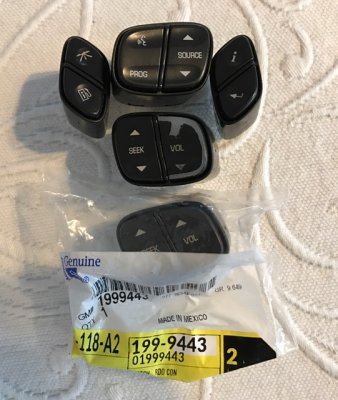
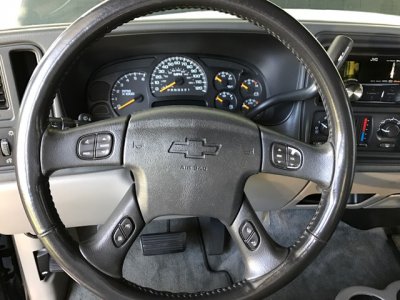
Steering Wheel Control Buttons - Blue LEDs

So I was fed up with my volume button paint being rubbed off and only a few of the buttons actually lit up anymore. I ordered a GM OEM replacement SEEK/VOLUME button on eBay for $24.78 shipped. I found a guy on eBay located in Tennessee going under the company name, The Gauge Pro, that would put any color LEDs in all 4 buttons for $44.99 with return shipping included.

Here is the link. http://www.ebay.com/itm/171254310780?ul_noapp=true

Cost me $11.00 to ship to him 2 day USPS Priority Mail. Terry received the buttons on a Friday and they were delivered back to me on Monday. What a quick turn around. We traded a few emails, including instructions that mirrored what I had researched online about how to remove/install the buttons.

Here are the steps that I took.

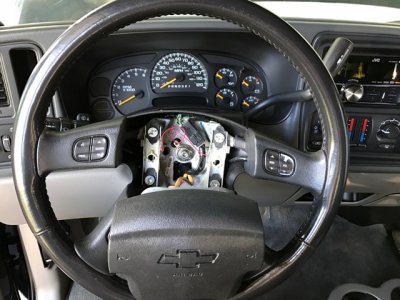
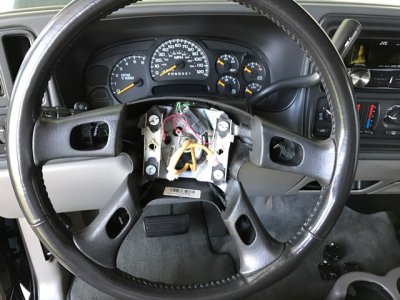
AIRBAG and STEERING WHEEL CONTROLS REMOVAL
1. Disconnect the negative battery cable.
2. Pull the 15amp Airbag fuse in the engine compartment fuse box.
3. Find the 2 small holes on the steering column just behind the actual wheel, push in a small screwdriver (or anything long and skinny) into one hole, which will release that side of the airbag. Repeat on the other side and gently pull the airbag forward to reveal the pink and yellow clips holding the airbag to the wheel.
4. Pinch and remove the 2 clips by pulling up and out, then carefully lay your airbag face down in the truck and away from where you are working.
5. Use a small flathead or L-shaped screwdriver or on the 2 lower buttons you can push through the wire hole to help push the button outwards as far as the tight wires will allow you to (more on this) and wiggle the button out of the steering wheel to access the clip. Be careful not to stretch the steering wheel material too much during removal or it will tear. Use a flathead screwdriver to push in and remove the wiring harness clip from the button. The top buttons have more stretch in the wiring harness and come apart a little easier than the bottom buttons, which will need a little persuasion to access the clips. Be gentle but forceful.


AIRBAG and STEERING WHEEL CONTROLS INSTALLATION
1. Repeat battery and 15amp fuse steps 1 and 2 from REMOVAL.
2. The top buttons should be able to clip in fairly easy with some persuasion of the button pressed hard against the wheel and tilted to one side, as there tends to be more slack in the wiring harness on top. One of the instructions suggested taking off the steering wheel to make this process easier with perhaps more play in the wiring harness as it is stuck under the steering wheel before it comes through the holes to the buttons. I chose not to follow this step.
3. The bottom buttons take some patience, repetition of the same movement and maybe a little luck. I pulled on the wiring harness with my fingers and needle nose pliers to get as much slack as possible to the opening. I also decided to use some fishing line and wrap it around the base of the connector to be able to pull it as tight as it would allow me, line it up with the button opening and with some luck, numerous tries, a bit of frustration (but having read other guys having the same issue, I knew what I was in for at the start, only wishing it was easier and that GM had put more slack in that harness initially...lol) and finally making the male and female pieces come together and clip in. They can only go in one way.
I tested each button before I pushed it in as far as it would go.
4. Install the 15amp Airbag fuse.
5. Connect the negative battery cable.

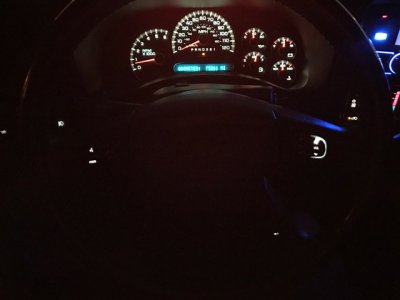
I am very happy with the results. Bright blue LEDs in the steering wheel controls that are fully visible as well as no more missing paint.

Total project cost was $80.77 and about 1 hour of my time.


IMG_1766.JPG

FullSizeRender.jpg

IMG_1767.JPG

IMG_1769.JPG


IMG_1696.JPG
 
Last edited:

07Burb

GM fan for life
Staff member
Administrator
Supporting Member
Joined
Jan 3, 2011
Posts
50,392
Reaction score
17,313
bought time you fixed that crap up. How did you ever live like that for so long? :insane:
 
OP
OP
Fosscore

Fosscore

Full Access Member
Joined
Apr 16, 2014
Posts
10,549
Reaction score
18,384
I'm kind of sick of seeing this beautiful sexy truck. It's everything I want on a truck. Color is wet, stance/wheels is where it's supposed to be, enough already and make a calendar.

Thx @Pachanga02. Appreciate the love.


Not me, this one and only truck is my motivation. I need a daily reminder.
:fuckyea:

Trying to match up with your LED projects. You know the little stuff....thx man.


[emoji122][emoji122][emoji122][emoji122][emoji122][emoji122][emoji122][emoji122][emoji122][emoji122][emoji122]

:beer:
 

Forum statistics

Threads
132,780
Posts
1,874,194
Members
97,616
Latest member
tygbenn
Top