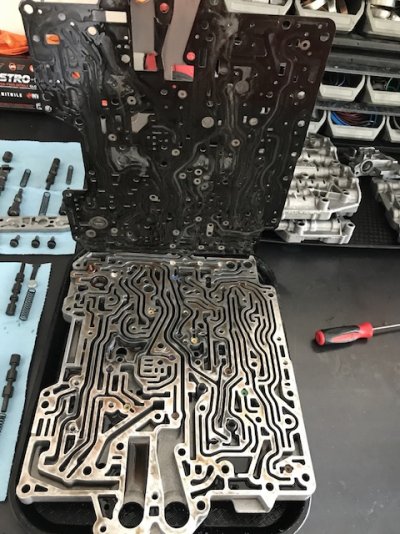
Hi All,
Since so many of us own at least one Tahoe or Yukon equipped with a 6L80, I figured I'd start an all-encompassing transmission thread with videos, links and other information as it relates to the 6L80/90 transmissions. I'll get it going with a tear down and inspection video and go from there. Hoping this can be an easy 'one-stop shop' for exchanging information, guidance and advice as it relates to 6L80 or 6L90 transmissions.
I'll update this first post with more over time and bump the thread when new stuff gets incorporated.
Feel free to post questions, comments, etc...
Note - Feel free to send me a PM as well but please provide your first name so that I know who I'm talking to - TIA.
2011 6L80 Teardown and Inspection
Special Tools Needed to Work on the 6L Transmissions
6L Transmission - Diagnosis and Troubleshooting, PT1 - Operating Fundamentals and Using Range Charts
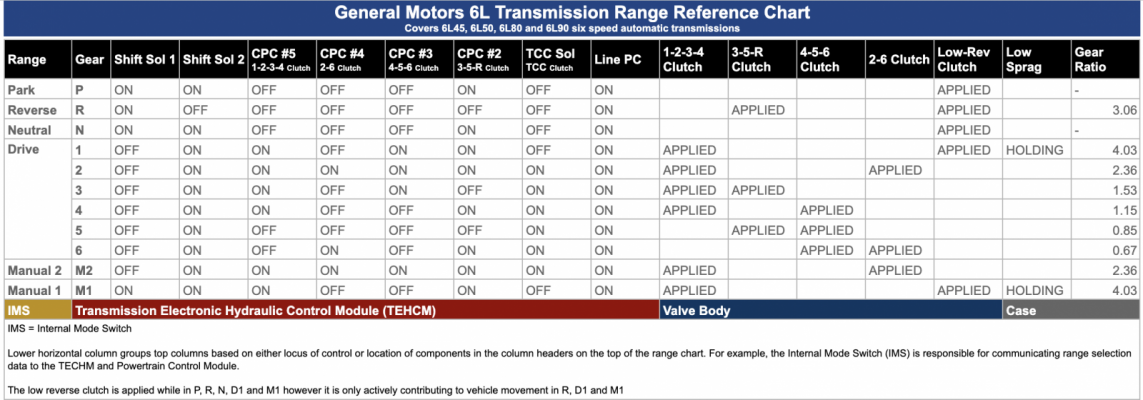
Quick primer on TEHCM resistance testing:
> Review this article for the TEHCM testing procedures.
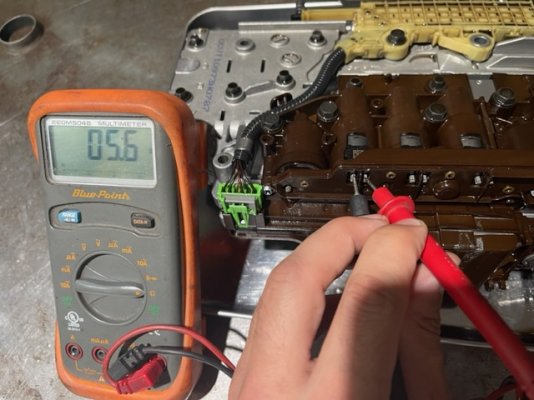
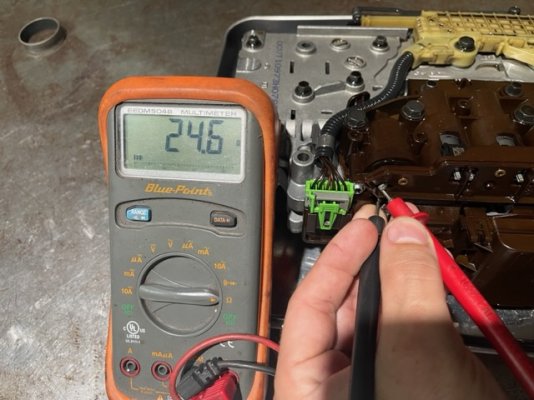
> Using a multimeter to test resistance for shift and pressure control solenoids (shift solenoids: 20-40 ohms; line pressure/clutch pressure control solenoids: 3-8 ohms).
clutch pressure control solenoid
shift solenoid
Pressure switch resistance (closed circuit): .7-1.9 ohms ( this is pressure switch #1 which sends a signal to the TCM reporting the status of the 3-5-R clutch reg valve in the valve body)
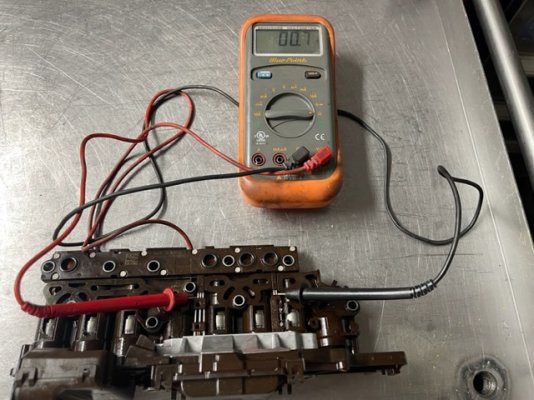
Pressure switch resistance (open circuit, pressure applied to switch) 11.5-12.9 kohms
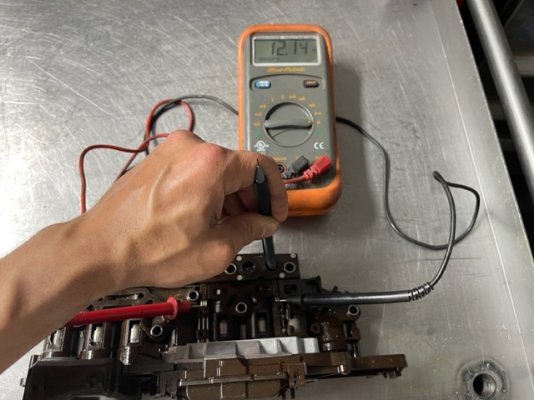
> Use pencil eraser to put pressure on switch to open circuit
> Pressure switch resistance should drop back to .7-1.9 ohms or so when circuit is closed again (may vary a bit but should not be significantly different).
If any of those pressure switches are not reading like the above when you do this test, then the TEHCM is bad and should be replaced!
TSBs and other Tech Info
ATSG Manual
TSB - Cooler Bypass Valve
TSB - Pump and 3-5-Reverse Drum
ATRA - Intro to the 6L80
ATRA - Changes Over the Years
ATRA - TEHCM Diag, T&E
Installation procedures & fluid level check
GEARS Mag: Diagnosing CAN communication issues (no scan tool)
6L80/90 TSB - UU0073 Communication Breakdown Between Modules (including the TEHCM)
Parts List for Overhaul
Since so many of us own at least one Tahoe or Yukon equipped with a 6L80, I figured I'd start an all-encompassing transmission thread with videos, links and other information as it relates to the 6L80/90 transmissions. I'll get it going with a tear down and inspection video and go from there. Hoping this can be an easy 'one-stop shop' for exchanging information, guidance and advice as it relates to 6L80 or 6L90 transmissions.
I'll update this first post with more over time and bump the thread when new stuff gets incorporated.
Feel free to post questions, comments, etc...
Note - Feel free to send me a PM as well but please provide your first name so that I know who I'm talking to - TIA.
2011 6L80 Teardown and Inspection
Special Tools Needed to Work on the 6L Transmissions
6L Transmission - Diagnosis and Troubleshooting, PT1 - Operating Fundamentals and Using Range Charts

Quick primer on TEHCM resistance testing:
> Review this article for the TEHCM testing procedures.
> Using a multimeter to test resistance for shift and pressure control solenoids (shift solenoids: 20-40 ohms; line pressure/clutch pressure control solenoids: 3-8 ohms).
clutch pressure control solenoid

shift solenoid

Pressure switch resistance (closed circuit): .7-1.9 ohms ( this is pressure switch #1 which sends a signal to the TCM reporting the status of the 3-5-R clutch reg valve in the valve body)

Pressure switch resistance (open circuit, pressure applied to switch) 11.5-12.9 kohms

> Use pencil eraser to put pressure on switch to open circuit
> Pressure switch resistance should drop back to .7-1.9 ohms or so when circuit is closed again (may vary a bit but should not be significantly different).
If any of those pressure switches are not reading like the above when you do this test, then the TEHCM is bad and should be replaced!
TSBs and other Tech Info
ATSG Manual
TSB - Cooler Bypass Valve
TSB - Pump and 3-5-Reverse Drum
ATRA - Intro to the 6L80
ATRA - Changes Over the Years
ATRA - TEHCM Diag, T&E
Installation procedures & fluid level check
GEARS Mag: Diagnosing CAN communication issues (no scan tool)
6L80/90 TSB - UU0073 Communication Breakdown Between Modules (including the TEHCM)
Parts List for Overhaul
| PART | GM Part # | Notes |
|---|---|---|
| Paper and rubber kit | BW high energy or Raybestos Stage One unless full race | |
| Clutch module | ||
| Kolene steel module for 3-5-R and 4-5-6 clutch packs | ||
| Factory steel module for 1-2-3-4, 2-6 and low reverse clutch packs | ||
| Bonded steel and rubber piston kit | OEM pistons are made by National Seal | |
| Snap ring kit for the 3-5-R and 4-5-6 clutch pack return spring assemblies | 24260139 | Early spring kit listed will service all years |
| Snap ring for the rear sprag assembly-to-center support | 24230752 | Will retro to 2006-E2007 units |
| Snap ring for the 4-5-6 hub damper cover plate | ||
| 38 element sprag clutch assembly | 24248957 | Will retro to 2006-E2007 units |
| GM heavy duty parking rod assembly (2017 and older) | 24280048 | 12.5" for 6L80E and 14.5" for 6L90E |
| Factory bushing kit | ||
| Thrust bearing kit (only needed if trans overheated) | ||
| Sonnax billet aluminum 1-2-3-4 apply piston | ||
| Sonnax 4-5-6 piston kit | Optional but strongly recommended | |
| Sonnax Zip Kit | Transgo Reprogramming kit is a viable alternative | |
| Sonnax Oversized Clutch Boost Valve kit | Necessary if one or more existing clutch boost valves fail vacuum test or prove to be worn; requires Sonnax reamer and related tooling for installation | |
| GM internal mode switch | 24246427 | Updated switch will retro to years 2006-E2007 |
| GM wiring harness and speed sensor assembly | 2012+: Application dependent and must match existing rear speed sensor design - consult dealer w/VIN | |
| GM separator plate | Year/application specific - consult dealer w/VIN | |
| GM TEHCM | Optional for later model units and strongly recommended for pre 2014 units; year/application-specific - consult dealer w/VIN | |
| Sonnax pressure switch rebuild kit and tool | Purchase if intending to re-use TEHCM | |
| GM TEHCM filter screen | Purchase if intending to re-use TEHCM | |
| New Torque Converter | New converter should come w/ converter clutch thickness => .050"; billet cover required for heavy duty or high performance | |
| Machine Work | ||
| Pump | Machine pump cover and body. Cut pocket to achieve .002 clearance between rotor/slide and deck surface | |
| 3-5-R Drum | Reinforce welds at the base of the drum (all years) | |
| High Performance Options | ||
| Rear planetary carrier assembly with billet drive plate | Not needed unless horsepower exceeds 700HP or if vehicle is regularly raced | |
| Sonnax 3-5-R high capacity apply ring | When installed and factory wave plate eliminated, this apply ring allows for an additional clutch and flat steel plate | |
| Sonnax 4-5-6 billet clutch hub | ||
| Camaro ZL1 Converter | Great performance upgrade as these are significantly stronger than the stock JMBX converters that come w/the 6L80E | |
| Raybestos Blue Plate Stage 3 friction module | ||
| Complete Raybestos Kolene steel module |
Last edited by a moderator:

