I’m back with an Esky this time

Disclaimer: Links on this page pointing to Amazon, eBay and other sites may include affiliate code. If you click them and make a purchase, we may earn a small commission.

OP
OP
Snowbound

Snowbound

Jim
Joined
Nov 23, 2016
Posts
1,055
Reaction score
2,477
Location
Chicagoland (Lockport)
I have a few minutes so I might as well update what happened Saturday.
I got a notification while I was at work that the automatic suspension control module was delivered. Soon as I got home I couldn’t wait to get that installed and programmed to see if it fixed my issue.
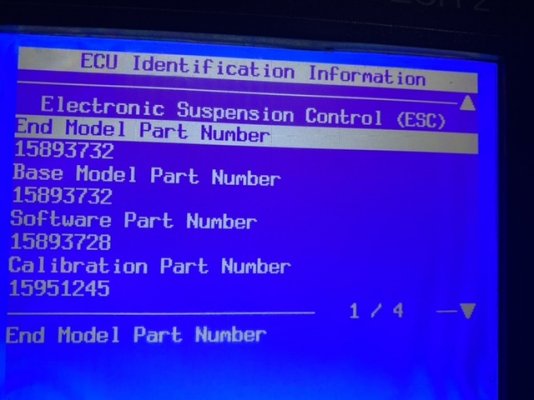
I first hooked up the scanner and checked the software and calibration identification numbers on the old unit.
E7854666-2AD3-4E6D-A98C-DB9C9BD8BFC7.jpeg

Then I plugged the Tech2 into my laptop and went to the GM website and downloaded the only software I could find for this module. The calibration number was different but it was the only thing I found that was for this module.
After I downloaded the program I swapped the old ASCM for the new one. Then I removed the relay for the compressor because I wasn’t sure what it would do and I didn’t want the compressor to run while I was downloading the program. Not sure that it would have but just as a precaution I pulled relay.
This was the first time I’ve ever used the Tech2 to program a module and it was fairly easy but at the same time I was afraid I would brick this module.
After it did its programming I turned key off and plugged relay back in. Scanned the info on the module and it looked like it worked.
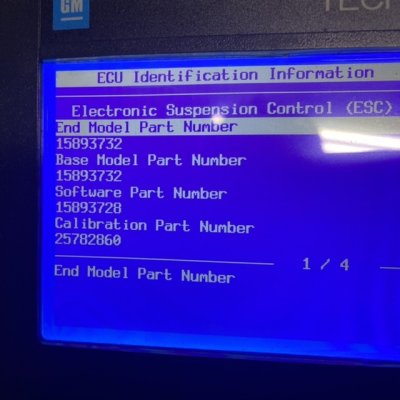
62D5A69B-F57B-40C2-8E42-BC0D3F312A8B.jpeg

But the compressor didn’t run. I pulled the codes and it had one stored for compressor relay fault. I cleared the code and compressor ran.
I pulled up the data and all my ride height sensors looked good, same data as the old module anyway. Then I commanded compressor on and watched the air pressure sensor and it read 0 and started to rise. Awesome! Before I was seeing 189psi all the time no matter what I did.

So now I have no codes, service suspension light is off. no Air bag message, and now just waiting to get this rim repaired so I can drive this thing and see how them struts feel and also can’t wait to hear no rattle in rear from that bad sway bar end link. So glad this is fixed and kicking myself for not doing it sooner but I really haven’t had the time.
 
OP
OP
Snowbound

Snowbound

Jim
Joined
Nov 23, 2016
Posts
1,055
Reaction score
2,477
Location
Chicagoland (Lockport)
I have some catching up to do and also some updating to do but I’m treating the most common rust spots today on my vehicles and I don’t believe I’ve ever shared this and what I do so I figured I’d throw it out there.
Starting with the doors, the bottom and back side of the door skins are prone to collect moisture and debris where the outer door is folded around the inner door. It’s always best to remove the door panel and clean out anything that has collected in there while it’s dry. Doesn’t have to be perfect but a blow gun to loosen it up followed by a vacuum is the way I do it. I don’t have any pics of that because today I’m only treating it do to limited time.
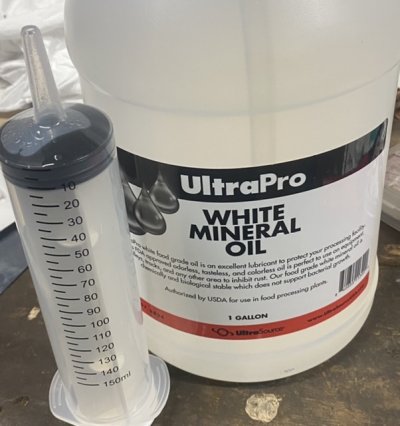
There are a few different things you can use, ATF works great because it has a lot of detergents in it but it does leave a smell for a few weeks. Petroleum jelly warmed to a liquid is also a good treatment but takes a little longer. You can melt it in microwave or by using a heat gun in a metal bowl or container. What I find easiest and cheap is mineral oil. You can pick up a gallon for under $20 and it doesn’t need to be heated or have any smell. Baby oil works for this too.
91139E60-D6F9-4DAE-A9C3-68F401FEABBA.jpeg

The syringe I got off Amazon a while back, they’re cheap. Like $6 for a pack of 3.
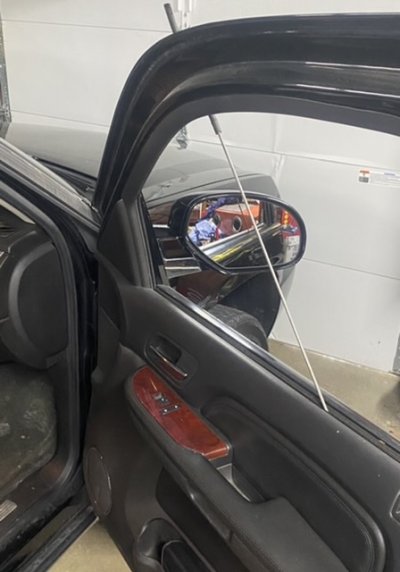
Then I take a piece of 3/16” brake tubing and cut it so it reaches the bottom of the door thru the window channel and leave some extra so I can do all my vehicles and also reach in from the rear after removing brake light from my truck and get to the top of wheel arch.
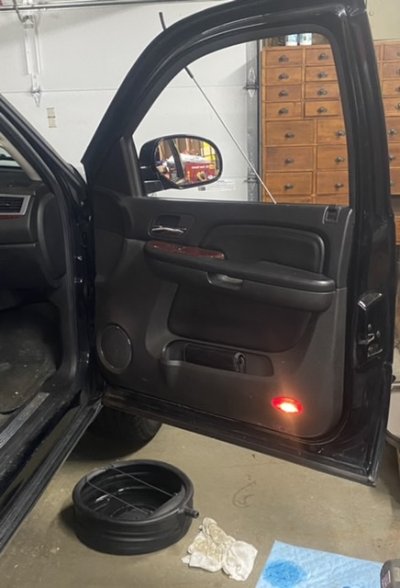
Just roll down the windows and feed the brake tubing in between window and seal. For the back of the door I like to start high and allow the oil to run down the seam. Then fill up the bottom of the door by moving the tubing to 3 different places along bottom. I use about 100ml of oil for each door and attach to brake tubing with a piece of 1/4” hose. Just put some towels and drain pain down to catch the oil as it drips out.
1362FB86-0D66-468D-B02A-ED82CFB2E18D.jpeg
D594D9A0-5EB3-4FD3-A3AA-86173BFD0CD1.jpeg
I’ll go in from under the hood into the back of each fender and use about 60ml to treat the drains. Remove sill plates from inside doors and put oil into holes to get it inside rockers. I usually hit that the hardest. Couple different ways to get above rear wheel wells but you can get to it from removing brake lights. May have to put a slight bend on tubing to get the oil where you want it. Go crazy with it and get everything and anything coated. The more the merrier. I usually do this every 2 years. Last couple years I’ve been slacking so I’m really going to town this time.
Just sharing something easy and cheap to help others try to keep their vehicles and investments clean and as rust free as we can keep them.
I’ll get back to the group later and give some updates on what else I’ve been doing. Hope everyone is safe and healthy.
 

Doubeleive

Wes
Supporting Member
Joined
Nov 7, 2017
Posts
26,211
Reaction score
39,279
Location
Stockton, Ca.
I have some catching up to do and also some updating to do but I’m treating the most common rust spots today on my vehicles and I don’t believe I’ve ever shared this and what I do so I figured I’d throw it out there.
Starting with the doors, the bottom and back side of the door skins are prone to collect moisture and debris where the outer door is folded around the inner door. It’s always best to remove the door panel and clean out anything that has collected in there while it’s dry. Doesn’t have to be perfect but a blow gun to loosen it up followed by a vacuum is the way I do it. I don’t have any pics of that because today I’m only treating it do to limited time.
There are a few different things you can use, ATF works great because it has a lot of detergents in it but it does leave a smell for a few weeks. Petroleum jelly warmed to a liquid is also a good treatment but takes a little longer. You can melt it in microwave or by using a heat gun in a metal bowl or container. What I find easiest and cheap is mineral oil. You can pick up a gallon for under $20 and it doesn’t need to be heated or have any smell. Baby oil works for this too.
View attachment 370753

The syringe I got off Amazon a while back, they’re cheap. Like $6 for a pack of 3.
Then I take a piece of 3/16” brake tubing and cut it so it reaches the bottom of the door thru the window channel and leave some extra so I can do all my vehicles and also reach in from the rear after removing brake light from my truck and get to the top of wheel arch.
Just roll down the windows and feed the brake tubing in between window and seal. For the back of the door I like to start high and allow the oil to run down the seam. Then fill up the bottom of the door by moving the tubing to 3 different places along bottom. I use about 100ml of oil for each door and attach to brake tubing with a piece of 1/4” hose. Just put some towels and drain pain down to catch the oil as it drips out.
View attachment 370754
View attachment 370755
I’ll go in from under the hood into the back of each fender and use about 60ml to treat the drains. Remove sill plates from inside doors and put oil into holes to get it inside rockers. I usually hit that the hardest. Couple different ways to get above rear wheel wells but you can get to it from removing brake lights. May have to put a slight bend on tubing to get the oil where you want it. Go crazy with it and get everything and anything coated. The more the merrier. I usually do this every 2 years. Last couple years I’ve been slacking so I’m really going to town this time.
Just sharing something easy and cheap to help others try to keep their vehicles and investments clean and as rust free as we can keep them.
I’ll get back to the group later and give some updates on what else I’ve been doing. Hope everyone is safe and healthy.
Mine are probably due to be lubed as well
 

Tonyrodz

Resident Resident
Joined
Feb 16, 2012
Posts
31,604
Reaction score
47,097
Location
Central Jersey
I've been brushing on Por 15 on the rust spots on my van. Thankfully it's dark green and the black Por 15 doesn't stick out too much. I like your idea. Doesn't the oil on the inside attract dirt/dust to it?
 
OP
OP
Snowbound

Snowbound

Jim
Joined
Nov 23, 2016
Posts
1,055
Reaction score
2,477
Location
Chicagoland (Lockport)
I've been brushing on Por 15 on the rust spots on my van. Thankfully it's dark green and the black Por 15 doesn't stick out too much. I like your idea. Doesn't the oil on the inside attract dirt/dust to it?
That dirt and dust is sticking to the damp metal without this treatment anyhow. The benefit of having the creases filled with oil is it will not allow moisture to sit in there and rust away the metal. The issue with only using POR is if the metal was not treated prior to using the coating, it’s just traps the moisture and it rots from the inside out. POR is a great product but it gets hard and can crack. Then moisture gets behind it and you’ll see the paint flake off exposing the rust. You should clean the area the best you can with a wire brush and some scotch brite pads, rinse it down and/or blow it out so it’s dry, use an etching metal prep or rust convertor and then coat with POR. The paint is for cosmetics and I would still pour some sort of treatment inside because the oil will get where the POR can’t or didn’t. And also the oil doesn’t harden so air and water won’t get behind it to contact the metal. That’s just my thought process and it’s a cheap and easy way to help preserve those seams. I’ve seen where guys have tried to seam seal the inside of the doors but if there’s any void or even the smallest pinholes that moisture will still get in there and do damage. You also run the risk of sealing up the drains or allowing water to sit because it’s built up too high in spots. I don’t know if my method is the cure-all but I can’t see how it hurts anything either.
 
OP
OP
Snowbound

Snowbound

Jim
Joined
Nov 23, 2016
Posts
1,055
Reaction score
2,477
Location
Chicagoland (Lockport)
Back to where I left off on this rig. The place that was repairing that small crack and powder coating the wheel for me kept pushing me off because they were busy and telling me it was 2 weeks before they could get to my rim. I said screw it and had to put the wheel back on and give her the vehicle back. I’m losing about 2lbs every other day so I’ve been having to check and fill the tire until they call and tell me to bring it in. I almost think they have forgotten about me but I’ve been busy so I haven’t called them either. I need to do that.
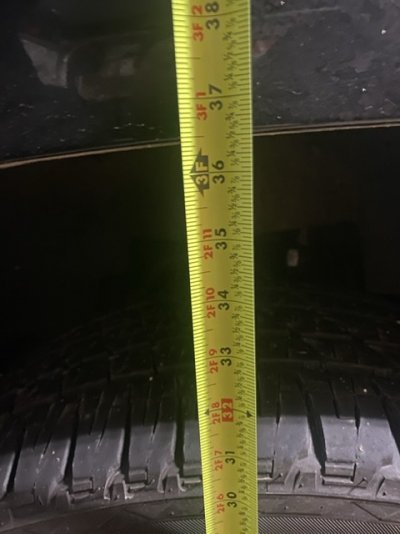
But with wheels on, tire pressures checked I’m sitting at 36-1/2” to wheel well. I’ll check it again in a few weeks and see if it has settled any from the new springs settling in.
C3FC1E21-EC56-4330-92F2-F3013C1ED247.jpeg

I wouldn’t say it rides any better or any worse. I wasn’t expecting a miracle but I can’t positively say the old struts were bad. They didn’t leak, but I’ve always thought this thing should ride better than it does. Idk, maybe my expectations are too high for a heavy SUV. It doesn’t “float” either or have body roll so I guess it’s as good as it should be. The new rear sway bar end link and bushing feel better though. I’m still waiting for my electronic struts.
 
OP
OP
Snowbound

Snowbound

Jim
Joined
Nov 23, 2016
Posts
1,055
Reaction score
2,477
Location
Chicagoland (Lockport)
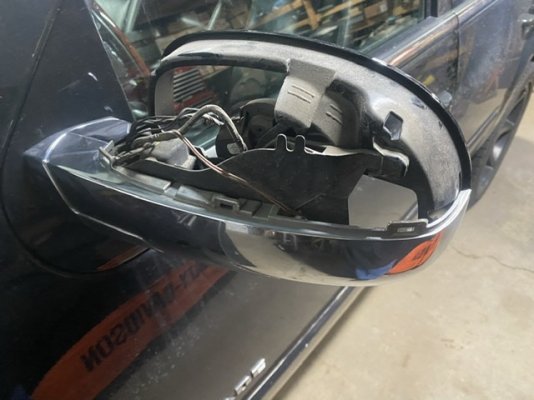
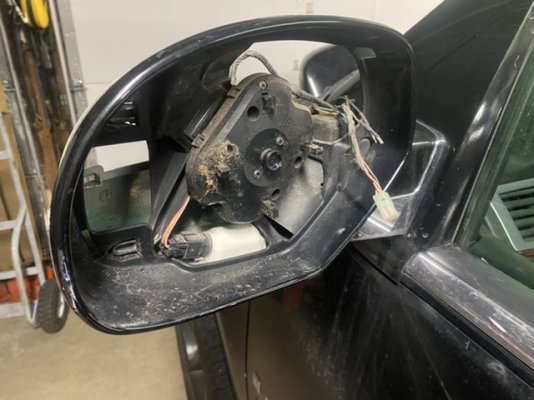
She took out the drivers side mirror on the garage door a while ago and I finally got around to changing that out. Started by removing the top of the housing and then you can get in there with a long skinny flat blade screw driver to release the tabs that hold the mirror to the motor plate.
FA708663-4779-4423-90DD-2D75C6BE3789.jpeg
FFC8986C-15E4-4407-B8B3-796F37EF9A4B.jpeg

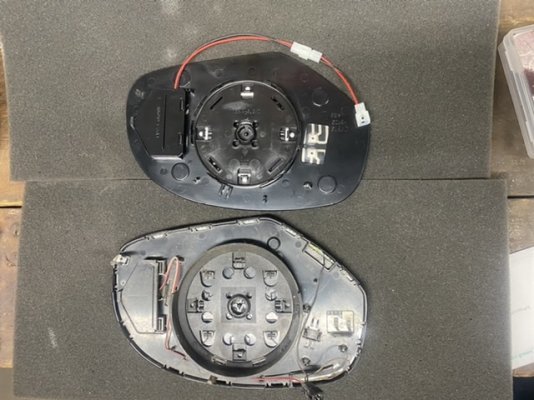
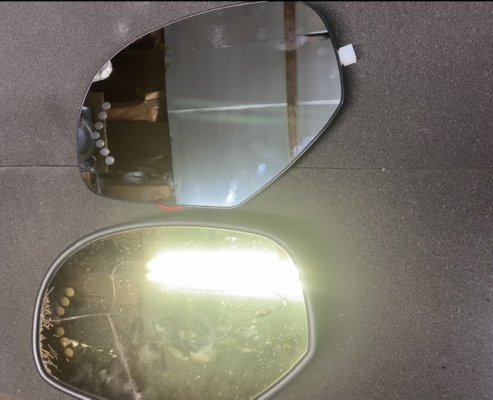
The replacement mirror is heated and has turn signal but it didn’t come with the light sensor for it he autodim. Kinda made me mad because it said it was a direct replacement.
847A727B-A559-4AF5-9DC5-791D9587E4B0.jpeg

3CB244AD-8088-4F7C-90E9-74DEEBD978CE.jpeg

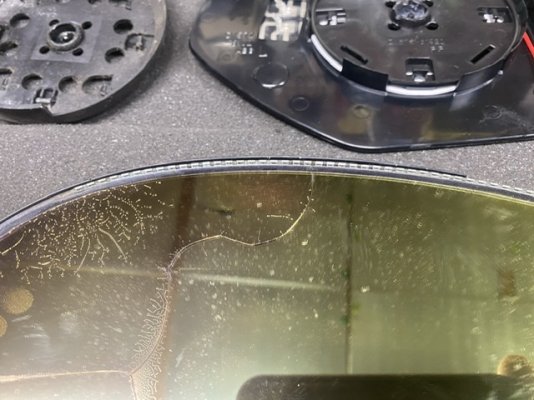
Another thing you can see is the original has a trim ring around glass where the replacement does not. I was close to returning the replacement and ordering an OEM.
 
OP
OP
Snowbound

Snowbound

Jim
Joined
Nov 23, 2016
Posts
1,055
Reaction score
2,477
Location
Chicagoland (Lockport)
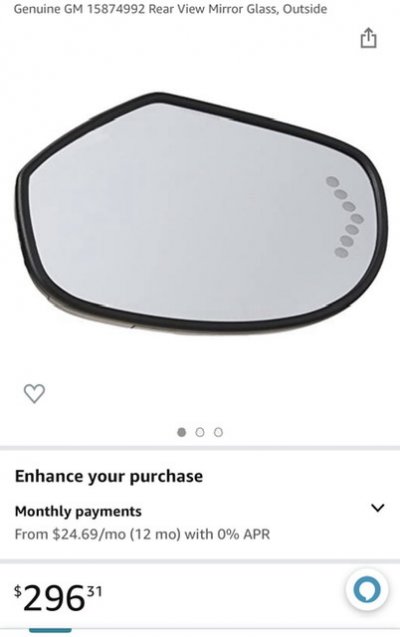
Then I found this and said, I’ll live with what I have.
76BAC4C1-20B5-49CF-8145-D1924BEAF6F8.jpeg

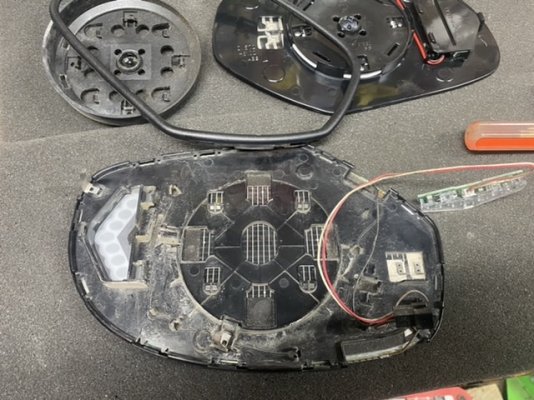
I pulled off that trim ring to see if I could transfer it but I couldn’t. Probably could have glued it on but what’s the point.
B2083D2A-AEE9-4B7B-AB8F-6C7CEA31845A.jpeg

Here you can see that sensor for the auto dim feature. I would like to keep it factory but $300 for a mirror, it’ll have to wait.
893A5577-D2B7-4C2C-A87B-13AB91F7381E.jpeg

I didn’t get a picture of the finished product but it’s pretty self explanatory, it’s just a mirror. Turn signal works fine and it looks like factory so I guess I’m satisfied with the outcome. She is.
 

Tonyrodz

Resident Resident
Joined
Feb 16, 2012
Posts
31,604
Reaction score
47,097
Location
Central Jersey
Then I found this and said, I’ll live with what I have.
View attachment 371104

I pulled off that trim ring to see if I could transfer it but I couldn’t. Probably could have glued it on but what’s the point.
View attachment 371105

Here you can see that sensor for the auto dim feature. I would like to keep it factory but $300 for a mirror, it’ll have to wait.
View attachment 371106

I didn’t get a picture of the finished product but it’s pretty self explanatory, it’s just a mirror. Turn signal works fine and it looks like factory so I guess I’m satisfied with the outcome. She is.
Maybe junkyard will have the whole mirror cheaper?
 
OP
OP
Snowbound

Snowbound

Jim
Joined
Nov 23, 2016
Posts
1,055
Reaction score
2,477
Location
Chicagoland (Lockport)
Maybe junkyard will have the whole mirror cheaper?
That’s definitely an option. I’ll have to call around or go on carpart dot com. Those motors aren’t cheap either so a complete used mirror might be a buck fity. And I need a motor for the passenger side because it won’t power fold. Maybe they are the same for both sides and I can kill 2 birds with 1 stone.
 

Forum statistics

Threads
132,321
Posts
1,865,949
Members
96,912
Latest member
Papaskip
Top