treehan77
TYF Fiend
Junk yard
Disclaimer: Links on this page pointing to Amazon, eBay and other sites may include affiliate code. If you click them and make a purchase, we may earn a small commission.
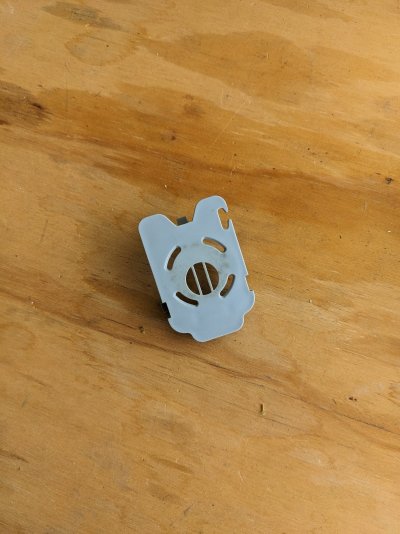
there is a used aspirator on ebay it has the cover on it $20does anyone know where to get one of the little round covers? I fixed mine by cleaning but the little cover has always been missing since I bought the truck
My 2005 has a very similar noise from the round thingy over & to the left side of the drivers head. It kinda sounds like a small fan to me. But how do ya get access to that item? Is there some schematic for it?They're not microphones, they're small fans that have something to do with the climate control system.
I believe that pops out of the headliner if gently pried out. There are a couple of retention clips molded into the plastic holding in the headliner panel. The sensor should snap out of/into the the face plate.My 2005 has a very similar noise from the round thingy over & to the left side of the drivers head. It kinda sounds like a small fan to me. But how do ya get access to that item? Is there some schematic for it?
So does anybody have a tutorial for removing the REAR ceiling sensor?
Here we are doing the same jobs the same way. Good info for others.Genuine GM Parts # 22834330 Cabin Air Temperature Sensor Aspirator
Here's how I accessed the rear aspirator. Use a panel clip removal tool to remove retainer clips in the headliner. (See last photo, 2nd tool from left is most useful) I don’t know if this method works on Suburban, ESV or XL’s rear aspirators. There’s a video earlier in this thread showing how to replace the front unit.
Let’s go!
Remove the upper plastic trim at the rear of the headliner by pulling straight down.
Remove both D pillar panels by pulling in and forward simultaneously.
Disconnect speaker wires. Set panels aside.
Remove the rear cargo light lens and then light housing by sliding it sideways and let it hang.
Remove both coat hooks by pulling and prying along the seam that joins each hook. Each hook is two pieces that when eventually pulled apart will release as an anchor and allow the headliner sides to drop. I used two small flat screwdrivers and gently worked around the seam perimeter. Refer to photos for expanded hooks.
Un-fasten the C pillar panels down to the seat belts by pulling in toward the center of the vehicle.
Use a bungee cord to keep them leaning toward each other as shown in photo.
Remove the grill from the aspirator with pry tool.
Remove the remaining two round retaining clips (circled in red) along at the rear and center of headliner with pry tool. The headliner should now drop easily at the rear.
Reach in through the rear being cautious not to bend the headliner too much thereby creasing it.
Unplug the old aspirator and plug in the new unit. Check for power.
Position the aspirator over the opening while another person attaches the grill from underneath. If going solo, you MIGHT be able to reattach the grill and hold the aspirator while accessing them from either side. If not, use a zip tie as shown in photo to hold the aspirator in place, secure grill and gently pull out zip tie. Take care to use center most grill holes to help orientate grill snapping into slots on aspirator. Remove zip tie, it’s the prudent thing to do!
Replace center clips in headliner and side hooks followed by the light assembly.
Push C panels back in place, reattach speaker wires, replace D panels and lastly upper plastic trim between the D panels.
Viola! Now celebrate this little victory with a frosty beverage.
Happy Trails!
Those are pretty easy to get from part outs. I don't expect they are expensive, either.Here we are doing the same jobs the same way. Good info for others.
There was no way to access that one the way the service manual indicates, so I loosened the headliner as well. Those coat hooks gave me challenges. Watched many vids and still managed to booger them up.

Question... is this supposed to be on all the time? I had an issue where my AC would only blow hot or cold. Saw on here that it could be the aspirator. I bought a new one and when I went to replace it the one I took out looked like the attached pic. Yeah, nothing there.
Anyway, I replaced it but AC now just blows only hot air. I haven't really checked to see if I can hear the new aspirator fan going... when is it supposed to be on?View attachment 427582
