Ripped out the factory h/u and CD player this weekend from my 1999 four-door, and replaced them with the Kenwood BT955HD (http://www.bestbuy.com/site/Kenwood...iver/7501148.p?id=1218848534048&skuId=7501148). Pics are attached. Sorry for the poor pic quality. Install was pretty easy with the Metra harness and install kit. I'll summarize as best I can.
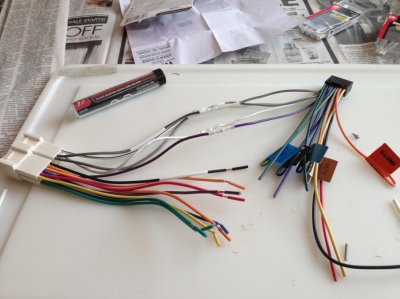
Step One: connect the metra wiring harness to the Kenwood harness. I soldered and heat shrunk the wiring harness (see pic), but I think that the cone-shaped wire connectors that crutchfield sells would have done as good a job. As mentioned many times on this board (thank you to previous posters BTW), you must connect the pink wire in the truck to a powered wire from the new head unit. Be sure to consult the card that came with the Metra harness to determine which wires you need and which you don't (i.e., power antenna). My first attempt by using the harness wires was unsuccessful (no rear speakers), so I merely cut the pink wire at the harness in the truck and connected it directly (outside the harnesses) to the remote lead from the Kenwood harness. Worked fine.
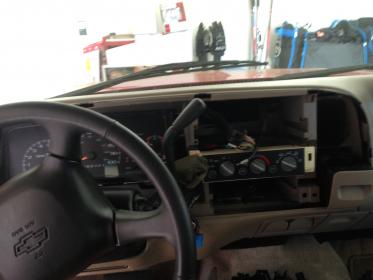
Step Two: remove the dash trim. This is easy to do, but you must use caution so as to not pull any wires from their housings. Be sure to put the gear lever in low to free up some space, and then carefully pull on the dash trim and it will come out without much pressure. My truck had 4 housings that must be disconnected: the light bundle to the left of the steering wheel, two for the 2WD and 4WD connections, and a 4th for the foglights. Most have a small tab that, when pressed, will free the bundle from the housing. Watch for the hazard button on top of the steering column as it is in a vulnerable spot.
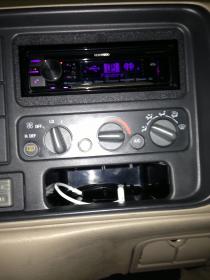
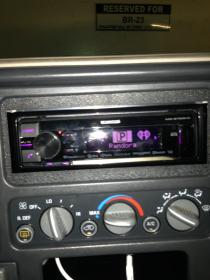
Step Three: install the head unit with the Metra kit. The instructions for the install kit (Metra 99-3002) are not the greatest, and so it took a little time to figure out exactly how to orient the adapter, head unit cage and then the head unit. I ultimately didn't use any of the snap-in faceplates, which yields a clean look (see pics). Once I figured it out, and got all the metal tabs oriented so as to secure the unit to the adapter, it went in with ease. You must also connect the headphone wire and antenna adapter (40-GM10) before sliding the unit in, and you should also tuck the harnesses and wires in the free space to make sure the head unit isn't jammed in there. I also connected the Kenwood iPod cord (KCA-ip202) to the rear USB at this point.
Step Four: I bought the Metra storage pocket (Metra 88-00-3302) for the space formerly occupied by the CD player. I was not at all impressed with the build quality of this item, and had to use electrical tape to affix the faceplate that did not connect securely to the pocket. I used a box cutter to increase the size of the holes in the pocket so that I could thread the Kenwood iPod cord through. For iPhone 5, you will need the firewire adapter, or use a USB-firewire connector in place of the Kenwood cord. I prefer the adapter so that I can use my non-firewire iPods in the truck. I ran the secondary micro-jack to the glove box so that only the iPod connector is in the storage pocket.
Step Five: replace the dash and run the microphone wire. The dash goes in just like it came out, but it takes some maneuvering to get all the wires and vents aligned. I ran the microphone wire up the pillar next to the dash, clipped it to the pillar, and positioned it so that it wouldn't affect the visor travel (see horrible pic).
I really like the clean look of the unit and storage pocket, and the bluetooth works seamlessly with the iphone. Pandora and iPod play great through the unit, and the HD radio is nice as well. It is too soon to comment on the sound quality, and I am not expecting much since I did not change out the speakers. It is at least as good as the OEM unit. The illumination on the Kenwood is a little dim, and I can tell it is going to take some time to get used to all of its features. The downside of the clean look is that not all controls are one step/touch. There is a remote, which I have not yet touched.
Hope this is helpful. Global thanks to the posters on this board, as the information available here is extraordinarily useful.

