You are using an out of date browser. It may not display this or other websites correctly.
You should upgrade or use an alternative browser.
You should upgrade or use an alternative browser.
Rear bumper... trailer hitch cover Mod
- Thread starter Joeltz
- Start date
Disclaimer: Links on this page pointing to Amazon, eBay and other sites may include affiliate code. If you click them and make a purchase, we may earn a small commission.
Philpug
Full Access Member
- Joined
- Dec 29, 2020
- Posts
- 221
- Reaction score
- 145
For me, the wiring is not an issue, I just need access for the hitch for the bike rack but I can see how it can be for many,
Joeltz
Member
- Joined
- Sep 28, 2020
- Posts
- 92
- Reaction score
- 74
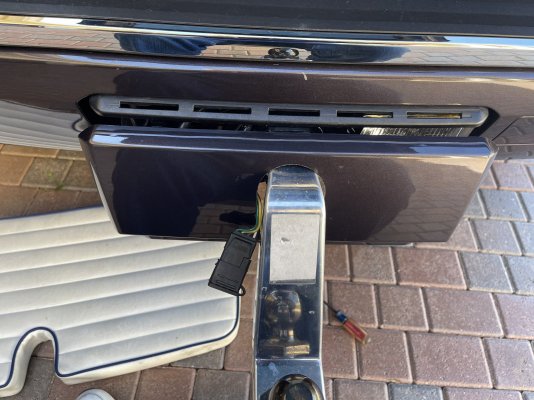
You have to cut the hole about 1/2 inch lower than the 2 inch receiver to be able to insert the upper tabs…. Put the pin in before putting the cover onI imagine from underneath. And what about pluging the light connecter in? Looks good though. I do like it.
Joeltz
Member
- Joined
- Sep 28, 2020
- Posts
- 92
- Reaction score
- 74
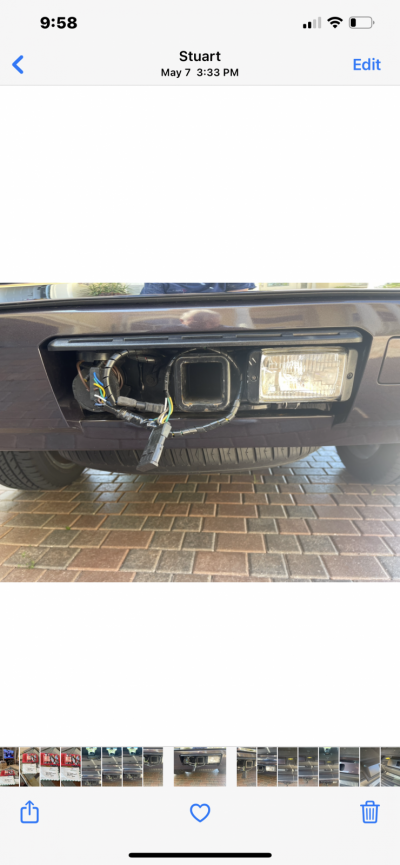
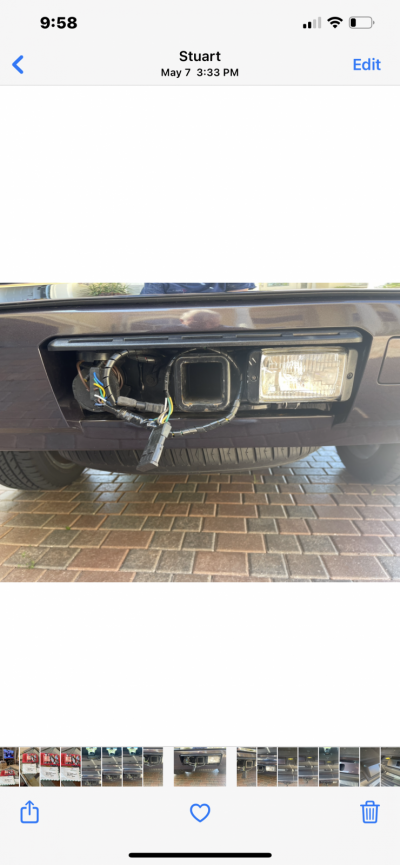
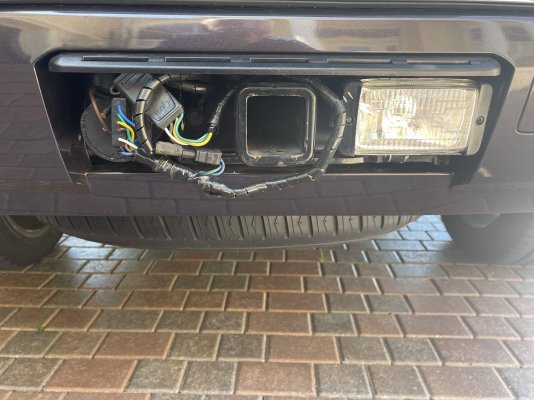
I had to modify the 7 pin plug to make it shorter for clearance for the wiresI’m interested too. Can you show it with pigtail connected and a pic without the hitch installed?
Joeltz
Member
- Joined
- Sep 28, 2020
- Posts
- 92
- Reaction score
- 74
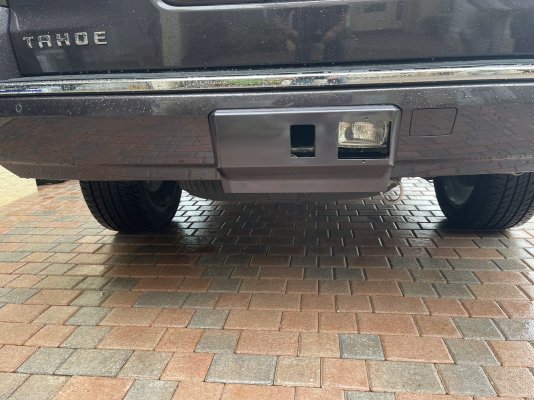
Stage 2 on the hitch cover. Trial fit after paint, screen over back up light not installed yet
Attachments
-
 F8BC95F6-CE81-4FA9-B89E-5C5C4F4494B8.jpeg325 KB · Views: 22
 -
 E13657E9-2B0E-4403-B554-8FF486E35E30.jpeg457.7 KB · Views: 23
 -
 737786CE-B6D3-47E3-8FC0-AEAF76C253FA.png922.2 KB · Views: 25
 -
 C396CDF0-718E-4A84-A619-ADF60DDC947A.jpeg275.5 KB · Views: 25
 -
 0FC0E83D-09AA-479F-A448-AE4696705473.jpeg303.5 KB · Views: 26
Joeltz
Member
- Joined
- Sep 28, 2020
- Posts
- 92
- Reaction score
- 74
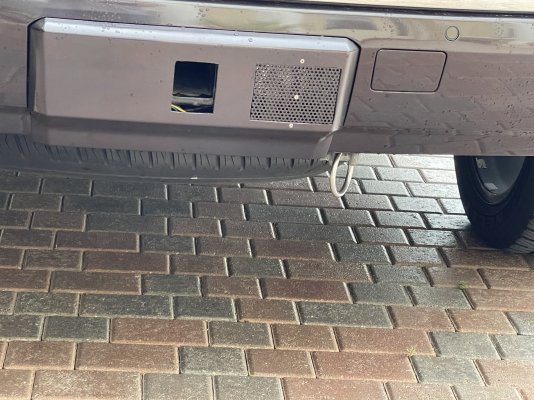
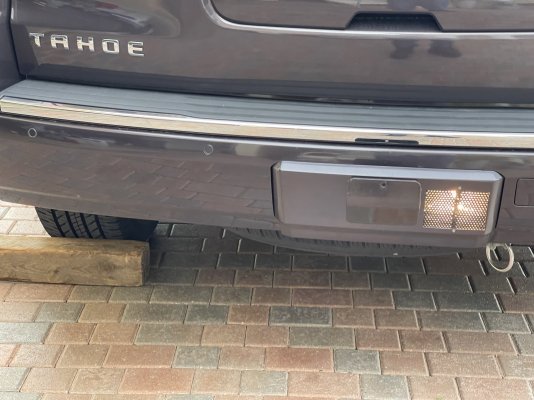
Stage 2 on the hitch cover. Trial fit after paint, screen over back up light not installed yet
Attachments
-
 A60068C0-4051-4F3D-9B17-4BB879804695.jpeg431.6 KB · Views: 21
 -
 BA40112A-0052-4802-A85E-FE4500CD45C9.jpeg386 KB · Views: 21
 -
 44A62139-A3E9-4E54-806B-5E4431AA2323.jpeg417.9 KB · Views: 21
 -
 A14D14D9-54CD-4CD5-90EF-A73D3B27E93A.jpeg276.7 KB · Views: 22
 -
 EDD22E3C-37FC-4C0F-8F5D-68ED4BDC9818.jpeg177.2 KB · Views: 21
Joeltz
Member
- Joined
- Sep 28, 2020
- Posts
- 92
- Reaction score
- 74
Sounds good but cannot see the photos.
Worried about losing my hitch coverSo I wanted a Cleaner look for my hitch, and studied and measured to cut a hole in the cover, so hitch goes thru the cover .
well if you look at inside of cover you can see mold lines and right in the middle a circle about 1/2 inch in diameter.
Use a 2 1/2 or 2 5/8 hole saw and drill using the molded circle as Center
The Hole will be exactly over the square hitch opening!!
you have to file the bottom of the cut hole Square to have enough room to slide the cover fingers into the upper mounting plate
Hitch goes thru the cover for a CLEAN look and you can put the pin in before attatching the cover
the hitch itself has a hole for the spare tire drop shaft you
can put a S hook and 6-7 inches of chain with a shackle for trailer safety chains I use a small hitch plate when not needing the Ball
View attachment 274309
View attachment 274308 View attachment 274310
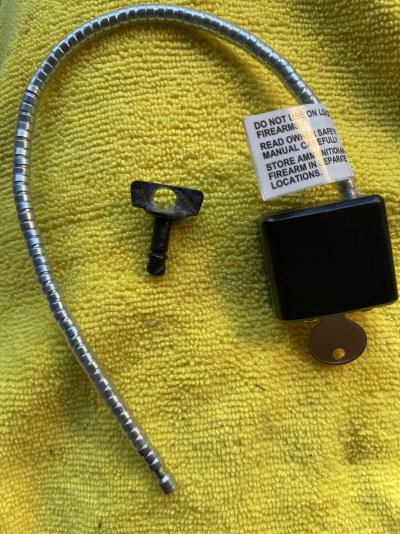
just Saying without a key you gotta’
break if off Now .. The atatchment “Twist Screws” are 14$ each
They are VERY hard to Drill Even Cobalt bits won’t get thru EZ
Attachments
MobileHomie
Full Access Member
- Joined
- Oct 15, 2021
- Posts
- 131
- Reaction score
- 120
I leave my drop hitch in all the time and like the looks of that, it does need access for the pigtail though.
So you put a light in there too? Is it wired to the back up lights?
Nice cricket!
So you put a light in there too? Is it wired to the back up lights?
Nice cricket!
Joeltz
Member
- Joined
- Sep 28, 2020
- Posts
- 92
- Reaction score
- 74
Yeah one too many pics…. So you cut down the 7 pin plug to clear the cover and use the blue Wire for backup light .. I used marine spreader light and drilled and tapped for the 1 bolt mount I had a brass screen from a boat pump and trimmed the cover for a good fit. It’s nice having a light down low when hooking up my boat trailer.
it’s all a very close fit and kinda nice of Chevy to put a circle right in the middle of the hitch cover on the back that’s centered up on the 2 inch hole for the ball mount
you can start with a 1/
1 1/2 hole saw and file out the hole… you need a 3/8 gap at bottom to be able to get the fingers on the cover into the slots
the pigtail comes out in that slot I have done 2 so far it’s Fun making something nobody else has !!
I have a lock for the hitch pin and it’s tight but fits perfect.. you sneak it in before cover is put All the way onIf you want any more pictures I put them Up
Attachments
Similar threads
- Replies
- 1
- Views
- 485
- Replies
- 15
- Views
- 1K

