Replcing intake gasket with questions

Disclaimer: Links on this page pointing to Amazon, eBay and other sites may include affiliate code. If you click them and make a purchase, we may earn a small commission.

Merc1973

Full Access Member
Joined
Sep 16, 2016
Posts
346
Reaction score
319
Location
Maryland
(I can't change my title spelling error) I'm finally able to replace my bad intake gasket giving me a whistle sound, rough idle at times and Bank 1&2 running lean codes.

I have the new:
-Fel-pro gasket set MS9016T
-AC Delco 15-11057 T-stat and water inlet assembly
-Dorman knock sensor harness
-AC Delco 213-3521 knock sensors
-AC Delco D1846A oil pressure sensor

Any tips/tricks would be welcomed. I don't have a service manual or Haynes book.

Since I'm changing the T-stat, I might as well drain the radiator too. How do I know what coolant/antifreeze is in there already, I don't want a sludgy DexCool mess. It does NOT look green. I don't know if it is DexCool or H/OAT or yellow universal?
 

mattbta

Full Access Member
Joined
Jun 19, 2012
Posts
1,117
Reaction score
2,062
Location
Frisco, TX
Back in 99 when I had a 30th Anniversary Trans Am with the LS1, I swapped to an LS6 intake. Everything I read said to use new bolts for the manifold and follow the correct torque order/specs.

I'm about to do this on my 145k mile Tahoe and wonder if it's still the case to need to replace the bolts since they're torque to yield. Probably so.
 

Chubbs

Full Access Member
Joined
Jun 24, 2017
Posts
634
Reaction score
391
If you do a thorough flush on the entire coolant system then you won't have to worry much about mixing coolant. Backflush the heater loop. Work the radiator over inside and out. You have all that new stuff already, may as well replace any hoses & clamps that look suspect, refill it with DexCool and prob never have to worry about the coolant system again if you are lucky.
 
OP
OP
Merc1973

Merc1973

Full Access Member
Joined
Sep 16, 2016
Posts
346
Reaction score
319
Location
Maryland
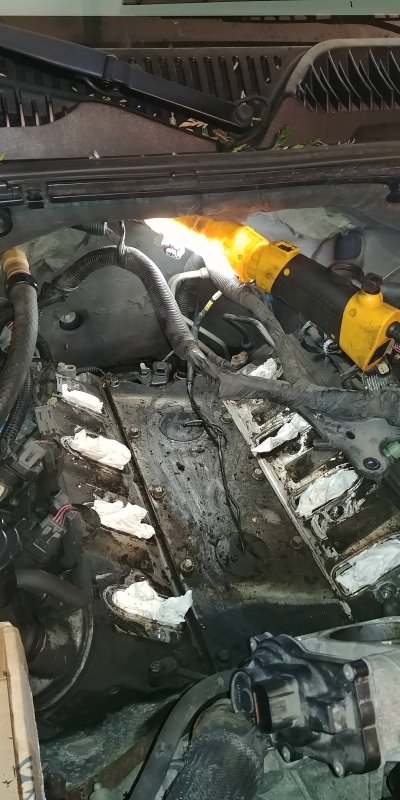
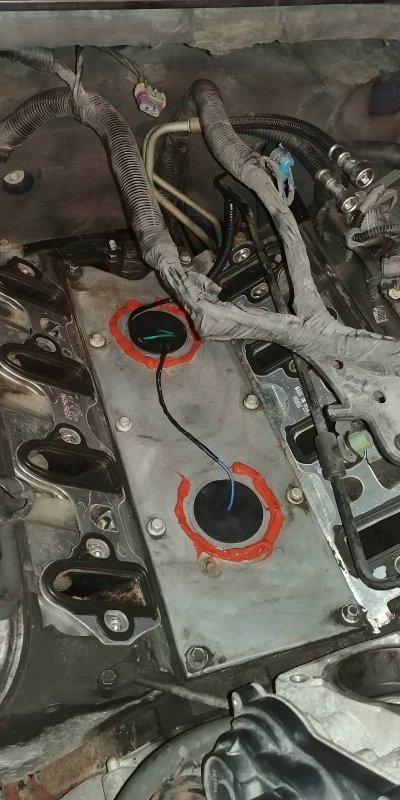
Got her done. Watched a bunch of videos. Left the fuel rail on and did not disconnect the cooland lines for the TB. Nice idle now, smooth as glass. Did not have time for t-stat or coolant change, next weekend. A lot of oil inside the intake. My Harbor Freight 3/8" torque wrench does not know the diffrence between the 2 low numbers for intake bolts, lol. It was an easy job just time consuming... injector plug connectors and cleaning took most of the time. My knock sensors and wells were nice clean and dry, no sign of water intrusion like most youtube videos. Took 4 hours, if I had to do it again it would be 2 hours.

TvHiAI6.jpg

E6MpvIP.jpg
 
Last edited:
OP
OP
Merc1973

Merc1973

Full Access Member
Joined
Sep 16, 2016
Posts
346
Reaction score
319
Location
Maryland
Update after drive to work and around town: I still have that strange whistle noise at 2300+ RPM... I guess it was not the gasket making that noise. Runs great no CEL.
 

mattbta

Full Access Member
Joined
Jun 19, 2012
Posts
1,117
Reaction score
2,062
Location
Frisco, TX
Just curious what you used to clean all the gunk on the valley cover, etc? I'm needing to do this and know mine is caked with crap.
 
OP
OP
Merc1973

Merc1973

Full Access Member
Joined
Sep 16, 2016
Posts
346
Reaction score
319
Location
Maryland
Just curious what you used to clean all the gunk on the valley cover, etc? I'm needing to do this and know mine is caked with crap.
I should have taken a photo of the before vacuuming leaves and junk, it was bad and stuff fell into the head.


Patience, step stool or a-frame ladder, good lighting, big box-o-rags from Homedepot ( AKA industrial paper towel), narrow flexible paint scraper, mineral spirits, brake cleaner, 90 degree "pick" tool...

Start with shop vac the whole area, even nearby parts of valve covers and intake ports as crap is bound to fall into the valves. Carefully, block intake head runners with paper towels. Use your 90 pick to clean around head bolts and then vacuum since the Felpro gasket needs a snug fit at the head bolt. Carefully use paint scraper for gunk from heads and valley pan and have a box to dump it into very close by. Wipe heads with Mineral spirit soaked towels (you will go through a lot) brake cleaner used carefully and paper towels for the valley pan. High temp RTV for the 'TSB' water dams around knock sensor wells. that took me an hour or so since there was so much leaves, and oily sand/dirt that I did not want to chance getting that into the valve or cylinder.

That 90 degree pick tool is super useful every where in this job. This was the best video, but watch others too and take advice from all. Parts will vary for assembly.... My Injector plugs were a PITA and did not look like the ones shown. Remove the brake booster hose at the brake booster. Take your time.

 
Last edited:

Forum statistics

Threads
132,762
Posts
1,873,792
Members
97,593
Latest member
slm987
Top