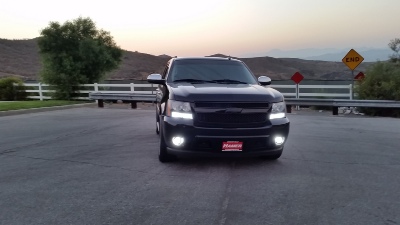
DWebPro
Full Access Member
I couldn't find a clear write up on how to do this, figured I'd give it a shot.
[yt]O6OjKAc9e0o[/yt]
Parts:
--(2) Epoxy Rectifier Diodes #276-1141 By RadioShack
--(4) 3157 60SMD DUAL COLOR SWITCHBACK
--(2) Pico Light Bulb Sockets 5447PT
--(2) 50W 6ohm Load Resistors
1. Remove Headlight housing and wire harness
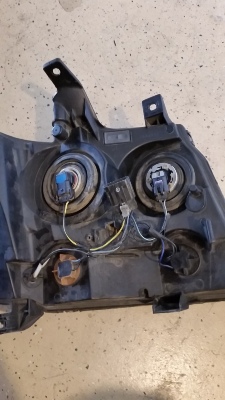
2. Cut the wires from the DRL bulb
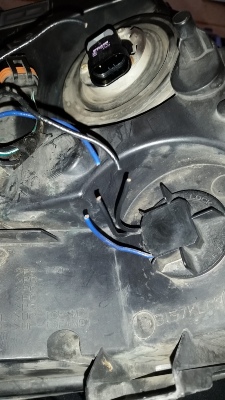
3. Using a dremel tool, trim the two smaller tabs off the bulbs sockets
Normal:
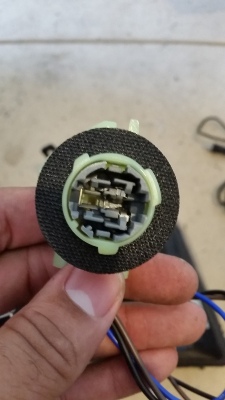
After cutting tabs:
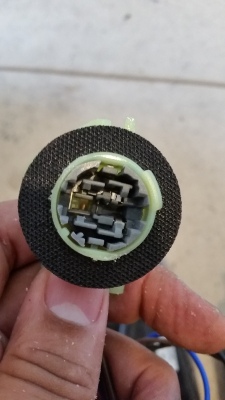
4. Wire one side of the resistor to the negative wire that was cut from the DRL and the other side it was cut from to the negative wire on the new bulb socket
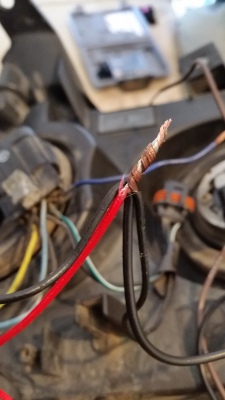
5. Wire the other side of the resistor to the blue wire on the new bulb socket to the light blue wire with white stripe.
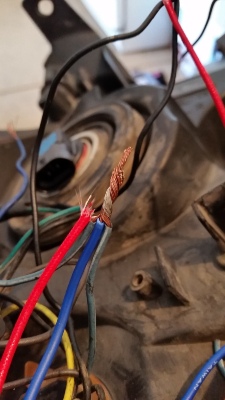
6. Wire the blue wire from the harness that connected to the old drl bulb socket to one side of the diode. Wire the other side to the brown wires on the blinker socket to the brown wire of the new bulb socket
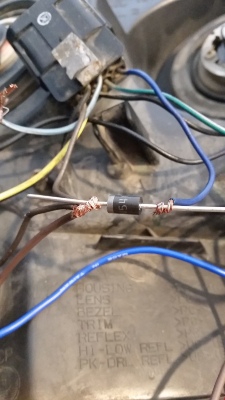
7. Solder everything up and use heat shrink wrap to make sure nothing is touching. I put a layer of electrical tape over everything as well.
[Just realized I don't have a picture of this]
When I do my projector retrofit, I will figure out where to mount the resistor.
[yt]O6OjKAc9e0o[/yt]
Parts:
--(2) Epoxy Rectifier Diodes #276-1141 By RadioShack
--(4) 3157 60SMD DUAL COLOR SWITCHBACK
--(2) Pico Light Bulb Sockets 5447PT
--(2) 50W 6ohm Load Resistors
1. Remove Headlight housing and wire harness

2. Cut the wires from the DRL bulb

3. Using a dremel tool, trim the two smaller tabs off the bulbs sockets
Normal:

After cutting tabs:

4. Wire one side of the resistor to the negative wire that was cut from the DRL and the other side it was cut from to the negative wire on the new bulb socket

5. Wire the other side of the resistor to the blue wire on the new bulb socket to the light blue wire with white stripe.

6. Wire the blue wire from the harness that connected to the old drl bulb socket to one side of the diode. Wire the other side to the brown wires on the blinker socket to the brown wire of the new bulb socket

7. Solder everything up and use heat shrink wrap to make sure nothing is touching. I put a layer of electrical tape over everything as well.
[Just realized I don't have a picture of this]
When I do my projector retrofit, I will figure out where to mount the resistor.
Last edited by a moderator:


