thehoe92 2003 Tahoe

Disclaimer: Links on this page pointing to Amazon, eBay and other sites may include affiliate code. If you click them and make a purchase, we may earn a small commission.

Anthony

2004 Tahoe LT (MA)
Joined
Jun 7, 2009
Posts
1,242
Reaction score
9
Location
Westen MA
Thehoe92,

Did you ever do a writeup about how to apply/install suede? You look like an expert and I would be very happy to see a write-up as I know many others would too. At least post the tools+ prep work so we/I can follow what you did and get the same great results!
 
OP
OP
thehoe92

thehoe92

fo sho
Joined
Jun 19, 2009
Posts
1,605
Reaction score
13
Location
The916
Thehoe92,

Did you ever do a writeup about how to apply/install suede? You look like an expert and I would be very happy to see a write-up as I know many others would too. At least post the tools+ prep work so we/I can follow what you did and get the same great results!

actually, yes I did!
as I was posting the pictures in this thread I was considering finding the link to that thread
someone asked how to do it and I explained it step by step

I think it was Narco.. I'll go look for it real quick

IIRC they dubbed me the suede master haha!

---------- Post added at 01:48 PM ---------- Previous post was at 01:32 PM ----------

http://www.tahoeyukonforum.com/forum/showthread.php?t=8455

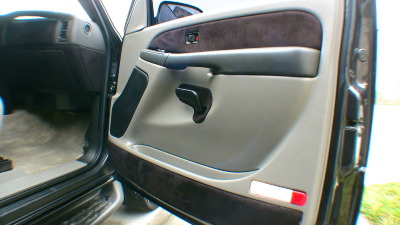
I answered a lot of questions about how to do the doors and some good tips on how to get it to come out right

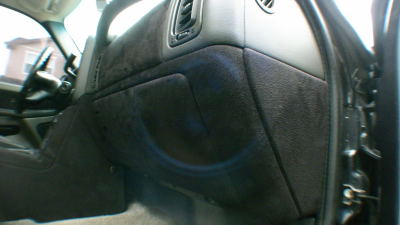
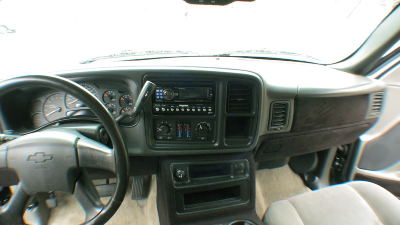
the center console and glove compartment are fairly easy.. to me at least
just take everything apart and make sure you degrease everything
I use 409 and then let it dry even after I rub all the dirt off just to make sure
spray the piece with a light coat of glue I used 3M the medium grade stuff and let it tack then lay the suede over and get it smooth
then pull the edges and glue the back side of the piece then let it tack and lay the edges down and make relief cuts as necessary
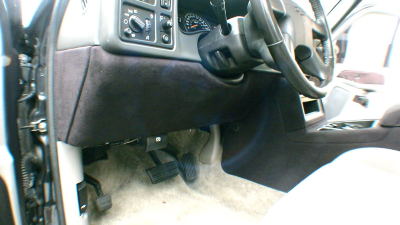
IMG_8389.jpg

IMG_8387.jpg

IMG_8384.jpg

the center console around the cubby's and the glove compartment take WAY more patience then anything else. I probably restarted 3 times because I was not happy with the turn out but just keep looking at my pictures for motivation because it does look fantastic when its all done!! :)

IMG_8386.jpg

IMG_8383.jpg

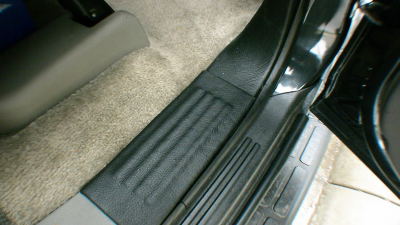
oh and I also did my a and b-pillars in vinyl as well as the door sills
 

AtomicHoe094

Atomichoe094
Joined
Apr 30, 2009
Posts
8,179
Reaction score
7
Location
cleveland, OH
you shouldnt of out that suede on the passenger airbag, anything in the way of the airbag and really throw it off.
 
OP
OP
thehoe92

thehoe92

fo sho
Joined
Jun 19, 2009
Posts
1,605
Reaction score
13
Location
The916
you shouldnt of out that suede on the passenger airbag, anything in the way of the airbag and really throw it off.
what you see is a cover over over the air bag.. that just drops down (I'm assuming) and pop goes the air bag out
I made sure nothing would get caught up when I had the dash off its clear to see that the suede just covers it and has like a couple cm's tucked behind where its free to just blow open

God that thing is clean. I love it. Your really tempting me to do suede inside
thank you :)
if you need help with it, I'm really good with step by step and the offer is open to anyone to just send me their interior and I'll wrap it for you in whatever material you want
I've done it for a couple local buddy's and every time it comes out cleaner than before because I know the tricks to get it done right

One of my favorites.
I appreciate it dude!! :)
 

Tahoewhat

Ballin' on a Budget
Supporting Member
Joined
Sep 20, 2009
Posts
3,720
Reaction score
24
Location
TX
Looks really good Kasey, Coming along nicely. Your the reason im thinking of doing suede interior. Just makes it look a little nicer than cheapo plastic. ( off topic, but how you like the RF components)
 
Last edited:

Forum statistics

Threads
132,729
Posts
1,873,283
Members
97,558
Latest member
BurbyRST
Top