You are using an out of date browser. It may not display this or other websites correctly.
You should upgrade or use an alternative browser.
You should upgrade or use an alternative browser.
What did you do to your NBS GMT800 Tahoe/Yukon Today?
- Thread starter vwbeaner
- Start date
Disclaimer: Links on this page pointing to Amazon, eBay and other sites may include affiliate code. If you click them and make a purchase, we may earn a small commission.
PopperM5
Member
- Joined
- Feb 7, 2016
- Posts
- 38
- Reaction score
- 72
I changed the Oil Pressure sending unit this past weekend.
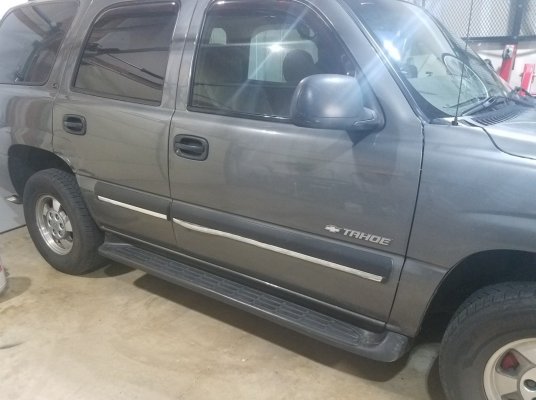
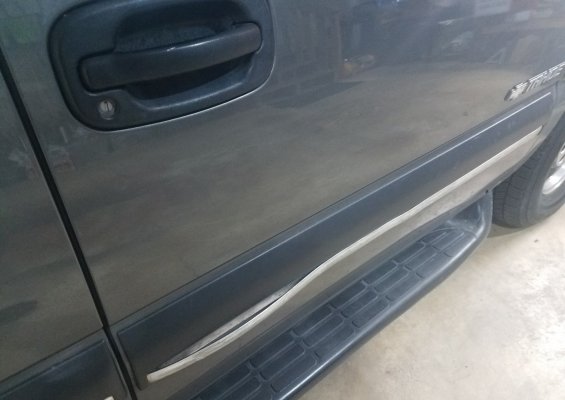
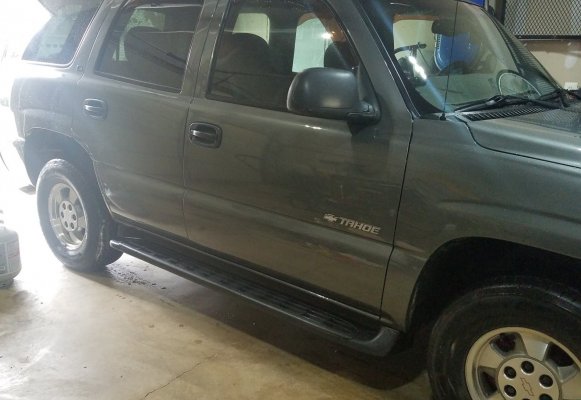
Finally decided to remove the body side molding on my 2002 Tahoe. Not as easy as I thought it would be but not to bad. Did the driver side last week and the passenger side today. It left a lot of adhesive behind but the 3M adhesive removal disk was able to get most of it off along with 3M adhesive removal spray for final clean up. However, I still have a bit of work to do. I do like the look. I then took the car out of the garage for a quick wash, it's been awhile.
Passenger side with molding still on:
One of the reasons I decided to pull the molding:
After the molding and adhesive was removed followed by the wash. I like the look:
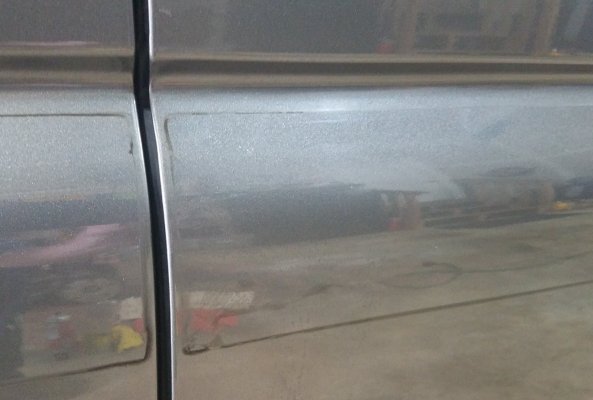
This is what I still need to figure out. This dark portion was right above the adhesive. The 3M wheel has little affect on it and the 3M chemical spray not any better. Driver's side not as pronounced but still there. I'm thinking of trying a good quality rubbing compound. Thoughts or ideas?
Passenger side with molding still on:

One of the reasons I decided to pull the molding:

After the molding and adhesive was removed followed by the wash. I like the look:

This is what I still need to figure out. This dark portion was right above the adhesive. The 3M wheel has little affect on it and the 3M chemical spray not any better. Driver's side not as pronounced but still there. I'm thinking of trying a good quality rubbing compound. Thoughts or ideas?

mountie
Supporting Member
Try some ' VM&P Naphtha ' on a small terry cloth towel. Will not damage paint, but may melt the adhesive enough to rub off without too much work......?Finally decided to remove the body side molding on my 2002 Tahoe. Not as easy as I thought it would be but not to bad. Did the driver side last week and the passenger side today. It left a lot of adhesive behind but the 3M adhesive removal disk was able to get most of it off along with 3M adhesive removal spray for final clean up. However, I still have a bit of work to do. I do like the look. I then took the car out of the garage for a quick wash, it's been awhile.
Passenger side with molding still on:
View attachment 422756
One of the reasons I decided to pull the molding:
View attachment 422757
After the molding and adhesive was removed followed by the wash. I like the look:
View attachment 422758
This is what I still need to figure out. This dark portion was right above the adhesive. The 3M wheel has little affect on it and the 3M chemical spray not any better. Driver's side not as pronounced but still there. I'm thinking of trying a good quality rubbing compound. Thoughts or ideas?
View attachment 422759
Scott in AZ
Full Access Member
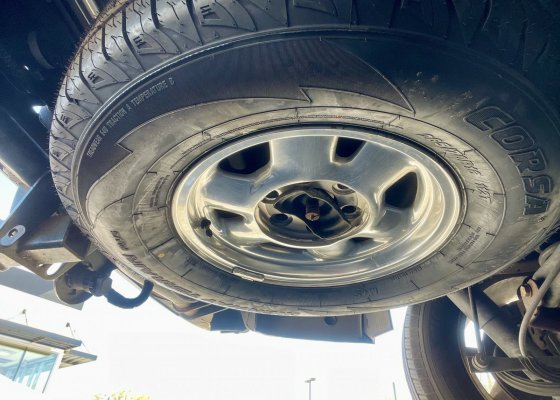
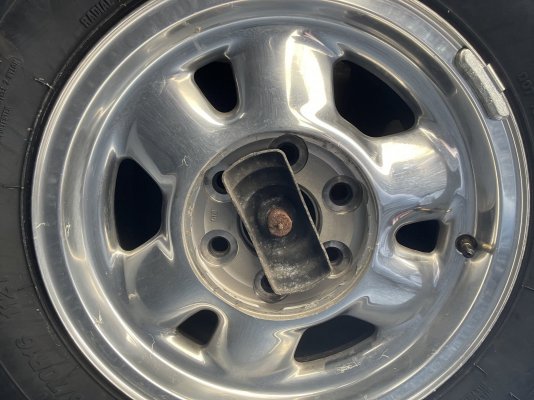
Finally got around to replacing the original spare tire under my 2001 GMC Yukon. I changed out the spare wheel and used one of the two original bright alloy wheels and a $107 Corsa 265/70/16 tire from Discount Tire.
Over a decade ago I upgraded to 18 inch wheels w 275/60/18 tires. The diameter on the 18” w 60-profile is same as the original 16” w 70-profile so it’s basically a full size spare underneath and weighs a few pounds less.
I still have one more OEM wheel in very good condition left if anyone in Phoenix area wants it for $20. I’ve been hoarding it all these years in my garage!
The original wheel mounted fine on the original hoist. The spring nut is rusted, however. Is there an easy way to keep the cable and replace the spring nut?


Last edited:
blueinkd
Full Access Member
- Joined
- Nov 21, 2017
- Posts
- 634
- Reaction score
- 1,523
Got me a new headlight switch and I had the trans rebuilt. What a world of a difference in how it drives and brakes!! I knew my torque converter was toast. Picked it up on Friday and let me tell you I'm very impressed with the crisp shifting and downshifting.
Attachments
mountie
Supporting Member
My headlight switch lights are out..... Either I can replace the bulb, or, like you... Just buy one.Got me a new headlight switch and I had the trans rebuilt. What a world of a difference in how it drives and brakes!! I knew my torque converter was toast. Picked it up on Friday and let me tell you I'm very impressed with the crisp shifting and downshifting.
blueinkd
Full Access Member
- Joined
- Nov 21, 2017
- Posts
- 634
- Reaction score
- 1,523
This was half my issue but I also couldn't turn on my daytime running lights without wiggling the mofo and cussing at it!!My headlight switch lights are out..... Either I can replace the bulb, or, like you... Just buy one.
mountie
Supporting Member
I always thought, cussing helped, to me. At least, it made me feel better ! .This was half my issue but I also couldn't turn on my daytime running lights without wiggling the mofo and cussing at it!!
Similar threads
- Replies
- 2
- Views
- 676


