Audio, side view cameras, 2nd Battery, Big 3

Disclaimer: Links on this page pointing to Amazon, eBay and other sites may include affiliate code. If you click them and make a purchase, we may earn a small commission.

OP
OP
Chrismnj

Chrismnj

Full Access Member
Joined
Sep 17, 2015
Posts
1,227
Reaction score
2,120
Location
NJ
Looks good.... when I did the "Big 3" upgrade i used 2/0 tinned copper shielded marine grade cable and soldered the terminals on and used the marine grade heat shrink that has adhesive inside.

View attachment 213910
View attachment 213911
View attachment 213912
The bigger cable barely fits through the RVC sensor.

Anyway... lots of debate on crimping VS soldering. Personally I prefer soldering although crimping is much faster and easier.

The most important part, IMO, no matter which route you take is heat shrinking the ends, like you did, to keep the moisture from getting in and corroding things.

Sorry to hijack your thread.... carry on.

you juts did one negative wire through the sensor correct? or you split past the sensor?
 

kbuskill

***CAUTION*** I do my own stunts!
Joined
Mar 11, 2017
Posts
5,314
Reaction score
8,343
Location
NE. FL.
you juts did one negative wire through the sensor correct? or you split past the sensor?
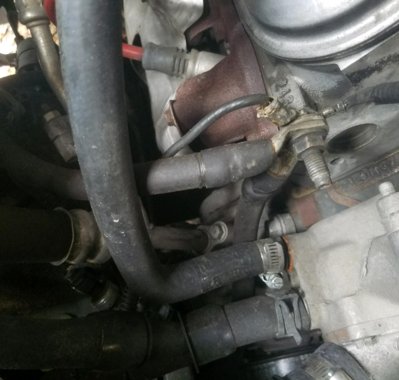
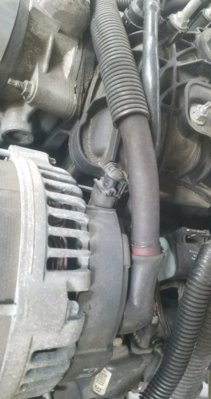
Yes just one. It comes off the negative post of the battery, continues through the RVC sensor, and terminates at the factory location on the front of the passenger cylinder head. I also added another cable from the same location at the cylinder head down to the frame rail, terminating at the upper strut mount.
rps20190114_212204_320.jpg

And here is a pic of the positive lead from the alternator...
rps20190114_212257_136.jpg
 
OP
OP
Chrismnj

Chrismnj

Full Access Member
Joined
Sep 17, 2015
Posts
1,227
Reaction score
2,120
Location
NJ
Yes just one. It comes off the negative post of the battery, continues through the RVC sensor, and terminates at the factory location on the front of the passenger cylinder head. I also added another cable from the same location at the cylinder head down to the frame rail, terminating at the upper strut mount.
View attachment 214037

And here is a pic of the positive lead from the alternator...
View attachment 214038

I saw this video about going with negative to alternator, might go this route and split from there.
 
OP
OP
Chrismnj

Chrismnj

Full Access Member
Joined
Sep 17, 2015
Posts
1,227
Reaction score
2,120
Location
NJ
Looks good.... when I did the "Big 3" upgrade i used 2/0 tinned copper shielded marine grade cable and soldered the terminals on and used the marine grade heat shrink that has adhesive inside.

View attachment 213910
View attachment 213911
View attachment 213912
The bigger cable barely fits through the RVC sensor.

Anyway... lots of debate on crimping VS soldering. Personally I prefer soldering although crimping is much faster and easier.

The most important part, IMO, no matter which route you take is heat shrinking the ends, like you did, to keep the moisture from getting in and corroding things.

Sorry to hijack your thread.... carry on.

I just noticed you have your 175Amp fuse on firewall, mine is on a battery post. Have you relocated yours or thats OEM?
 

justinesky

Full Access Member
Joined
Mar 9, 2015
Posts
183
Reaction score
48
This is all such good info. i did a lot of this a few years ago. Make sure you send down the powder coat where the alt meets any metal. I also ran a ground from my second battery to the alt bolt at the alt that says GND. You guys give me more ideas...
 

kbuskill

***CAUTION*** I do my own stunts!
Joined
Mar 11, 2017
Posts
5,314
Reaction score
8,343
Location
NE. FL.
I just noticed you have your 175Amp fuse on firewall, mine is on a battery post. Have you relocated yours or thats OEM?

It's OEM for pre '08... '09+ changed to the style you have.
 

kbuskill

***CAUTION*** I do my own stunts!
Joined
Mar 11, 2017
Posts
5,314
Reaction score
8,343
Location
NE. FL.
This is all such good info. i did a lot of this a few years ago. Make sure you send down the powder coat where the alt meets any metal. I also ran a ground from my second battery to the alt bolt at the alt that says GND. You guys give me more ideas...

I repurposed my original cable that went from the alternator to the **** fuse. It now goes from the same ground spot on the alternator bracket to the bolt on the firewall that has the braided cable going to the back of the drivers side head.

At some point I want to add a second battery also.
 

Forum statistics

Threads
132,803
Posts
1,874,448
Members
97,646
Latest member
wfstewart

Latest posts

Top