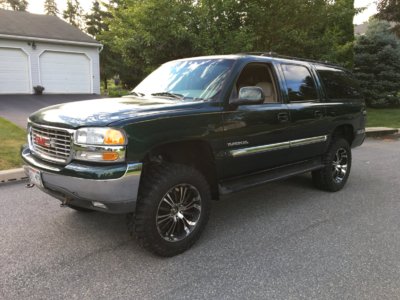
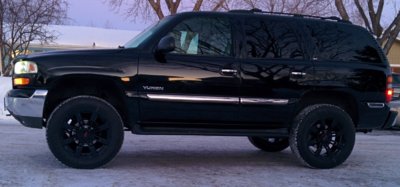
Changing the rusted torsion keys in my yukon

Disclaimer: Links on this page pointing to Amazon, eBay and other sites may include affiliate code. If you click them and make a purchase, we may earn a small commission.

06JET

Full Access Member
Joined
Apr 18, 2018
Posts
169
Reaction score
179
Location
Wisconsin
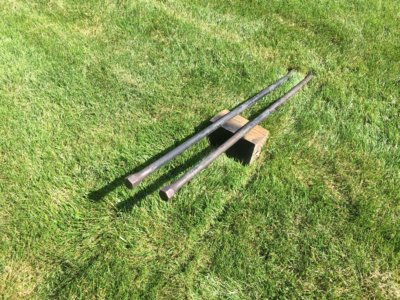
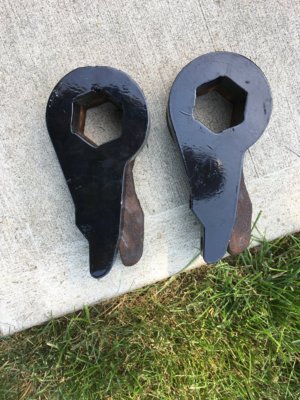
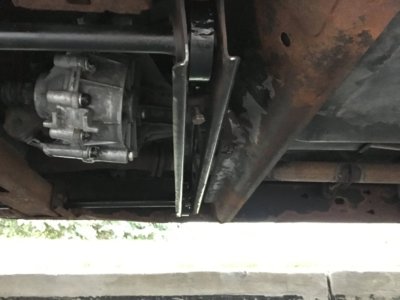
I wasn't going to post this but I figured it might help someone out if they are in a situation like mine. I live in WI but I am in PA working and renting a apt from an older lady. It is connected to her house and is a great place to stay and very reasonable. With that said I have on street parking and limited room to work on my Yukon. We get along great so she agreed to let me use her driveway. The tools I brought are few so this was a pretty big project for me in this situation. No welder, No cutting torch, No lift, No air, just hand tools and electric drill, 4-1/2" grinder and electric impact. First of all as I said I live in Wisconsin so everything under the Yukon is rusted and it is 17 years old. The keys were rusted in tight. I had sprayed PB Blaster on them for a week before I started this. I heated with a small butane torch and beat the crap out of them but no luck. So I went this route. I started grinding to get down to the torsion bar but it was taking forever so I started to drill with 1/8" drill bits in a row down to the torsion bar. Then went to a bigger bit and opened up a gap across the old key. I hooked a ratchet strap to the front of the frame to the other end of the torsion bar and pulled it tight. As I beat the crap out of the old key it cracked in the drilled location and finally come off as the ratchet strap kept pulling it forward and I beat it backward. Here is the pictures of the final result. Also for those that have questions about what the difference in the lift keys to the factory keys are I have added a picture. You can see that the torsion bar has to be turned more to equal the same jack bolt length/location as the factory key which in turn raises the truck.
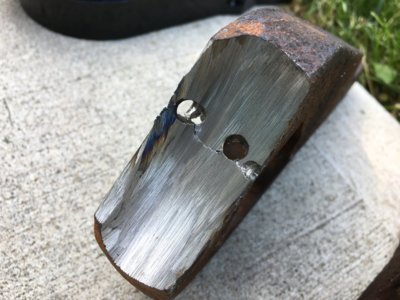
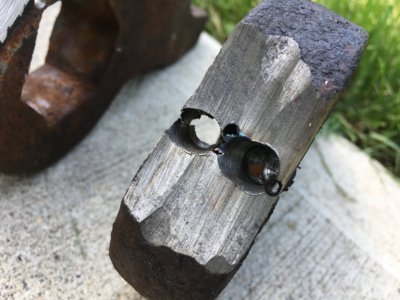
009.JPG 010.JPG 018.JPG 007.JPG
 

cmc76

Full Access Member
Joined
Sep 5, 2014
Posts
685
Reaction score
313
WI to PA.
Are you a driller for Michels?
 
OP
OP
06JET

06JET

Full Access Member
Joined
Apr 18, 2018
Posts
169
Reaction score
179
Location
Wisconsin
No, but Michel's is on some of our projects for PPL. I work for AECOM on the construction management side. We are doing T-Line rebuilds and Substation upgrades. I am in the Lehigh Valley area of PA.
 

cmc76

Full Access Member
Joined
Sep 5, 2014
Posts
685
Reaction score
313
Was just curious. I'm with Michels in new berlin. On a few AECOM projects as well
 
OP
OP
06JET

06JET

Full Access Member
Joined
Apr 18, 2018
Posts
169
Reaction score
179
Location
Wisconsin
Question- I did not notice this when I got finished installing the keys but now I noticed the brace for the keys is pushed back and not level up and down like it used to be. I may have done it with the tool I was twisting on so hard to get the new keys up far enough to get the torsion bolts installed and didn't notice it. Is this a big deal?

009.JPG
 

BeenChevy

Full Access Member
Joined
Feb 24, 2015
Posts
508
Reaction score
254
Location
Minnesota
Shouldn't be much of an issue.

Nice work getting those out. The new keys don't look to have been cut very well. The hexagon should at least have a level plane front to back where the spring sits. From what I observe in the photos is that they may be rounded a bit and not very "square". Are they the same thickness (width) as the stock keys?

Be cool to see how your truck sits with these and your body lift. Post more pics of the old dog!
 
OP
OP
06JET

06JET

Full Access Member
Joined
Apr 18, 2018
Posts
169
Reaction score
179
Location
Wisconsin
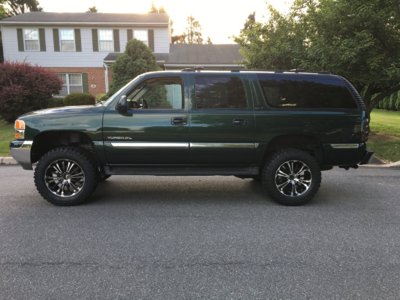
I actually loosened them and used my electric impact to reinstall them and straightened everything up. The keys were the cheaper ones from ebay and they work great. They fit pretty snug and I haven't had any issues. They are a little thicker than the factory keys. The front settled a little and I got it aligned after this picture. It sets level. I wasn't a body lift fan before but after I needed to work on it and realized how much room 3" gives you between everything and the body I became a huge fan.
003 (6).JPG 005 (6).JPG View attachment 208240
 

BeenChevy

Full Access Member
Joined
Feb 24, 2015
Posts
508
Reaction score
254
Location
Minnesota
Yeah you can tell you've taken care of your 01 - Not an easy feat up in the rust-belt. Did you stack it higher in the rear after these photos? My 01 Yukon sits lower in the rear after leveling. It's approaching a suspension overhaul again and i'll be throwing in a used set of Z71 coils and inexpensive coil-over shocks font/rear - Depending on how it sits with Z71 springs i'll probably end up having to go with an inch taller spring seats. Here's how mine sat after leveling 4 years ago.. crazy how much this truck has transformed since then (2/3/14).

IMG_20140302_181734.jpg
 
OP
OP
06JET

06JET

Full Access Member
Joined
Apr 18, 2018
Posts
169
Reaction score
179
Location
Wisconsin
No more stacking of spacers. I have 2" spacers in the back under the springs and the lift keys in the front. With settling and alignment it sets level now. I forget the measurements to the center of the fenders but I will check after I get it off the ramps it's on now. I have it up doing some rust removal and applying some Corroseal. Front is done now working on the back frame and rear end.
 

Forum statistics

Threads
132,766
Posts
1,873,930
Members
97,605
Latest member
audley71
Top