Exhaust Manifold Leak (Suspected): Tips, Suggestions, Experience?

Disclaimer: Links on this page pointing to Amazon, eBay and other sites may include affiliate code. If you click them and make a purchase, we may earn a small commission.

OP
OP
CruelJung

CruelJung

Member
Joined
Jul 11, 2022
Posts
43
Reaction score
55
I have been driving my '08 Yukon XL for nearly four years now, and it has always made a 'ticking' noise on cold startup. This noise subsides within a minute or so, as the engine temperature rises. No CEL or codes. Over the past four years I have been gaining more automotive knowledge and competency, as well as developing a general obsession with this vehicle--how it runs, how it sounds, how my maintenance/repair choices will affect a trajectory towards supercharging one day...

So, I started chasing this 'ticking' noise a few months ago because I noticed an exaggerated form of it under load while driving with the window down. When looking for a busted exhaust manifold bolt, I found that the second-to-rearmost manifold bolt on the passenger side was loose enough to turn with my fingers. There was also soot visible in a few areas above and below the manifold flange. I torqued all 12 bolts to 18 ft. lbs.--noting that all but one bolt were under 11 ft. lbs.--and the result was less noise for less time when cold starting and still noise under load.

Having some free time, last week, I decided to revisit the manifold bolts again because the cold start 'tick' duration seemed to be increasing. Sure enough, the bolts were under the 18 ft. lb. torque spec again and--once re-torqued--the cold start noise level and duration were reduced.

Presuming that the sound (when cold and under load, but dissipating in idle from cold to operating temperature), visible soot, loose bolts (potentially walked out and damaged gasket seal?) point towards an exhaust leak, I am planning to do the following:


1. Replace the current, rusty hardware with ARP header bolts
a. Leaning towards ARP 434-1102 (SS, hex)
b. Considering ARP 434-1301 (SS, stud/nut)

2. In conjunction, replace the exhaust manifold gasket (without removing manifold entirely--i.e., not disconnecting from Y-pipe)
a. Leaning towards OEM (Genuine GM), AC Delco, or Mahle
b. Considering a Remflex gasket or double Remflex gasket to compensate for any warping of the manifold

3. See what happens
a. If the sound persists, I will try to tighten the studs (manifold to Y-pipe).
b. If sound STILL persists after "a.", then I will remove manifold entirely to inspect, replace manifold-to-Y-pipe gaskets, and potentially replace the manifold.


With all of that said, do any of you with experience have some advice for the materials, process, or--for that matter--diagnosis?
Firstly, I want to thank all of you for replying to this. This community is amazing and I am grateful for the opportunity to be part of it.

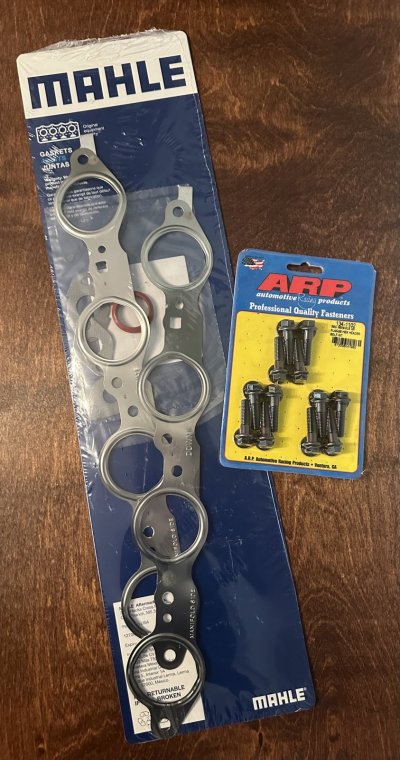
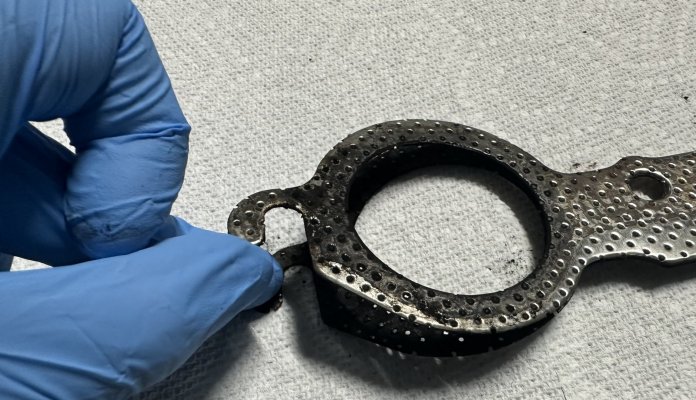
At this point, I have the manifold gaskets and bolts (see attached image). After double-checking what I thought I knew, it seemed the general consensus was NOT to use stainless steel bolts--with the potential exception of using ARP's recommended install lubricant/anti-seize. Aesthetics can play a role in my decisions sometimes, but my initial pull towards SS was for what I theorized to be better utility. How wrong I was. Anyway, I went with ARP's 134-1102, which is a 3/8" flange chromoly hex-head M8 bolt. Also, I could not find what looked like a reputable option for a genuine GM gasket online and I saw a few positive posts about Mahle (which apparently owns Victor Reinz--did not previously know this), so I went that route.


So, what I would like to do is change my exhaust manifold bolts and gasket without detaching the manifold from the down-pipes/cats and I have some ideas (questions after):

1
. Take out exhaust manifold bolts and let exhaust (with manifold attached) drop to allow maximum space to prep surfaces for new gaskets. Complete the rest of the work...

2. Remove the inner four exhaust manifold bolts, leaving the outer two just threaded enough to hold up the manifold, cut out and remove the old gasket, try to prep surfaces as best as possible, *cut out the bottom of the outer two bolt holes in the new gasket (creating hanger hook ends for the gasket to be draped over the still remaining original bolts)*, place the new gaskets, install the new ARP bolts in the inner four areas, then remove the outer two original bolts and replace them with the new ARPs.

3. Begin the same way as in option "2," to the point of having the surfaces prepped and only the two outer (original) bolts remaining in place to hold up the manifold. Instead of altering the new gaskets, I will install an ARP bolt in the second to rearmost hole (for support), remove the rearmost (original) bolt and replace it with another ARP *with* the corresponding gasket section, remove the support ARP bolt (second to rearmost) and install the new ARP bolt and gasket on the opposite end, then install the middle four ARP bolts.


Presuming any of these options are even possible (also, presuming this is a two-man job):

-
What should I clean the mating surface with (tools, solvents) and how can I best keep my exhaust ports clean of debris while doing so (especially if I don't let my exhaust 'drop' out of the way and my working space is limited)?

-I am thinking my exhaust can 'drop' out of the way because of the flex pipe and cross member below the oil pan to support it. How wrong am I about that?

-If I lower the exhaust as mentioned above, should I do both sides together or separately?

-Is it a bad idea to trim the new gasket under the outer bolt holes and should I expect any potential gasket failure if doing so?

-Are the other gaskets in the pictured kit for an EGR on other applicable vehicles?

-Are there any other concerns that I am not even foreseeing?


Thank you, again!
 

Attachments

  • IMG_1941.jpeg
    IMG_1941.jpeg
    305.3 KB · Views: 10
Last edited:

j91z28d1

Full Access Member
Joined
Feb 28, 2022
Posts
3,302
Reaction score
4,105
those new ones look like good gaskets to me. oem MLS type, the ones on the engine definitely aren't and seem to be leaking. I'm a bit supised you couldn't hear it, but carbon doesn't lie. gotta be leaking some.


as for the gaskets. I do not know if you can replace the gaskets without disconnecting the exhaust pipe. you might be able to slip it in, but I've not done it. anytime I've done gaskets I've had the pipe off. I do live in a non rust zone, so no issues zipping the bolts off.

I have seen and used MLS exhaust gaskets that the end holes were slotted so you could drop them over the 2 end bolts. so it won't hurt anything, just make sure what you cut it with doesn't distort the gasket. but also I've installed them before on other vehicles where you leave the 2 end bolts in, remove one while holding the end up, slip say the front in from the top, put that bolt back in, and then move to the back and remove that bolt while holding it up and slide the gasket in.

as for if you need to clean it. you might find those non MLS gaskets on there are stuck to the head or manifold and need scrapped off. at that point it pretty much needs to come off anyways.
 
OP
OP
CruelJung

CruelJung

Member
Joined
Jul 11, 2022
Posts
43
Reaction score
55
those new ones look like good gaskets to me. oem MLS type, the ones on the engine definitely aren't and seem to be leaking. I'm a bit supised you couldn't hear it, but carbon doesn't lie. gotta be leaking some.


as for the gaskets. I do not know if you can replace the gaskets without disconnecting the exhaust pipe. you might be able to slip it in, but I've not done it. anytime I've done gaskets I've had the pipe off. I do live in a non rust zone, so no issues zipping the bolts off.

I have seen and used MLS exhaust gaskets that the end holes were slotted so you could drop them over the 2 end bolts. so it won't hurt anything, just make sure what you cut it with doesn't distort the gasket. but also I've installed them before on other vehicles where you leave the 2 end bolts in, remove one while holding the end up, slip say the front in from the top, put that bolt back in, and then move to the back and remove that bolt while holding it up and slide the gasket in.

as for if you need to clean it. you might find those non MLS gaskets on there are stuck to the head or manifold and need scrapped off. at that point it pretty much needs to come off anyways.
Thanks for all of your advice! I was able to complete the job in the October/November cusp and my engine sounds all the better for it.

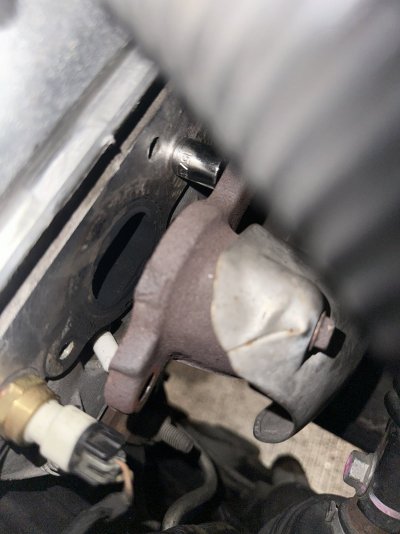
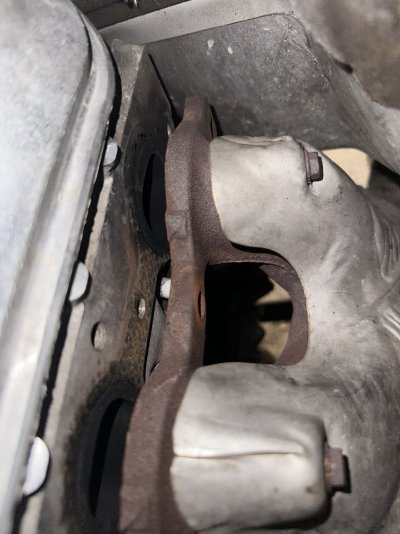
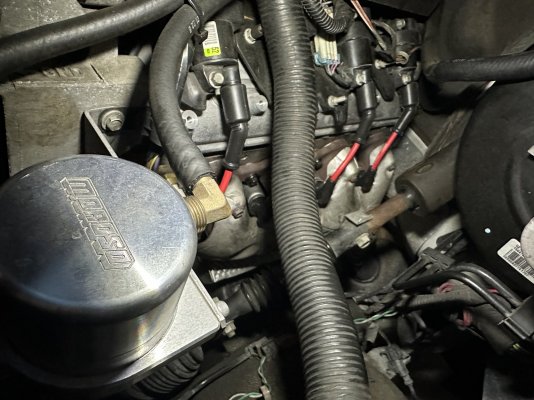
Due to the manifold bolts having been removed already (circa 2020) there were zero issues getting them out. Similarly, the mating surfaces weren't as bad as they could have been, so cleaning them with the manifold still attached to the exhaust system was possible--I placed a small socket between the head/manifold to keep them spaced apart. Needless to say, I over-thought the gasket removal/replacement bolt work quite a bit. Everything old came off and everything new went on--no modifications to gaskets, either. The only mildly complicated aspect to putting the new gaskets and bolts in was that I needed someone underneath to push up on the exhaust (to line up the holes and keep pressure off of the bolt shafts) while I carefully threaded the last couple new bolts into the heads.

Also, the spark plug wires did not cooperate with me, so I earned a new set of those, too--AC Delco, of course. That's something that flew right over my head when planning this, but wasn't a big deal.

So, after replacing the gaskets and bolts (and spark plug wires), some of the noise persisted. I crawled underneath and tightened the collector (manifold-to-cat) junctions to torque spec--the driver side was under torque on 2 of 3 studs and the passenger side on 1. After that, the noise was gone.

I wouldn't be surprised if there isn't a perfect seal on the collector gaskets, since they were loose enough to make noise and probably have some soot on mating areas, but there is no audible indication of a leak anymore--I have been putting my ear to the wheel wells on cold starts and driving close to concrete walls with the windows down, to check.

Thank you to everyone who shared their experience and knowledge!
 

Attachments

  • IMG_1968.jpeg
    IMG_1968.jpeg
    243.3 KB · Views: 3
  • IMG_1967.jpeg
    IMG_1967.jpeg
    280.1 KB · Views: 3
  • IMG_1983.jpeg
    IMG_1983.jpeg
    367 KB · Views: 2
  • IMG_1982.jpeg
    IMG_1982.jpeg
    310.9 KB · Views: 4
  • IMG_2009.jpeg
    IMG_2009.jpeg
    316.4 KB · Views: 3

Geotrash

Dave
Supporting Member
Joined
Feb 16, 2018
Posts
6,557
Reaction score
16,454
Location
Richmond, VA
Regarding the gasket, I think I will go for the OEM style first and see if that works. I was only put under the impression that doubling up on the gasket can work by some anecdotes from automotive-minded individuals I know, but I think they were referring to the composite style gasket which is more or less of consistent thickness. The OEM, MLS gasket for these Vortecs seems to have a greater thickness around port holes, so I don't think doubling would be a good idea unless someone with experience can tell me otherwise. Additionally, I've read that while these thicker, composite aftermarket gaskets (Remflex: 50% crushable graphite, etc.) give a great seal initially, they tend to break and blow out later.

I took a video of my cold startup noise and will post it here, shortly.
I agree with you - no advantage to doubling up the MLS gasket that I can see. If anything, it adds risk. And I also agree with you on the composite gaskets - they're great for sealing up damaged surfaces but they don't last as long as MLS gaskets do, in my experience, but I suppose that depends on the application.
 

j91z28d1

Full Access Member
Joined
Feb 28, 2022
Posts
3,302
Reaction score
4,105
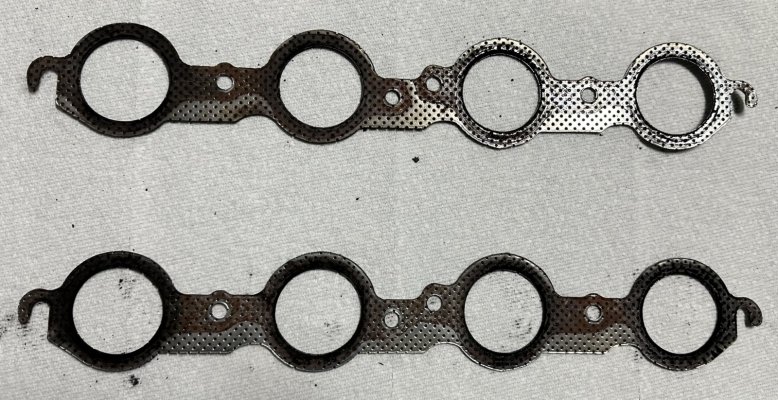
judging by the carbon around the ports those old gaskets were leaking really badly.


glad it all worked out. always nice when a repair actually fixed a problem. Hopefully it runs better. I gotta guess with that much of a leak your o2 sensor readings and stuff were off.
 
Top