You are using an out of date browser. It may not display this or other websites correctly.
You should upgrade or use an alternative browser.
You should upgrade or use an alternative browser.
Fosscore's 2006 Tahoe Build Thread
- Thread starter Fosscore
- Start date
Disclaimer: Links on this page pointing to Amazon, eBay and other sites may include affiliate code. If you click them and make a purchase, we may earn a small commission.
Fosscore
Full Access Member
- Joined
- Apr 16, 2014
- Posts
- 10,557
- Reaction score
- 18,427
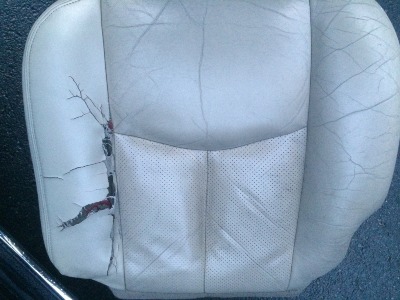
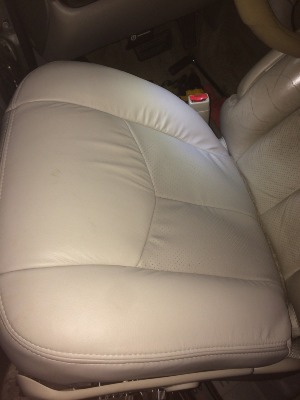
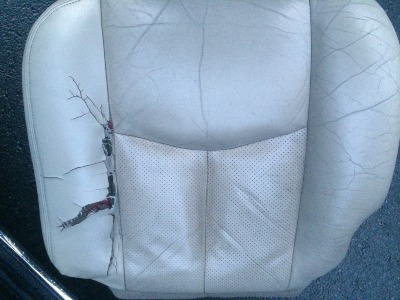
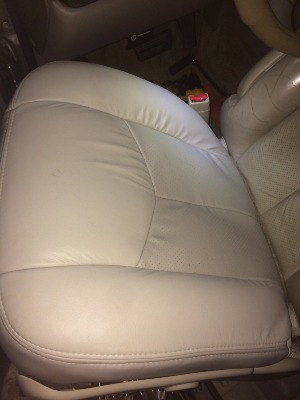
Yikes! That was pretty bad. End result is Sweeeet....
Pachanga02
Full Access Member
The previous owner of the seats had the left side fixed but it wasn't with leather. It was a hard vinyl that in the winter hardened and cracked. The foam was good to go so it's nice to have a fresh bottom again. Just drove the family to NJ for a Lego thing for my kids and it was a nice comfy ride.
Fosscore
Full Access Member
- Joined
- Apr 16, 2014
- Posts
- 10,557
- Reaction score
- 18,427
So after two months away, it's time to get back to work on some of the projects I have been wanting to complete.
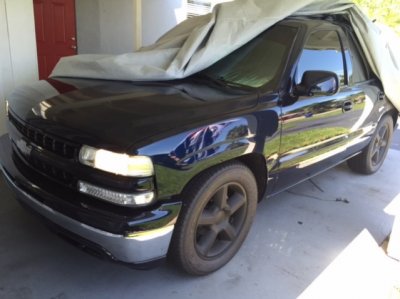
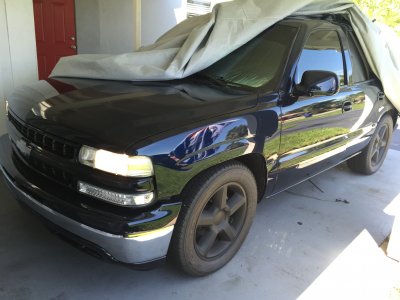
The truck has sat under the carport since late May. Wife not happy, but she has indulged me while I was away. The truck stayed fairly clean under the truck cover, but still needs a wash.
The brakes held up pretty well. A little surface rust from sitting, but the painted parts on the rotors and calipers still look good from when I did the brake job before the summer.
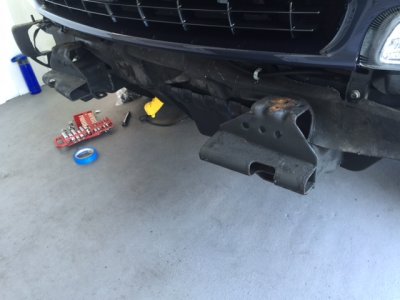
The front and rear chrome bumpers are at the painters to finish the color matching this week. Should have those installed by next week, if no delays at the paint shop.
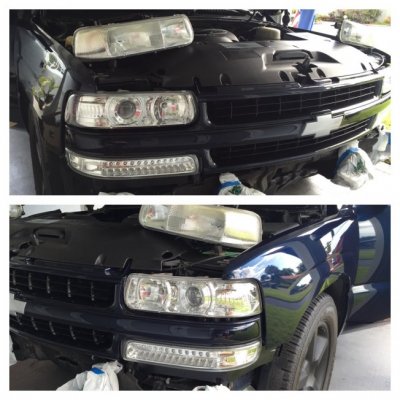
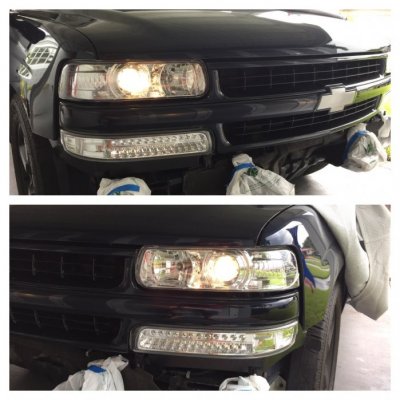
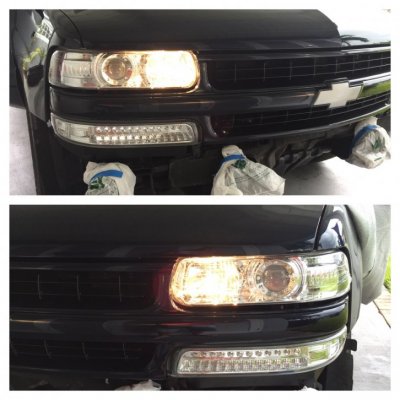
Installed the chrome Depo projectors today. A retro may be in the future works, but will stick with the bulbs that are in there for now. Had a gift card so they only cost me about $15 via Amazon Prime. Can't go wrong with that.
Here's a few pics of them installed, low and high beam looks. Haven't had a chance to drive with them yet. I think they look pretty good without going too far away from the OEM look.


Fosscore
Full Access Member
- Joined
- Apr 16, 2014
- Posts
- 10,557
- Reaction score
- 18,427
October 2015
73250 miles
After working out of town this summer, it was time to get back to work on the Tahoe in September. Thankfully the wife tolerated my truck sitting covered under the carport during the dog days of summer and put up with the mess I made of the house with spare parts for the various projects that would consume all of September when I got home. I had really only planned a few changes, but too much time on the TYF pushed me in a few new directions that I might not have considered and I decided to take on a quite a bit at once since the truck was torn apart. Pretty damn happy with the results. Hope you all enjoy this detailed report and the way she is looking now. I sure do and have got nothing but killer compliments.
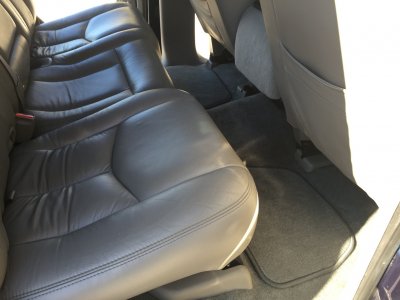
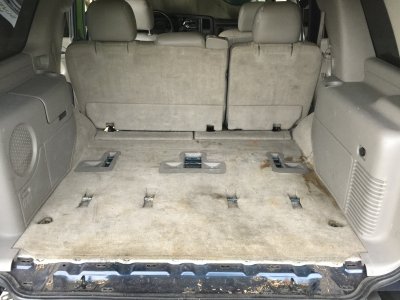
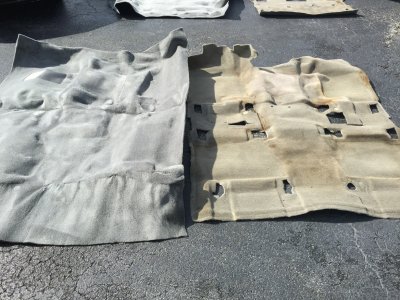
The first order of business was to change out the nasty OEM carpet. It looked and smelled horrible and I had wanted to change it out since I started working on the truck back in late 2013. I ordered a few free samples from stockinteriors.com to compare to the OEM color as I wanted to go a bit darker this time, but not too dark. After a few ridiculous quotes for installation, I decided to save the labor cost and do it myself. Not too challenging, just time consuming and hot.
ACC (Automotive Custom Carpet is the company that stockinteriors.com get their orders from. If you go directly to AAC to order directly through their website, make sure and check the price as they appear to be a bit higher so do your research). TYF member Red Rocket had just replaced his carpet with the same color, so that sold me. #8078 Dark Grey. Cost of the complete 4 door plush cut carpet with mass backing and the custom carpet floor mats front and back to complement the new carpet was $500.
I had already ordered the T50 Torx bit for the middle seat belts that bolt in by the doors and the rear tie downs by the lift gate. I had also ordered an E14 driver bit for the front seat rear bolts, but after searching further on TYF, I found that the rear bolts can also take a 7/16" long socket and the front bolts took a 15mm long socket. The front seat rear bolts go all the way through the floor of the truck while the front bolts are welded to the floor of the truck. The middle row seats have an 18mm nut that threads on to the bolt that is already welded to truck floor. There is also a 1/2" nut that connects the 60/40 split.
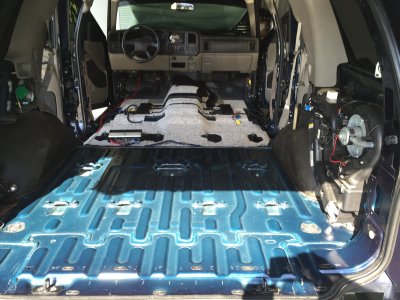
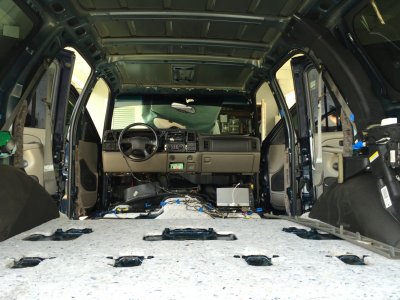
With all necessary materials and tools on hand, I ripped apart the interior of the truck from front to back. Three rows of seats and all the trim was removed so that I could access all the edges properly. The replacement carpet is pre-formed around the wheel wells, the transmission hump and the slight elevation between the middle and rear seats. All other holes for seat bolts or trim pieces need to be custom cut by you. Make sure and get a good sturdy pair of shears that can cut carpet. I ordered the mass backing option and that stuff just laughed at my new shears. It took a little extra effort to work through that stuff, but I did succeed.
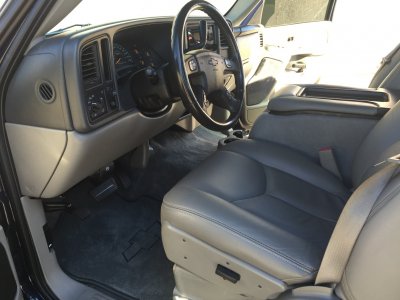
I could not believe how nasty the OEM carpet really was once it was out of the truck. Night and day difference in looks and smell. Coupled with the new leather driver seat bottom before the summer, the truck smells so much better. The new carpet came back to shape as it baked on my hot Florida driveway. I made use of that time to vacuum and wipe down the inside of the truck. The OEM carpet pad was still in great shape so just a quick shake out was all that was needed.
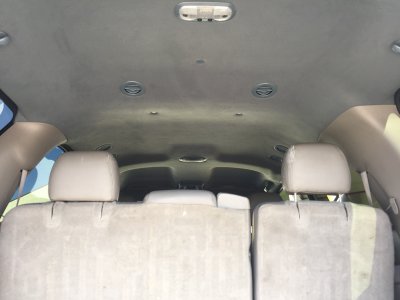
My wife came out to look at my progress, as the house was now filled with the seats and trim pieces and the Tahoe was gutted to the metal. She looked at the headliner and said you might as well replace that while you have the truck ripped apart. You don't have to tell me twice. More trim came off and shortly thereafter the headliner came down. I had unplugged everything, but could not access the main wiring harness plug behind the dash and did not feel like trying to trace it back. So I labelled the plug ends and carefully pulled the wires from the headliner as they had been hot glued in place. I called the upholstery shop and they had the headliner and visors back to me in one day for $250. Money well spent for that effort of letting them clean off the old stuff and install the new material. I went a few shades darker on the overhead from the pewter to dark grey.
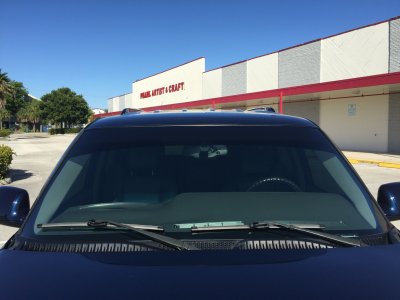
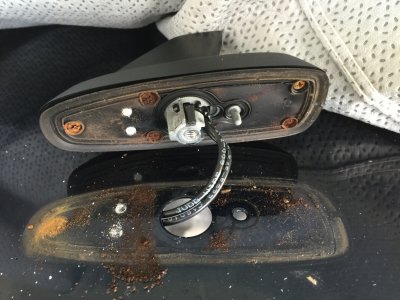
With the headliner out, it was time to delete that fugly OnStar antenna. I have always hated that shark fin up top. I unplugged it and pulled it out. One small hole and one bigger hole plus some marks from the antenna having been up there for 10 years. Good time to pull it off as the screws on the underside of the antenna were rusted and starting to mark the paint on the roof. Hmm...not wanting to get into some body work on those holes I found some plastic plugs at Lowe's (surprisingly they have a good selection of metric and automotive plugs) to plug the holes.
I already had some rattle can OEM color from automotivetouchup.com sitting around from previous color matching projects. I gave them a quick sand, primer, topcoat and clear coat and used some black silicone sealant to put them in place. I sealed them up top and wiped clean around the edges and then again on the inside of the roof. I made sure and gooped on a considerable amount of sealant around the holes to keep it all dry, especially with the new headliner. One plug was a body panel fastener with a wide head and the ribbed threads. The other plug was the type with a wider base and two very small extrusions that lock it into place. Of course the diameter of the holes in the roof and the plugs do not match perfectly, so there was a bit of creativity needed to secure them in place underneath, but also create enough surface space on top to seal up from water.
As the roof holes were actually bigger than the head and the ribbed thread of the body panel fastener, I used a combination of 3 nylon washers to hold the plug in place by pushing them up the threads to secure the plug in place and not allow it to pull out or shift around. It worked as good as a regular nut would and spread the pulling power over the wide washer. With the plugs in place and color matched as well, it is low profile up top and unless you are looking right at it (or an OCD TYF member spots it), you won't even notice. Worth saving some time on the filling and fairing side of things. By the time the headliner went in a couple of days later, that sealant was flexible, but waterproof. Looks sweet and OnStar shark fin is gone!
With the new color headliner a few shades darker grey, I decided to paint all the pieces stuck in the overhead as well to better blend in. I found a darker grey at Lowe's that turned out really nice after dismantling the pieces as far as they could be taken apart to get the best coverage. That set me back a few days before I could reinstall the headliner. I used two coats of paint and two coats of satin clear coat to bring down the shine. I think it turned out really nice and since it is not high traffic, it should hold up pretty good. I put the headliner back inside the truck, fired up the glue gun and laid down the wire harness in the exact same track spots. The headliner went back up and I installed the painted pieces before starting on the carpet. It was still worth having the pros install the new material and doing the installation in the truck myself.
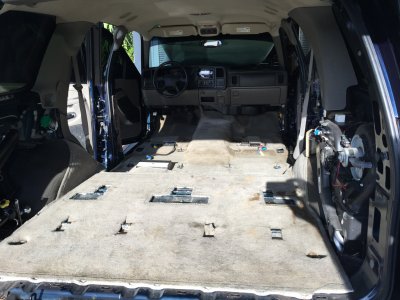
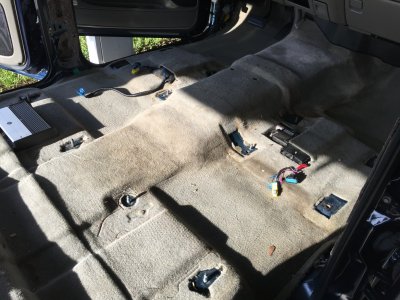
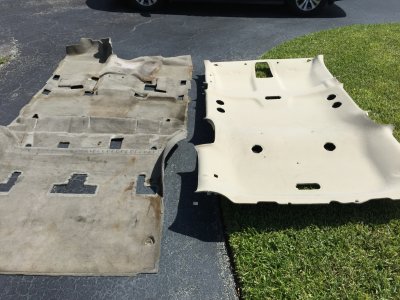
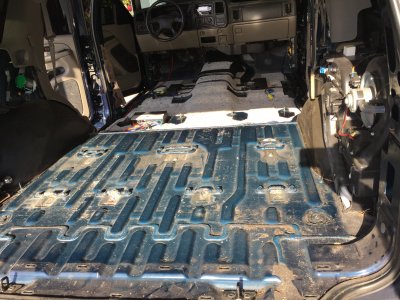


Last edited:
Fosscore
Full Access Member
- Joined
- Apr 16, 2014
- Posts
- 10,557
- Reaction score
- 18,427
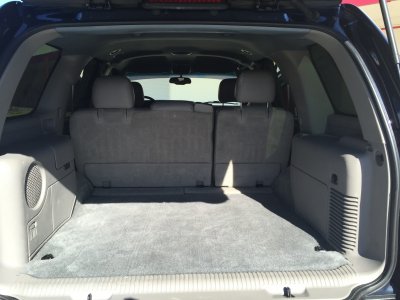
Finally it was time to install the carpet which started this whole September project. Even with the pre-formed spots, the carpet required tugging and trimming to get it to lay down and make sure the opening for the trim clips would snap securely into place. It is pretty straight forward with the hardest spots being the transmission hump/drivers pedals, getting under the dash and the middle to rear seats transition. The support piece by the accelerator pedal and the few curves in that area that make it a tight fit. As well, the trim piece coming down over the rear wheel well was not happy with the thickness of two layers of carpet. A few relief cuts were needed to tuck it into the little void by the seat belt bolt which then allowed that trim piece to snap into place. Once the sill plates were snapped in, that continuous flow of trim helped secure things in place.
I decided for a super clean install with as minimal cutting as I could get away with. I did not cut out as many openings as were on the OEM carpet. So instead of the seat frames sitting directly on the floor of the truck I was able to push/cut the bolts through the carpet, compress the seat and frame enough to get the bolts threaded and then tighten it down with the ratchet. The front seats have a nice slit for the air conditioning vent and power seat wires while the middle row tucks in the amplifier wires nicely. The back carpet piece sits underneath the front carpet piece with the raw edge transition ending right at the elevation point. It is only noticeable if the middle seats are up with the seat base being in the down position. Looks really clean. I gave all the seat bases and leather a good wipe down while they were out. There was some nasty crap stuck to the frames.
It sure was hot as hell during the day outside in Florida even under the carport. I had a blower fan, lots of water and the radio blaring and achieved a successful end result with $$ saved on labor and the satisfaction of having down this project myself. Pretty cool.
For the moment, I left the rear cargo area uncut for the third row seats. I don't use them, so I stored my seats and trim pieces and left it clean. Looks great. May get cargo mat just to keep the carpet in good shape.


Fosscore
Full Access Member
- Joined
- Apr 16, 2014
- Posts
- 10,557
- Reaction score
- 18,427
Fosscore
Full Access Member
- Joined
- Apr 16, 2014
- Posts
- 10,557
- Reaction score
- 18,427
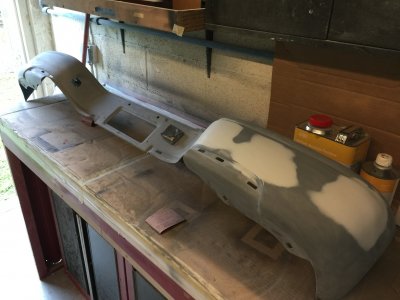
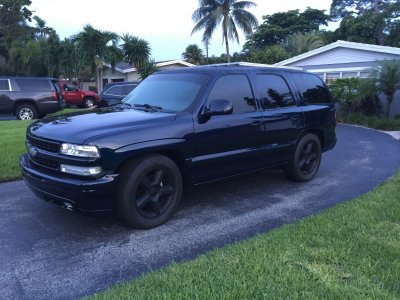
I sent my front and rear chrome bumpers off to be color matched as well. The painters turned them around in about one week and they look beautiful. The painters treat me right and only charged me for the materials, plus a couple 12 packs. They paint parts for the boat, so that repeat business keeps me in good graces. Not a bad relationship to keep working on. They spot filled a few scratches and gave them both a real good primer coat and sanded perfectly smooth before sending it to the spray booth.
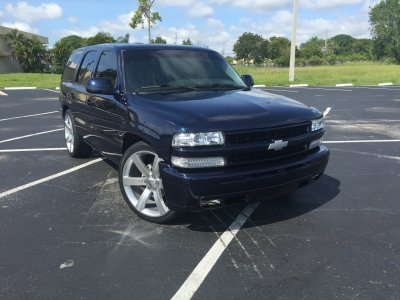
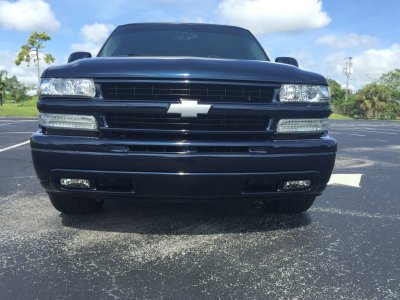
The front end all color matched just looks pretty badass IMO!! I also tested the spare tire and dropped it to the ground as well. All looks fine. First time I think the tire removal tools had every been used.
I decided to trade out my OEM headlights for some Depo projectors. Maybe a retrofit in the future, but for now they sure look nice and dress up the front end a bit nicer.
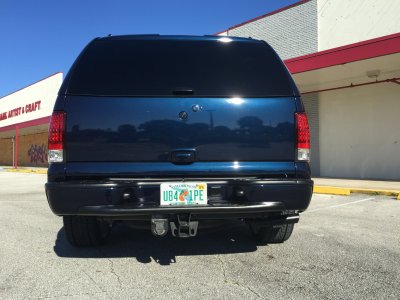
Keeping with the removing hardware theme, I decided to take off my rear wiper. Pretty straightforward removal except for the 5 holes with 3 different sizes. Of course it couldn't just be easy. Even an imprint from the wiper stopper and a bit of missing paint under the wiper motor arm. I already had a good mix of plugs from the OnStar antenna delete, so I decided to go that route rather than do a fill and fair. Of course it would be much a much cleaner shave, but again it will only be noticeable to the OCD crowd (me included), but losing the wiper is worth the trade off to me to have a few small plugs that are color matched and sealed in place. Plus I can always put the wiper back in place if I need to for sale, etc... The wiper stopper has 3 small plugs, and the wiper washer and wiper motor arm holes have 2 different size body panel plugs. It is noticeable, but only because you are looking for it. Still better than having the wiper that I never use just hanging there. Maybe a clean shave down the track. I color matched the rear lift gate push button ring as well while I was at it.
I took the Esky rack off as I knew there were two small corrosion spots by the rack inserts on the drivers side. I masked everything off, Dremeled the rust spots back to metal, primed, filled, faired, top coated and clear coated it back to life. Not bad for a quick repair on the roof. Plus they are under the roof rack so it is not visible. I polished and waxed the Esky rack and reinstalled it.


Fosscore
Full Access Member
- Joined
- Apr 16, 2014
- Posts
- 10,557
- Reaction score
- 18,427
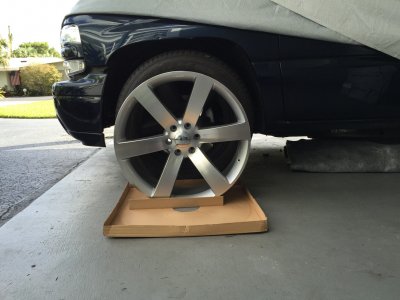
Tires and wheels. The crowning jewel of my September project. Everything else I did to the truck was so worth it and made a huge difference, but nothing transforms the look of the truck like a new set of wheels. They just tie it all together. I searched a long time and polled the TYF numerous times, but just couldn't decide what to go with.
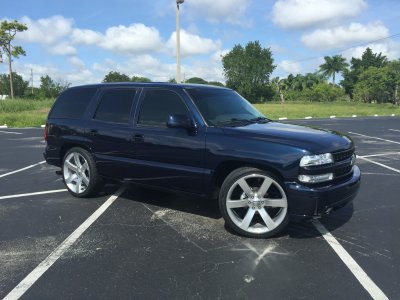
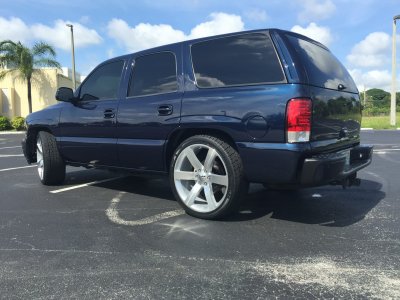
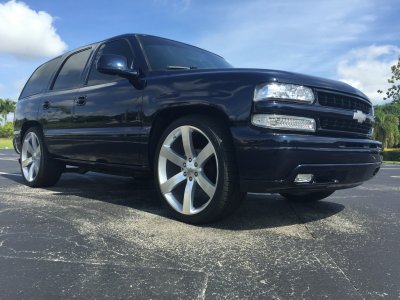
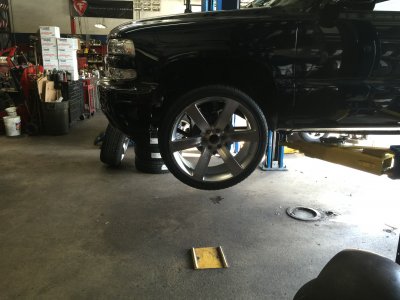
I finally pulled the trigger at the end of the summer and ordered a set of 22 inch TBSS machine face all silver from Tony. I also ordered some 285/45/22 tires online. The 22 inch TBSS were back ordered 90 days and my tire order got cancelled pretty much the same day. Guess it was not meant to be. And for good reason...
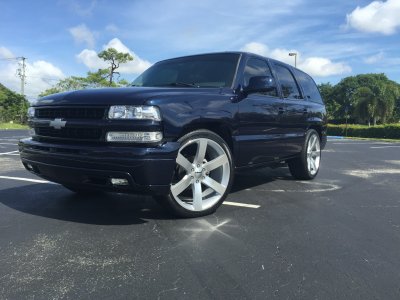
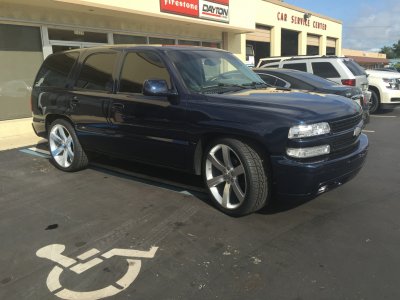
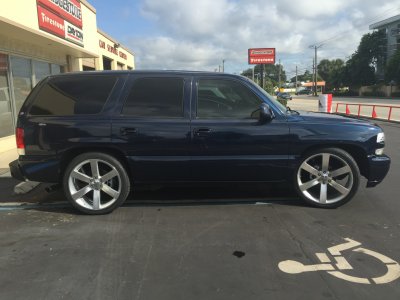
My patience paid off. I pulled the trigger and hit Tony up again for some 24 inch TBSS replicas. Machine face all silver. They were on my door step 4 days later. I contacted my mechanic and he had pretty much the same price on tires as online so I turned him loose on coordinating the tires arrival with the wheels and set up an appointment for mounting them up. Put in new AC Delco TPMS sensors as well to get that light off the dash finally. Running 295/35/45 Nexen Roadian HP tires. Lock to lock and there is zero rubbing issues.
Big jump to 24s since I had never run that big before, but I figured why not? Might as well make a statement and reveal the truck all at once with the paintwork, removed hardware, new carpet, new headliner and new tires and wheels. Phew! Pretty stoked and I finally get to drive it after 3 months. Been fun cruising around.
Couldn't be happier and the compliments so far have been wow!! Even the wife thinks they look great.
Thanks for the input and motivation.
Here are some pictures from this weekend after I got her all washed up. Some with and without the Esky rack. Hope you guys like the results.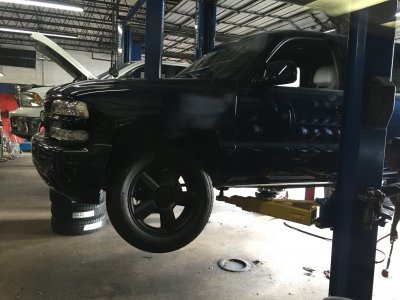


Fosscore
Full Access Member
- Joined
- Apr 16, 2014
- Posts
- 10,557
- Reaction score
- 18,427
Similar threads
- Replies
- 17
- Views
- 4K
- Replies
- 56
- Views
- 8K
- Replies
- 51
- Views
- 7K

