Growing up doesn't have to suck

Disclaimer: Links on this page pointing to Amazon, eBay and other sites may include affiliate code. If you click them and make a purchase, we may earn a small commission.

OP
OP
iamdub

iamdub

Full Access Member
Joined
Apr 23, 2016
Posts
20,821
Reaction score
44,932
Location
Li'l Weezyana
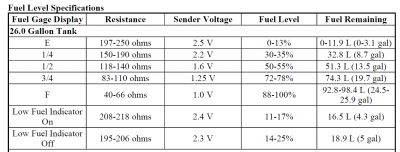
I tested the level sensor on the original fuel pump module. Full was 40.x ohms, as it should be. As I slowly lowered the float arm, the impedance increased fairly smoothly until it reached a maximum of 193.8 ohms with a considerable amount of travel left in the float arm. Moving the arm further resulted in an open circuit for the rest of its travel. It's supposed to operate on a 40 ohms (full) to 250 ohms (empty).

193 is 77.2% of 250. 100% - 77.2% is 22.8%, which is a little under 25% or 1/4 tank. Just under 1/4 tank (per the gauge) is where it really started acting up when accelerating.

So, this means that when my gauge read ~1/4, I actually had anywhere from just under 1/4 tank of fuel to fumes remaining.

What I don't get is why the gauge didn't just suddenly plummet to "E" soon after that ~1/4 tank mark. Perhaps the PCM has backup logic to override the analog sensor in case of a failure? It could estimate the fuel remaining by factoring the last known quantity and injector duty cycle.

I guess I'm gonna have to fill one of my race jugs and go for a drive to see where it stalls. I could put three gallons in the jug and when the Tahoe runs out of fuel, that three gallons plus whatever is still in the tank should put the gauge right around the 1/8th tank mark. I'd know the accuracy of my gauge as well as my "stall point".
 
Last edited:

swathdiver

Full Access Member
Joined
May 18, 2017
Posts
19,582
Reaction score
26,269
Location
Treasure Coast, Florida
I tested the level sensor on the original fuel pump module. Full was 40.x ohms, as it should be. As I slowly lowered the float arm, the impedance increased fairly smoothly until it reached a maximum of 193.8 ohms with a considerable amount of travel left in the float arm. Moving the arm further resulted in an open circuit for the rest of its travel. It's supposed to operate on a 40 ohms (full) to 250 ohms (empty).

193 is 77.2% of 250. 100% - 77.2% is 22.8%, which is a little under 25% or 1/4 tank. Just under 1/4 tank (per the gauge) is where it really started acting up when accelerating.

So, this means that when my gauge read ~1/4, I actually had anywhere from just under 1/4 tank of fuel to fumes remaining.

What I don't get is why the gauge didn't just suddenly plummet to "E" soon after that ~1/4 tank mark. Perhaps the PCM has backup logic to override the analog sensor in case of a failure? It could estimate the fuel remaining by factoring the last known quantity and injector duty cycle.

I guess I'm gonna have to fill one of my race jugs and go for a drive to see where it stalls. I could put three gallons in the jug and when the Tahoe runs out of fuel, that three gallons plus whatever is still in the tank should put the gauge right around the 1/8th tank mark. I'd know the accuracy of my gauge as well as my "stall point".

This might help some:

upload_2021-5-15_1-25-0.png
 
OP
OP
iamdub

iamdub

Full Access Member
Joined
Apr 23, 2016
Posts
20,821
Reaction score
44,932
Location
Li'l Weezyana
@iamdub im looking to do the big three upgrade on my Nali, would that kit you linked work for my 2006?

It's pretty much a universal kit. One end of the three wires has the lug and heat shrink on it and you cut it to length and install the lug and heat shrink on that end of the wire yourself. On a GMT800, the battery and where the alternator cable goes is in the front left corner. So, there should be plenty of wire to go from the alternator to that positive lug, then from the positive lug to the positive post on the battery. You'd need an extra lug and some heat shrink, though.
 

adventurenali92

Full Access Member
Joined
Feb 16, 2015
Posts
7,387
Reaction score
8,613
Location
Big Bear Lake, ca
It's pretty much a universal kit. One end of the three wires has the lug and heat shrink on it and you cut it to length and install the lug and heat shrink on that end of the wire yourself. On a GMT800, the battery and where the alternator cable goes is in the front left corner. So, there should be plenty of wire to go from the alternator to that positive lug, then from the positive lug to the positive post on the battery. You'd need an extra lug and some heat shrink, though.
Thanks for the info. Gonna have to figure out how this is gonna work for me since I have neither the expertise to do this on my own, nor the audio shop nearby to connect everything for me.
 
OP
OP
iamdub

iamdub

Full Access Member
Joined
Apr 23, 2016
Posts
20,821
Reaction score
44,932
Location
Li'l Weezyana
Thanks for the info. Gonna have to figure out how this is gonna work for me since I have neither the expertise to do this on my own, nor the audio shop nearby to connect everything for me.

It ain't nuttin' but copying the factory stuff. No expertise involved, really. If you can change out headlight assemblies and trim pieces, change engine oil, etc., then you can make and install the Big 3. Worst case is you'd have to buy or borrow something to crimp the lugs. You can use crimpers or a hammer style tool.

Example of hammer style: https://www.amazon.com/Compression-Crimping-Terminals-Tech-Team/dp/B0812CDCFD


Soldering isn't necessary. But, if you wanna solder them, you just need a torch, a spool of solder and pliers to hold the lug. I use Vise Grips to better my chances of not dropping the lug when it's full of molten solder.

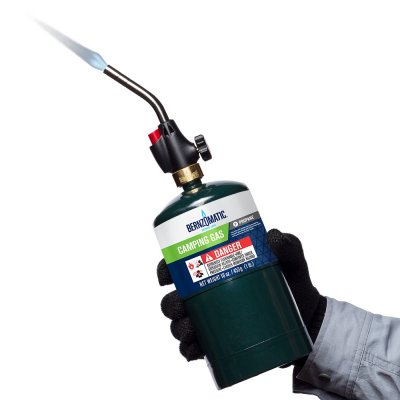
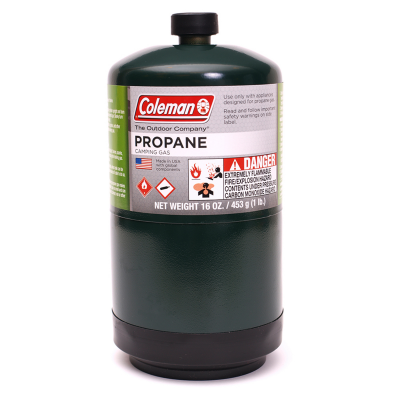
I use a Coleman propane camp stove fuel tank with a Bernzomatic torch head:
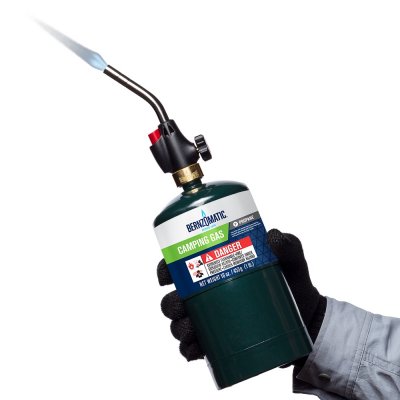
sposable-gas-cylinder-453g-hand-torches-torch-kits.jpg

51-8799e61d3d1a_1.857706f7a1a44ddf7024e9e7e1f07eaf.png
 

Sam Harris

Supporting Member
Joined
Sep 26, 2018
Posts
7,427
Reaction score
14,911
Location
Texas
It ain't nuttin' but copying the factory stuff. No expertise involved, really. If you can change out headlight assemblies and trim pieces, change engine oil, etc., then you can make and install the Big 3. Worst case is you'd have to buy or borrow something to crimp the lugs. You can use crimpers or a hammer style tool.

Example of hammer style: https://www.amazon.com/Compression-Crimping-Terminals-Tech-Team/dp/B0812CDCFD


Soldering isn't necessary. But, if you wanna solder them, you just need a torch, a spool of solder and pliers to hold the lug. I use Vise Grips to better my chances of not dropping the lug when it's full of molten solder.

I use a Coleman propane camp stove fuel tank with a Bernzomatic torch head:
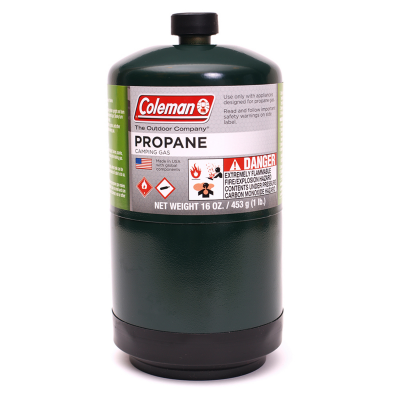
sposable-gas-cylinder-453g-hand-torches-torch-kits.jpg

51-8799e61d3d1a_1.857706f7a1a44ddf7024e9e7e1f07eaf.png
Agree! This is not difficult stuff. I have the kit in my cart.. to order later.. sometime in the near future.. you can definitely do it Chase..!
 

Forum statistics

Threads
132,245
Posts
1,864,689
Members
96,794
Latest member
Pippyochi
Top