Here’s my Audio Setup, Let’s See Yours!

Disclaimer: Links on this page pointing to Amazon, eBay and other sites may include affiliate code. If you click them and make a purchase, we may earn a small commission.

Jason in DLH

Cheeseburger and Fries
Joined
Sep 4, 2020
Posts
1,400
Reaction score
1,562
Location
MN
Figured this might help someone in the future and I’m curious to see how others are setup, so please let’s see how you did it!

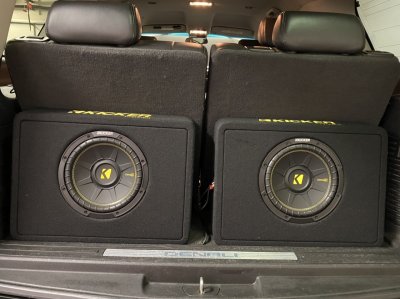
In my custom audio build I first started with the subs that I wanted that fit perfectly in the back:
D6E08AD9-A0E9-4F91-96F5-1B050091E66E.jpeg
2 -10” Kicker CompC 4 OHM 300Watts RMS Each

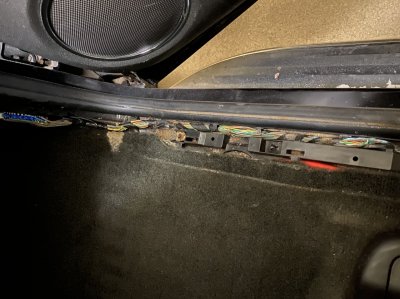
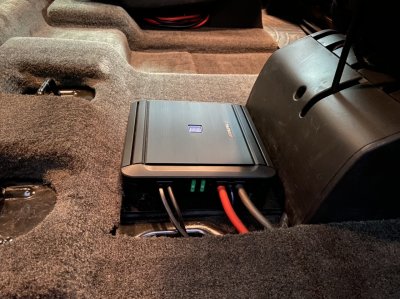
I then decided on the amp (I simply took a Sawzall to the piece of carpet that detaches from under the 2nd row seats). I removed the driver side 2nd row to run the RCA, Remote Turn On, and Wired Amp Control underneath carpet and up to the dash. I brought the power cable (inside wire loom) at about a 45 degree from the battery inside the wheel well and attached it to the frame and brought it up through a grommet I installed (under front passenger side sill plate). I then caulked the grommet from the inside and outside. I stripped the paint near the amp for the ground wire and sealed that with rubberized coating.
D629D6A3-600F-4FB2-A09E-8D59E624976E.jpeg
Alpine MRV500 500Wx1

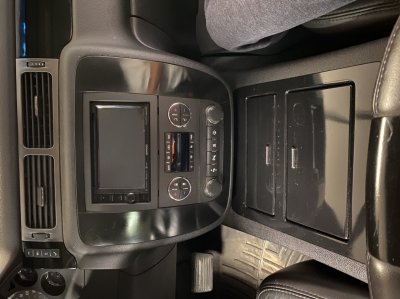
Finally I chose the head unit. A Kenwood DDX376BT that was easy to bypass parking sensor so you can watch videos while on the go.
754C2733-06C8-4766-93BE-9EC0EECAD0E0.jpeg
Kenwood DDX376BT

And the final touches...
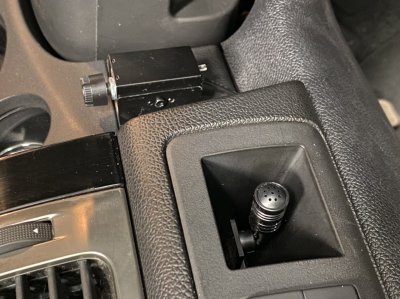
The wired Amp control and microphone for the hands free calling and what not (I always wondered what that little empty box was for. Now I know...a microphone!)
EC751C09-5345-47F9-93E9-3D5E18F9E2EB.jpeg

Overall I’m satisfied with how it all turned out. I especially like the wired amp remote so I can turn the bass down. Oh, I needed to remove the rear lift trim and caulk/tape all the loose wires and connections as the rattling was unbearable. I also caulked the license plate bracket. It still rattles, but not nearly as bad.

I think my next build will be 2-15” Solo Barics and I’ll build my own ported box.
 
OP
OP
Jason in DLH

Jason in DLH

Cheeseburger and Fries
Joined
Sep 4, 2020
Posts
1,400
Reaction score
1,562
Location
MN
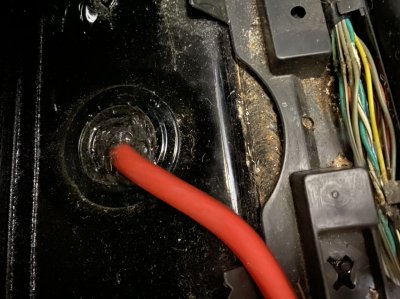
DE552282-BC48-4A98-BAB5-70F11EA27773.jpeg Here’s the power cable coming from the battery to inside the Yukon. You have to take off the sill plate as well as the kick panel to be able to pull the carpet back far enough to drill through this location.

94771764-1ECF-410A-971A-E12E3E87774A.jpeg

Super easy way to route the power. And then I can run the RCA separately on the other side to minimize sound interference. Not to mention I was having a hard time finding a way to run the RCA towards the passenger side (again, I don’t want the power and RCA run together just in case of sound interference) and I didn’t have to run the power across the engine bay.
 

Joseph Garcia

Supporting Member
Joined
Aug 2, 2018
Posts
7,604
Reaction score
10,460
Good job, and thanks for sharing.

Good job on running the power wire and the low signal wires on separate sides of the truck's body.

My 2 power amps are hidden in the rear side panels of the truck, as I usually have my 2nd row bucket seats in the stowed position, in order to have open cargo space available within the truck. My 3rd row seats are hanging off the ceiling in my garage, as I very rarely use them.

I also have a Kenwood head unit, and I really like it. My microphone is located at the top of the windshield, peeking out from behind the rear view mirror, and my sub volume control is located at the bottom of the driver's side dashboard, near my right knee.

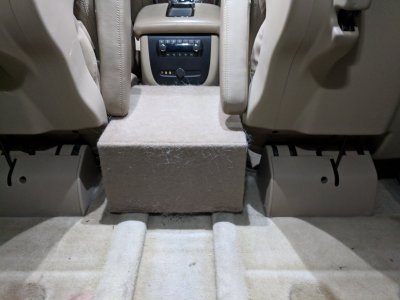
My sub is in a custom box between the second row bucket seats, and it can double as a table for the second row seat occupants, on the rare occasions when I have them in the down position, with people in them. It more commonly serves as a seat for one of my two 90+ lb. white German Shepherds, who likes to sit on it and peer over my shoulder out the front windshield, when I'm driving. (hence, all the white dog hair)


Subwoofer.jpg
 
Last edited:
OP
OP
Jason in DLH

Jason in DLH

Cheeseburger and Fries
Joined
Sep 4, 2020
Posts
1,400
Reaction score
1,562
Location
MN
Nice setup! What kind of amps and speakers/sub(s) are you running? The sub must be downward facing?

I, too, like the Kenwood. My factory Bose speakers really came alive after installing the Kenwood. I really like all the speaker adjustments available.
 

Joseph Garcia

Supporting Member
Joined
Aug 2, 2018
Posts
7,604
Reaction score
10,460
Nice setup! What kind of amps and speakers/sub(s) are you running? The sub must be downward facing?

I, too, like the Kenwood. My factory Bose speakers really came alive after installing the Kenwood. I really like all the speaker adjustments available.

My audio system is designed for my in-truck listening pleasure only, and not for setting off car alarms, or announcing my arrival from 2 blocks away.

Door and post speakers are Alpine, a decent and affordable middle-of-the-road brand, since the truck is not my daily driver. I would have preferred Focal speakers, like I have in my daily ride, but I could not justify the additional expense. My sub is an American made AudioMobile 10" full size speaker (not a pancake design speaker), which is specifically designed for small 1 cu. ft. sealed enclosures, and the downward-firing enclosure was custom designed and built to accommodate the sub.

My speakers are powered by a 4x75 watt RMS Kenwood amp, and the sub is powered by a bridged 500 (2x250) watt RMS Rockford Fosgate amp. I would have preferred JL Audio HD amps, like I have in my daily ride, but I could not justify the additional expense.
 

89Suburban

Bull in the china shop
Supporting Member
Joined
Jan 10, 2013
Posts
15,411
Reaction score
43,112
Location
SE PA
Figured this might help someone in the future and I’m curious to see how others are setup, so please let’s see how you did it!

In my custom audio build I first started with the subs that I wanted that fit perfectly in the back:

View attachment 259588
2 -10” Kicker CompC 4 OHM 300Watts RMS Each

I then decided on the amp (I simply took a Sawzall to the piece of carpet that detaches from under the 2nd row seats). I removed the driver side 2nd row to run the RCA, Remote Turn On, and Wired Amp Control underneath carpet and up to the dash. I brought the power cable (inside wire loom) at about a 45 degree from the battery inside the wheel well and attached it to the frame and brought it up through a grommet I installed (under front passenger side sill plate). I then caulked the grommet from the inside and outside. I stripped the paint near the amp for the ground wire and sealed that with rubberized coating.
View attachment 259589
Alpine MRV500 500Wx1

Finally I chose the head unit. A Kenwood DDX376BT that was easy to bypass parking sensor so you can watch videos while on the go.

View attachment 259590
Kenwood DDX376BT

And the final touches...
The wired Amp control and microphone for the hands free calling and what not (I always wondered what that little empty box was for. Now I know...a microphone!)
View attachment 259591

Overall I’m satisfied with how it all turned out. I especially like the wired amp remote so I can turn the bass down. Oh, I needed to remove the rear lift trim and caulk/tape all the loose wires and connections as the rattling was unbearable. I also caulked the license plate bracket. It still rattles, but not nearly as bad.

I think my next build will be 2-15” Solo Barics and I’ll build my own ported box.


Jason awesome shit man. I have my eye on those subs as well.
 
OP
OP
Jason in DLH

Jason in DLH

Cheeseburger and Fries
Joined
Sep 4, 2020
Posts
1,400
Reaction score
1,562
Location
MN
Thanks! I like the fact that they fit perfectly in the back of the Yukon. They sound great and they are easy to carry when I want to clear the space for bikes or what have you.
 
OP
OP
Jason in DLH

Jason in DLH

Cheeseburger and Fries
Joined
Sep 4, 2020
Posts
1,400
Reaction score
1,562
Location
MN
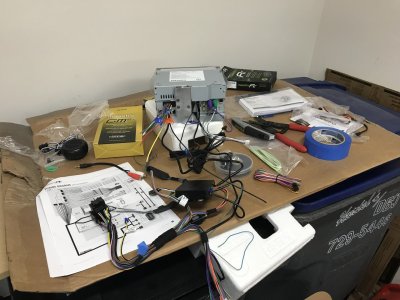
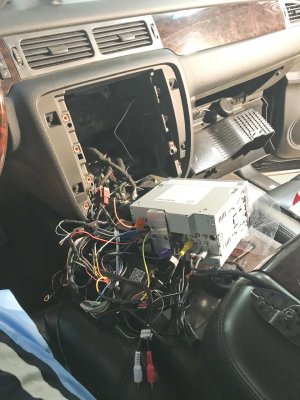
Here’s additional photos of the install: The actual wiring of the Kenwood receiver to the Maestro OEM adapters was easy.

DB69B042-4F52-4FED-AE9C-BA623AA67384.jpeg

The problem I had was stuffing all the extra wires in the dash...

F3629176-C711-4298-9173-E2B9FC16B424.jpeg
That’s all the extra Maestro wires to be able to retain the OEM buttons on the steering wheel, OBDII connector, rear audio controls, microphone wire, and I think that’s it. Stuffing all this in was by far the hardest part of the install.

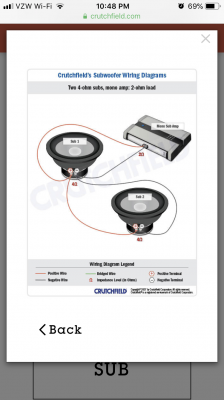
I bought everything from Crutchfield and they have great wiring diagrams such as this one:

13B800E7-63AA-4F84-8F59-6A081B577427.png
 
OP
OP
Jason in DLH

Jason in DLH

Cheeseburger and Fries
Joined
Sep 4, 2020
Posts
1,400
Reaction score
1,562
Location
MN
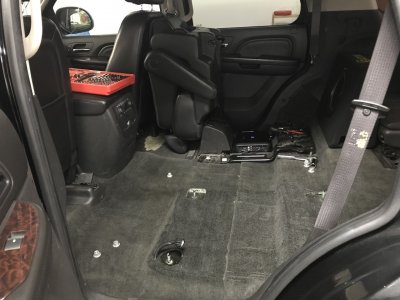
I chose to take the seat out to run the remote turn on and RCA under the carpet for a no-see-em look.

38BA256B-D0C4-4BED-A8EB-B2596D1DEB54.jpeg

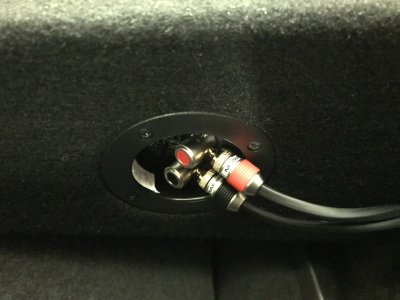
And can’t forget the banana plugs for the subs! These really come in handy to be able to remove the subs in a jiffy. Easy to install on the wire!

F5BD0B00-F01E-456B-8BD7-9477F77DF906.jpeg
 

Forum statistics

Threads
133,094
Posts
1,879,542
Members
98,058
Latest member
clarktahoe2016
Top