gtrslngrchris
Full Access Member
- Joined
- Feb 4, 2017
- Posts
- 172
- Reaction score
- 278
I picked up this Tahoe the first weekend in February this year after deciding I'd buy and build a Tahoe for the same money that my Duramax was going to cost me in maintenance this year. That way I can push off the maintenance for more fun things and get a new daily driver out of it that's slightly less annoying, but also a lot slower 
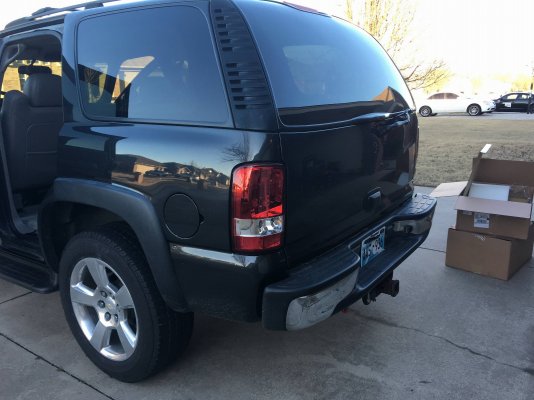
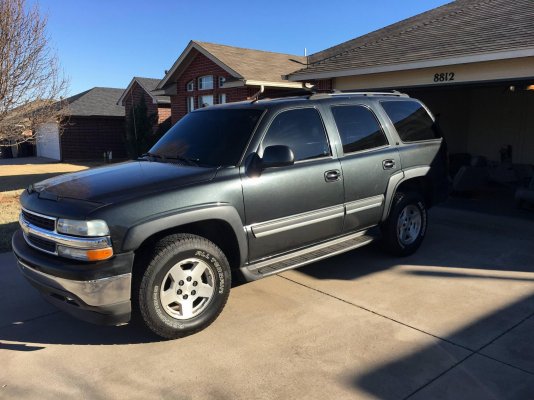
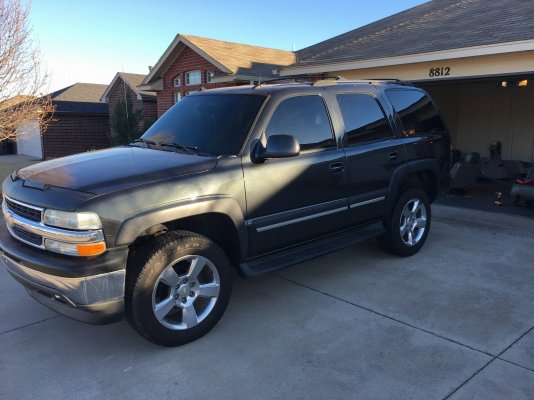
I talked the guy down to $3500 because of some door dings, hail damage on the hood, pretty minor hit on the rear passenger quarter and the rear wiper pushed in slightly along with possible water pump, serpentine belt and a few other minor things. That said this was a 2005 LT with everything but the sunroof so I was pretty stoked. This is how she sat after I drove her 3 minutes home.
I did almost nothing the first week other than drive her to and from work but as soon as Saturday rolled around I pulled the interior completely as the previous owner had absolutely no problem living in their own filth in this thing and letting their grandkids do almost as bad in the back seats. Lucky for me I had a coworker's son who was in trouble that had to help
Keep in mind this is AFTER the first vacuuming pass but right after I pulled the seats.
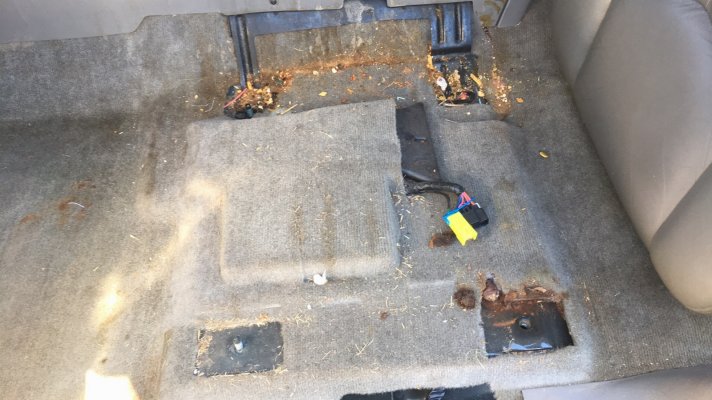
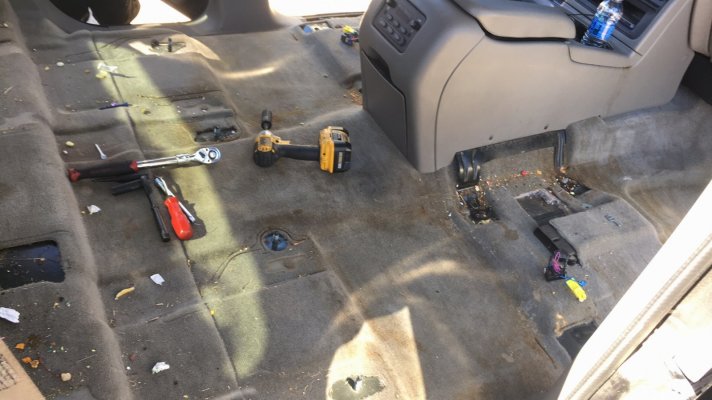
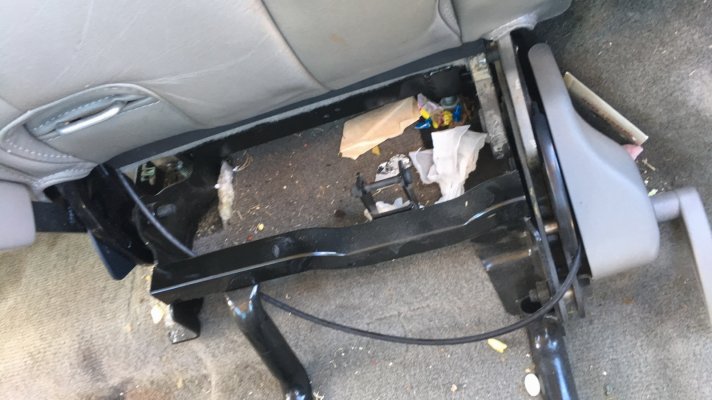
Once all the seats and console and plastics were out I yanked the carpet and we then marveled at how they managed to get so much crap underneath the carpet and jute padding.
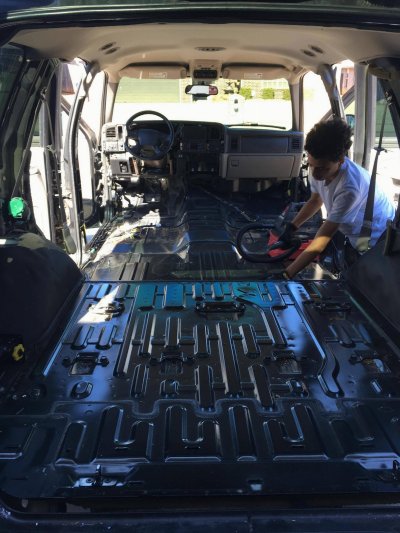
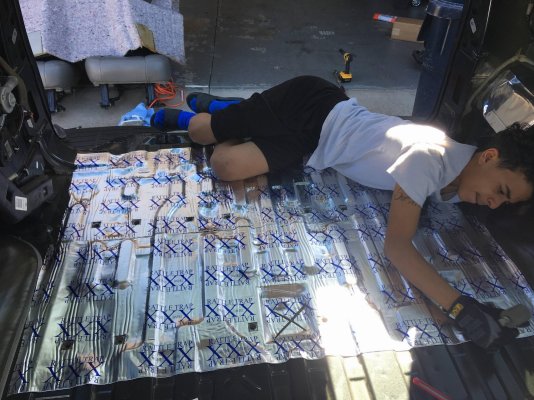
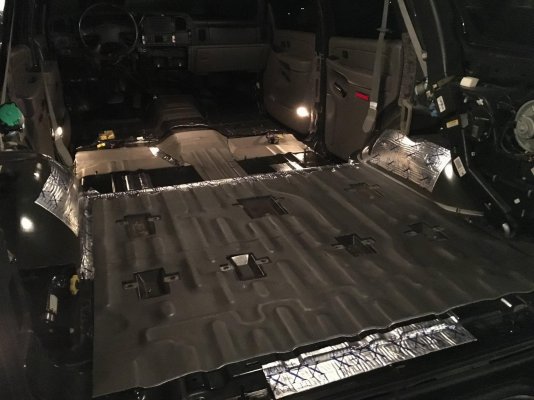
Then it was time for a light round of sound deadening. I wasn't interested yet in pulling the headliner and door panels to do a complete job but while we had most everything else ripped out for cleaning it seemed like the thing to do. FatMat 80mil first always. Here you can see Adonis enjoying the pain in the ass that is making the FatMat fit all the contours and look pretty.
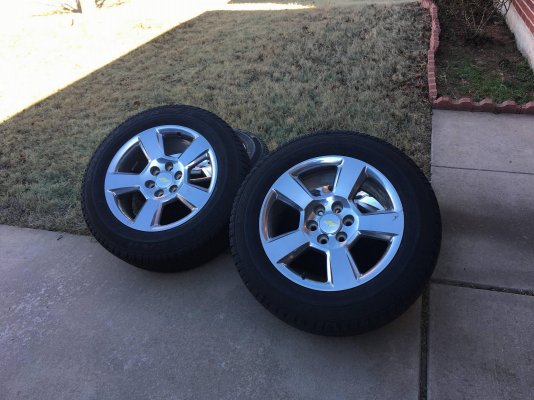
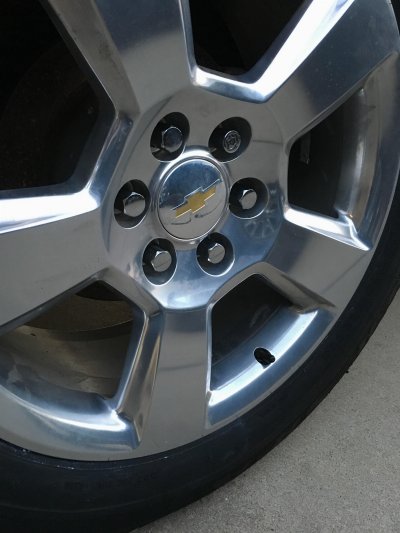
I say I did nothing the first week but I did go get these off a 2016 Silverado in my Duramax. I paid $650 for the set with trashed tires and managed to sell my factory wheels and tires for $600 the next day. I had a set of 265/60/20 10-ply tires hanging around from my Duramax still so I had my friend mount them for me and then Adonis got to learn how to use a jack and torque wrench
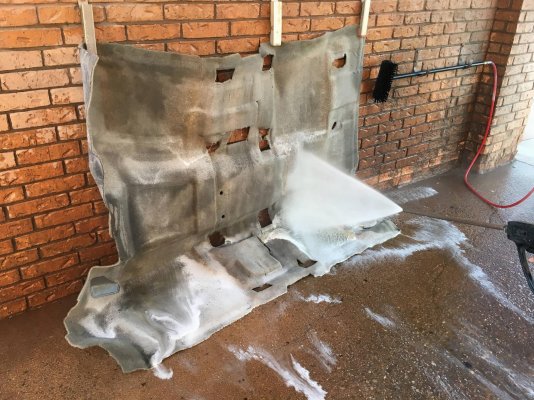
Once we got done with the distraction of the 20s it was back to real work and so we took the carpet to the car wash after doing some pre-treating with Simple Green and a good deal of hand scrubbing.
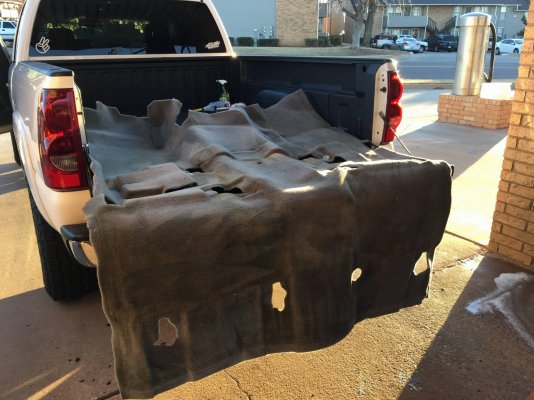
Then we let them drip dry in the tailgate for about 10 minutes and then drove back to let them air dry in the driveway overnight.
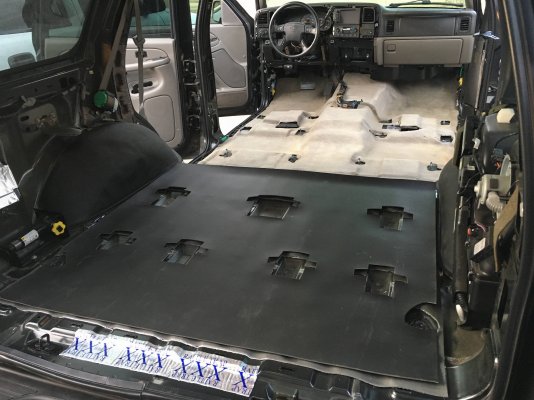
Once the carpet was drying it was back to sound deadening and the second layer is always a decoupler. Closed cell foam went in to keep sound transfer from happening between the FatMat underneath and the mass-loaded vinyl that would go next that actually blocks the noise.
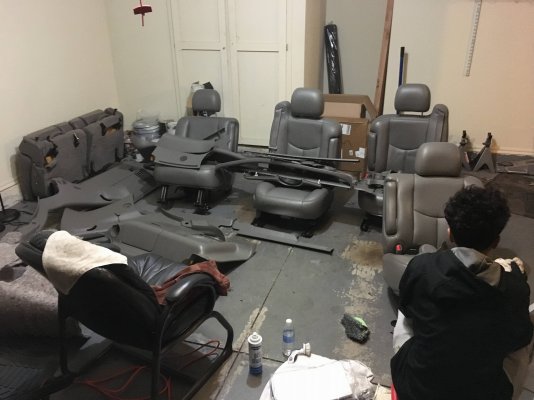
Finally we sat in the garage and did a thorough cleaning of all the interior pieces that were strewn about.
That was most of weekend 1 done and I let it sit and drove other things the rest of the week. I installed my Pioneer 8200-NEX at some point using the PAC interface. Normally I would use the cheap harness and bypass all the factory systems but I'm not going to replace anything for awhile sound system wise... not exactly anyway.
For weekend two one of the first things I did was to re-clean almost everything because by the light of the garage it had all looked clean a week ago but in daylight that was another matter entirely. Lots of stains and spots that were just hard to see in bad lighting. Next I attacked my new wheels again. I had re-used the factory lug nuts that are designed for the threaded nut center caps but I found a set of the new 22" lug nuts on eBay used for $37.50 shipped with wheel locks, key and the documentation so once they were in they went on and the wheels look much better for it I think.
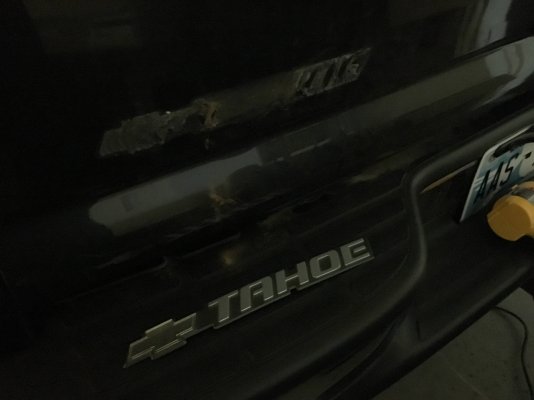
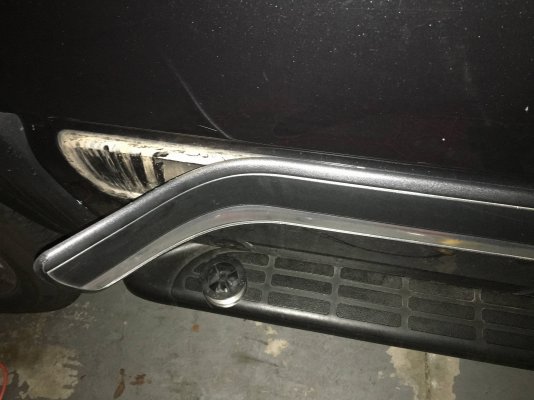
Next was debadging the whole truck including the body side mouldings. For the badges I usually hit them with a head gun to soften the adhesive a bit then run behind them with fishing line to cut through it and then off they come. For the side mouldings they get a lot of heat gun and then I start with the fishing line enough to pry the edge up and then they pull off pretty easy working top and bottom back and forth basically just tearing them off gently.
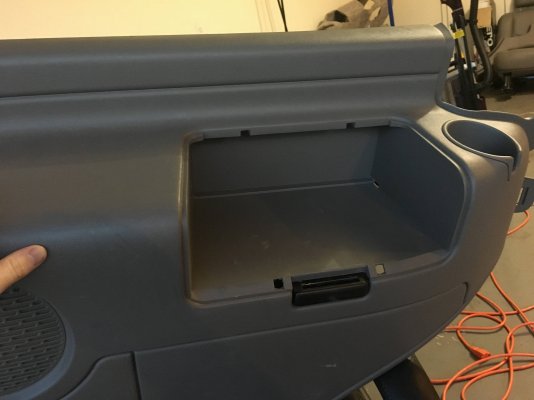
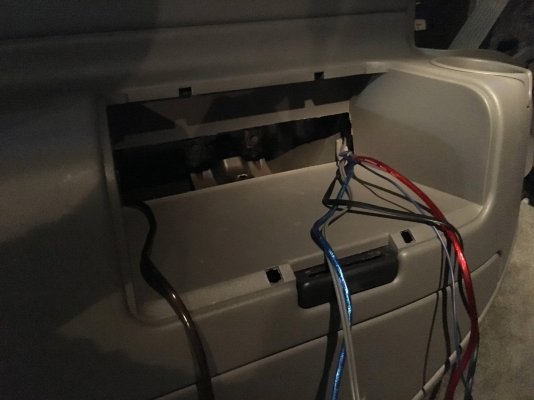
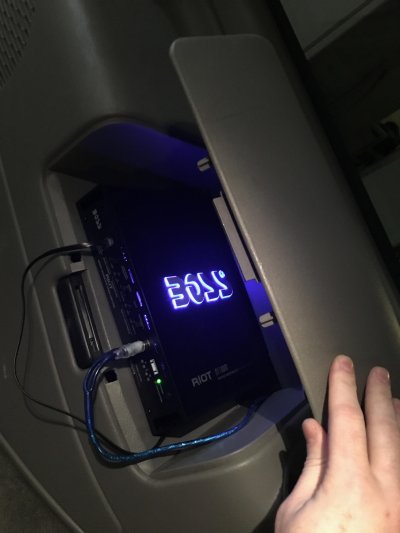
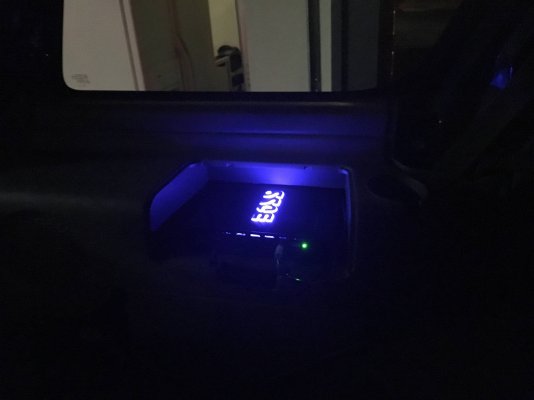
I also modified the factory Bose subwoofer to run on a separate amp which is a mod I've done before with great success. The factory system to me sounds like shit and I've narrowed it down to two things. 1: the Bose amp is underpowered for the application and 2: the headunit/source is garbage. I already had replaced the source with a top end Pioneer unit and the system sounded much better already but the bass could still be better so I tossed a $50 Boss amp in the back and wired up the Bose sub to it.
I clip the connection from the sub to the amp and then connect White with Green Chaser to Red and then Green is my Positive connection to the amp and White with Red Chaser is my Negative.
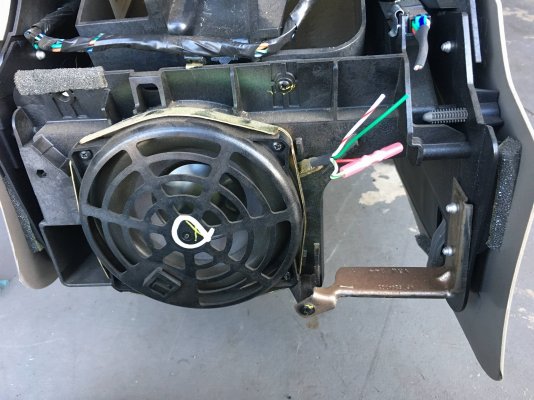
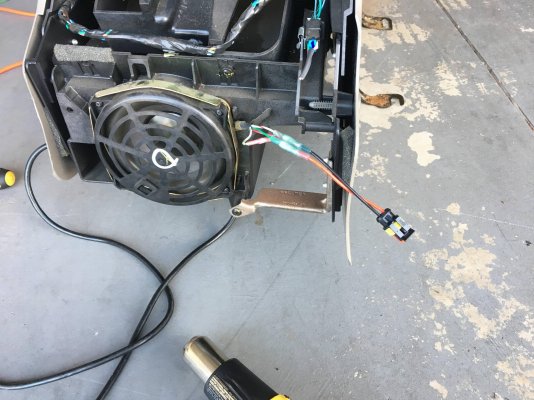
Because I wanted to be fancy and because I know I will definitely be removing the console more than once after this I crimped on a plug so the console would remain modular. I wouldn't normally crimp my connections but on a setup like this I'm not too worried about it and it's not too unlikely that it will be temporary. That said, this will make my life infinitely easier in the future.
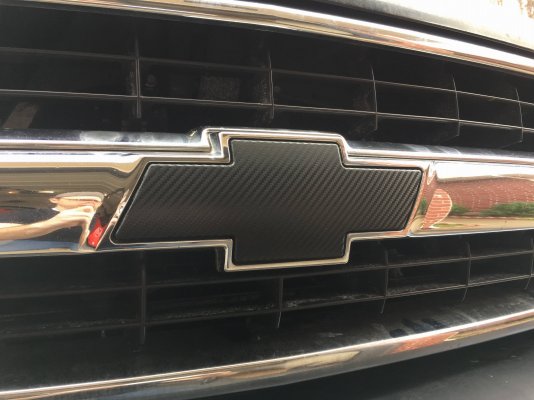
I finished that night with wrapping my bowtie in carbon fiber finyl I had laying around. It seemed like it would go better with the Spiral Grey than flat black and to be honest it grows on me the more I see it.
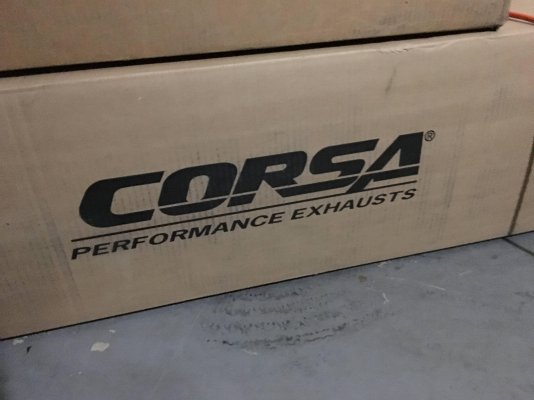
Most of Sunday for weekend 2 was spent cleaning and reassembling half of the interior so I could drive it again. While I was cleaning interior pieces and reassembling my friend was hitting the adhesive on the doors with the rubber eraser wheel and then doing a light polish to see what the paint would look like after a bit of attention. HOWEVER, it did get exciting after we got back from test driving an M5 because we decided it was time to install the Corsa 14232 exhaust I had bought. Unfortunately I didn't take any pics of the install or even a shot of the tips while they were shiny and new but I do have this lovely picture of the boxes.
I also had my friend take a video of the exhaust note. I absolutely love the way it sounds and compared to my Duramax it's whisper quiet on the inside. It's actually very surprising to me how there is absolutely no drone with an exhaust note like this but don't worry I'm sure to ruin that soon with what is coming soon.
We managed to finish that just as it started raining so we went and drove around and did stupid things in Tow/Haul in the rain for a bit to enjoy the exhaust.
Hopefully some of you guys will enjoy my build thread. This is my first Tahoe but I've owned many 99-07 Classic trucks before and have a pretty extensive record of modifying them. Here is a link to the other GMT-800 I currently own which is a Silverado front end swapped to a Sierra Duramax 2500HD with a big turbo and built trans and way way too many other things to list. Should give at least a few of you some ideas for things!
I talked the guy down to $3500 because of some door dings, hail damage on the hood, pretty minor hit on the rear passenger quarter and the rear wiper pushed in slightly along with possible water pump, serpentine belt and a few other minor things. That said this was a 2005 LT with everything but the sunroof so I was pretty stoked. This is how she sat after I drove her 3 minutes home.

I did almost nothing the first week other than drive her to and from work but as soon as Saturday rolled around I pulled the interior completely as the previous owner had absolutely no problem living in their own filth in this thing and letting their grandkids do almost as bad in the back seats. Lucky for me I had a coworker's son who was in trouble that had to help
Keep in mind this is AFTER the first vacuuming pass but right after I pulled the seats.


Once all the seats and console and plastics were out I yanked the carpet and we then marveled at how they managed to get so much crap underneath the carpet and jute padding.

Then it was time for a light round of sound deadening. I wasn't interested yet in pulling the headliner and door panels to do a complete job but while we had most everything else ripped out for cleaning it seemed like the thing to do. FatMat 80mil first always. Here you can see Adonis enjoying the pain in the ass that is making the FatMat fit all the contours and look pretty.

I say I did nothing the first week but I did go get these off a 2016 Silverado in my Duramax. I paid $650 for the set with trashed tires and managed to sell my factory wheels and tires for $600 the next day. I had a set of 265/60/20 10-ply tires hanging around from my Duramax still so I had my friend mount them for me and then Adonis got to learn how to use a jack and torque wrench


Once we got done with the distraction of the 20s it was back to real work and so we took the carpet to the car wash after doing some pre-treating with Simple Green and a good deal of hand scrubbing.

Then we let them drip dry in the tailgate for about 10 minutes and then drove back to let them air dry in the driveway overnight.

Once the carpet was drying it was back to sound deadening and the second layer is always a decoupler. Closed cell foam went in to keep sound transfer from happening between the FatMat underneath and the mass-loaded vinyl that would go next that actually blocks the noise.


Finally we sat in the garage and did a thorough cleaning of all the interior pieces that were strewn about.

That was most of weekend 1 done and I let it sit and drove other things the rest of the week. I installed my Pioneer 8200-NEX at some point using the PAC interface. Normally I would use the cheap harness and bypass all the factory systems but I'm not going to replace anything for awhile sound system wise... not exactly anyway.
For weekend two one of the first things I did was to re-clean almost everything because by the light of the garage it had all looked clean a week ago but in daylight that was another matter entirely. Lots of stains and spots that were just hard to see in bad lighting. Next I attacked my new wheels again. I had re-used the factory lug nuts that are designed for the threaded nut center caps but I found a set of the new 22" lug nuts on eBay used for $37.50 shipped with wheel locks, key and the documentation so once they were in they went on and the wheels look much better for it I think.

Next was debadging the whole truck including the body side mouldings. For the badges I usually hit them with a head gun to soften the adhesive a bit then run behind them with fishing line to cut through it and then off they come. For the side mouldings they get a lot of heat gun and then I start with the fishing line enough to pry the edge up and then they pull off pretty easy working top and bottom back and forth basically just tearing them off gently.


I also modified the factory Bose subwoofer to run on a separate amp which is a mod I've done before with great success. The factory system to me sounds like shit and I've narrowed it down to two things. 1: the Bose amp is underpowered for the application and 2: the headunit/source is garbage. I already had replaced the source with a top end Pioneer unit and the system sounded much better already but the bass could still be better so I tossed a $50 Boss amp in the back and wired up the Bose sub to it.
I clip the connection from the sub to the amp and then connect White with Green Chaser to Red and then Green is my Positive connection to the amp and White with Red Chaser is my Negative.

Because I wanted to be fancy and because I know I will definitely be removing the console more than once after this I crimped on a plug so the console would remain modular. I wouldn't normally crimp my connections but on a setup like this I'm not too worried about it and it's not too unlikely that it will be temporary. That said, this will make my life infinitely easier in the future.

I finished that night with wrapping my bowtie in carbon fiber finyl I had laying around. It seemed like it would go better with the Spiral Grey than flat black and to be honest it grows on me the more I see it.

Most of Sunday for weekend 2 was spent cleaning and reassembling half of the interior so I could drive it again. While I was cleaning interior pieces and reassembling my friend was hitting the adhesive on the doors with the rubber eraser wheel and then doing a light polish to see what the paint would look like after a bit of attention. HOWEVER, it did get exciting after we got back from test driving an M5 because we decided it was time to install the Corsa 14232 exhaust I had bought. Unfortunately I didn't take any pics of the install or even a shot of the tips while they were shiny and new but I do have this lovely picture of the boxes.

I also had my friend take a video of the exhaust note. I absolutely love the way it sounds and compared to my Duramax it's whisper quiet on the inside. It's actually very surprising to me how there is absolutely no drone with an exhaust note like this but don't worry I'm sure to ruin that soon with what is coming soon.
We managed to finish that just as it started raining so we went and drove around and did stupid things in Tow/Haul in the rain for a bit to enjoy the exhaust.
Hopefully some of you guys will enjoy my build thread. This is my first Tahoe but I've owned many 99-07 Classic trucks before and have a pretty extensive record of modifying them. Here is a link to the other GMT-800 I currently own which is a Silverado front end swapped to a Sierra Duramax 2500HD with a big turbo and built trans and way way too many other things to list. Should give at least a few of you some ideas for things!

