What did you do to your NBS GMT800 Tahoe/Yukon Today?

Disclaimer: Links on this page pointing to Amazon, eBay and other sites may include affiliate code. If you click them and make a purchase, we may earn a small commission.

Tahoewhat

Ballin' on a Budget
Supporting Member
Joined
Sep 20, 2009
Posts
3,720
Reaction score
24
Location
TX
Hell Yea, sounds like your gonna have a good Friday haha

Man the ZL1 is nice. Im really loving the interior w/ the suede or alcantra it has. Very nice. Got me some ideas for my TA. But yeah good friday. lol.

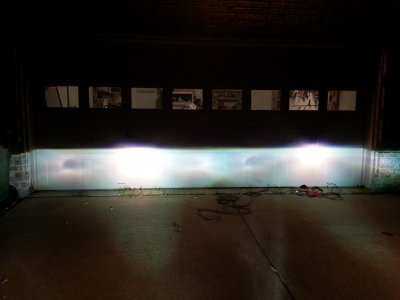
Projectors looks good, but man those are huge in there. The fusion fogs i have can go in from the front. But thats making me want to dig them out and make them fit.

Today - put my SS front rims back on.
 

YukonXL04

The Riverboat
Supporting Member
Joined
Sep 3, 2013
Posts
2,489
Reaction score
175
Location
Arlington, TX
Haha there ya go, upgrade the TA too haha.

Yeah they are big lol. But this was free so ya. Should be easier for you with the z71 lights, and smaller projectors. Looking forward to finishing these
 

jomulk56

Resident Lurker
Joined
May 1, 2009
Posts
1,237
Reaction score
11
Location
IN
Oh awesome. Next on my list! See a light tint would be perfect for my white truck. Awesome!

Projector fogs anyone? Just temp installation for rotational alignment. Best of all this was free lol. Sure you could do better with a real hid projector, but it definitely beats the stock fog lights lol.

Lows step cutoff only, fogs straight cutoff only, lows and fogs, lows and fogs looking at the front, and color flicker anyone? Lol no one will ever see the color flicker but it's there haha.

Also 5k lows 6k fogs temp, unsure if I want to match the fogs 5k or go yellow 3k

Nice. I've always liked the matched fogs but the yellow might work with a white truck.
 

Bomba02

Full Access Member
Joined
Mar 27, 2013
Posts
371
Reaction score
8
Yea, Here is some. Keep in mind this is pretty much just a mockup stage.

Basically what I did was cutout the back of the fog housing to fit the projector as close to the lens as I could get. Then I heated up the plastic housing only on the backside careful not to deform the front lens side. once the plastic is heated you can stretch it open some more to fit the projector into it. I have eyeballed the both assemblies and they are close to where I think I want them aiming wise. Then I will mount the both onto the truck and get my aiming where I want it. Epoxy the projector to the housing, then start to build out the housing to meet the backside of the projector to seal it up. Once that is done the whole inside and out will get painted high heat black except the chrome ring on the face of the lens holder.

The first pic is the trimming on the housing. The next is the curved cutoff shield. There is 1 of the heated expanded plastic. the last 2 are of the whole assembly just pressure held together.

Oh awesome. Next on my list! See a light tint would be perfect for my white truck. Awesome!

Projector fogs anyone? Just temp installation for rotational alignment. Best of all this was free lol. Sure you could do better with a real hid projector, but it definitely beats the stock fog lights lol.

Lows step cutoff only, fogs straight cutoff only, lows and fogs, lows and fogs looking at the front, and color flicker anyone? Lol no one will ever see the color flicker but it's there haha.

Also 5k lows 6k fogs temp, unsure if I want to match the fogs 5k or go yellow 3k

Nice man looks great, still need to get to doing my retrofit sometime! Lol. Good job using the projector out of your headlight, you say modifying the cut off shield helped? Ill prob do the same thing install new ones in head lights and install old ones in my fogs! Good work. Hey any of those pics just fogs on shooting at garage?
Billy
 

YukonXL04

The Riverboat
Supporting Member
Joined
Sep 3, 2013
Posts
2,489
Reaction score
175
Location
Arlington, TX
Nice man looks great, still need to get to doing my retrofit sometime! Lol. Good job using the projector out of your headlight, you say modifying the cut off shield helped? Ill prob do the same thing install new ones in head lights and install old ones in my fogs! Good work. Hey any of those pics just fogs on shooting at garage?
Billy

Thanks man, yeah I figured it was a way to reuse those projectors. I cut new cutoff shields from aluminum flashing with a straight cutoff instead of a stepped on that's on headlights. Then I curved the edges of it to produce a sharper across the beam pattern. It sharpens up further away, the garage pic is only about 10-15ft away. At 30+ it's nice and sharp. The first picture is fogs only. This one. Also it's flatter in person. The camera is picking up the center hotspot and distorting it.
 

Attachments

  • 20140404_215631.jpg
    20140404_215631.jpg
    94.3 KB · Views: 20

criffaaa1

Full Access Member
Joined
Jan 30, 2014
Posts
112
Reaction score
1
Thanks man, yeah I figured it was a way to reuse those projectors. I cut new cutoff shields from aluminum flashing with a straight cutoff instead of a stepped on that's on headlights. Then I curved the edges of it to produce a sharper across the beam pattern. It sharpens up further away, the garage pic is only about 10-15ft away. At 30+ it's nice and sharp. The first picture is fogs only. This one. Also it's flatter in person. The camera is picking up the center hotspot and distorting it.

Looks good, great idea.

sent from my Crifftastic $3
 

Big Buttons

The SS Burb
Supporting Member
Joined
Nov 10, 2010
Posts
3,479
Reaction score
36
Location
South Texas
I dropped a second at the track with my new Circle D 3000-3200 stall and gained about 3mph. Very happy with the results!
 

Forum statistics

Threads
131,400
Posts
1,850,399
Members
95,492
Latest member
Helmetgurus
Top